
Untitled
Yesterday I continued work on the hydrangea plant. I needed to find a way to make hydrangea leaves, lots of hydrangea leaves. I decided to give my Cricut try. I started by finding a hydrangea leaf template online. I uploaded it into Cricut design space, resized it so it would be 1:12 scale, and set it up to do 2 test cuts. Since I’m trying to use what I have on hand I wasn’t sure which type of paper, I already had, would work best between a heavy craft paper or a vintage typewriter paper. Turns out the typewriter paper was best. It’s thinner and easier to shape. I then set up the Cricut to cut out 160+ pairs of leaves.
Here they are after they were cut and removed from the mat. Knowing what I know now I should have colored the paper before I cut them. It would have saved a lot of time.

I used a combination of alcohol ink and water soluble markers to color each individual leaf.

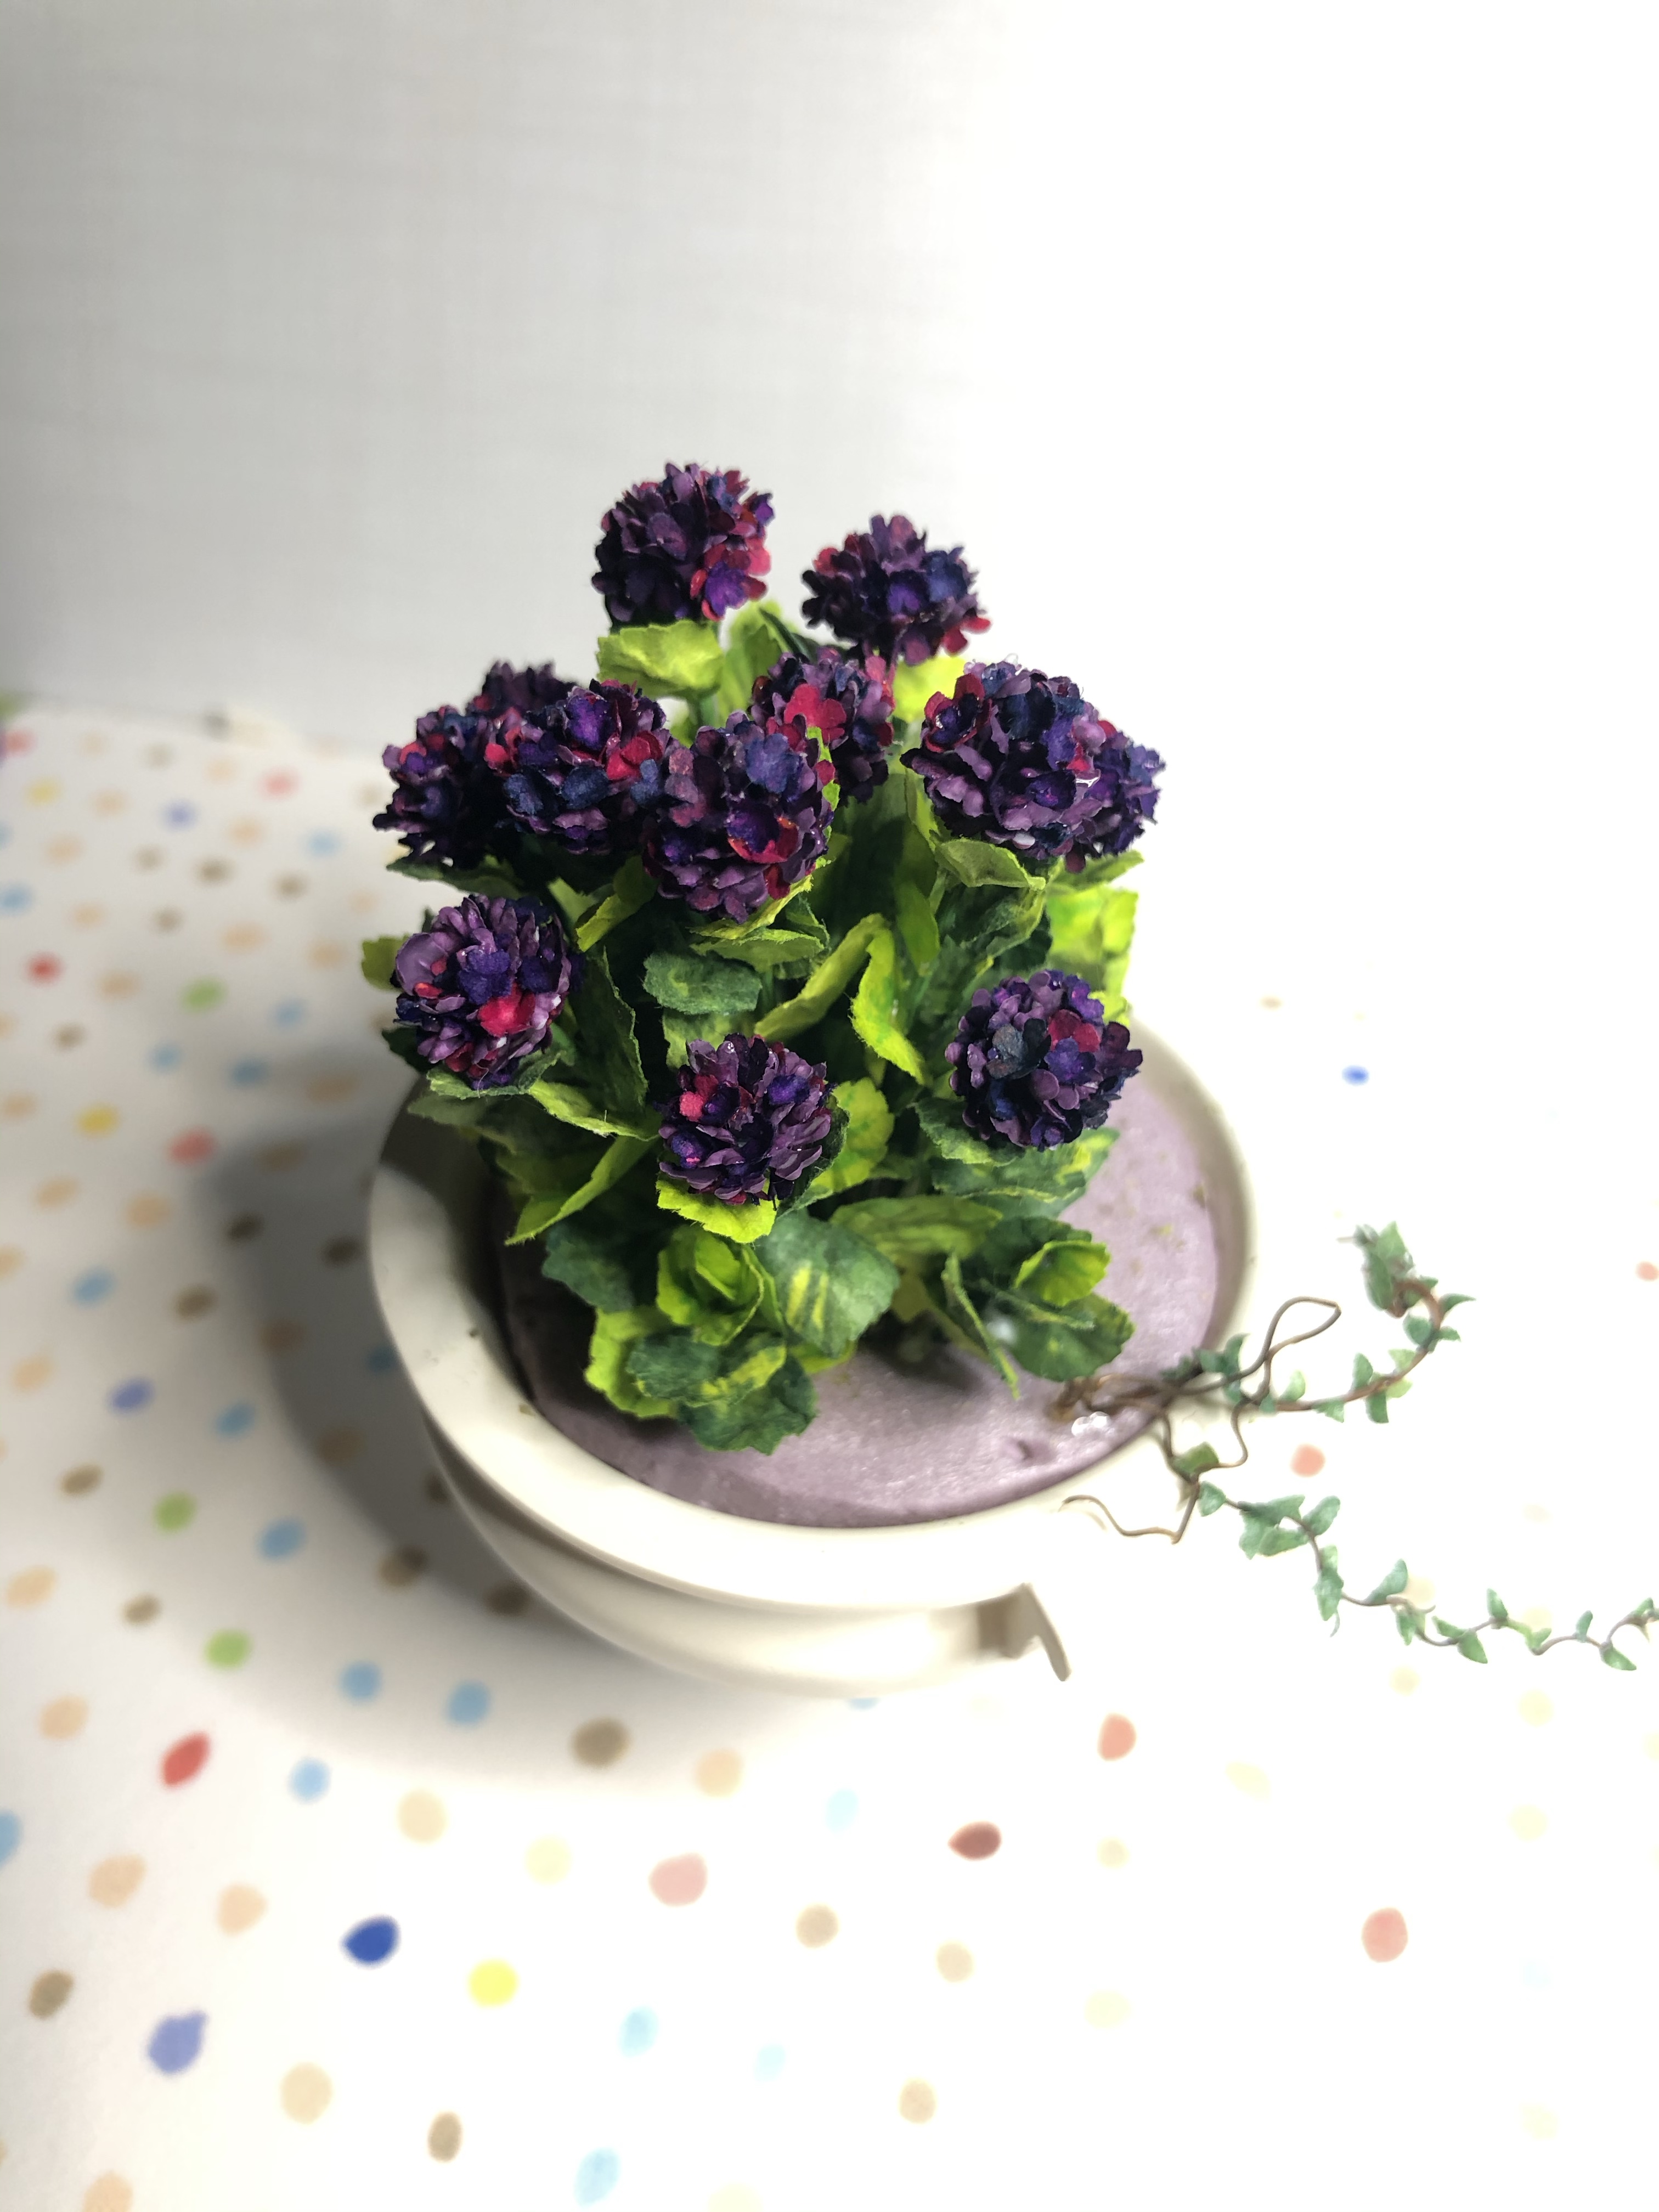
It took the better part of 2 days to color the blossoms and leaves, glue all the blossoms and leaves in place, and add extra leaves to fill in the extra area around the stems. It was worth it.

I’m happy with the color variations on both the flowers and leaves. I couldn’t fully capture the color with my camera.
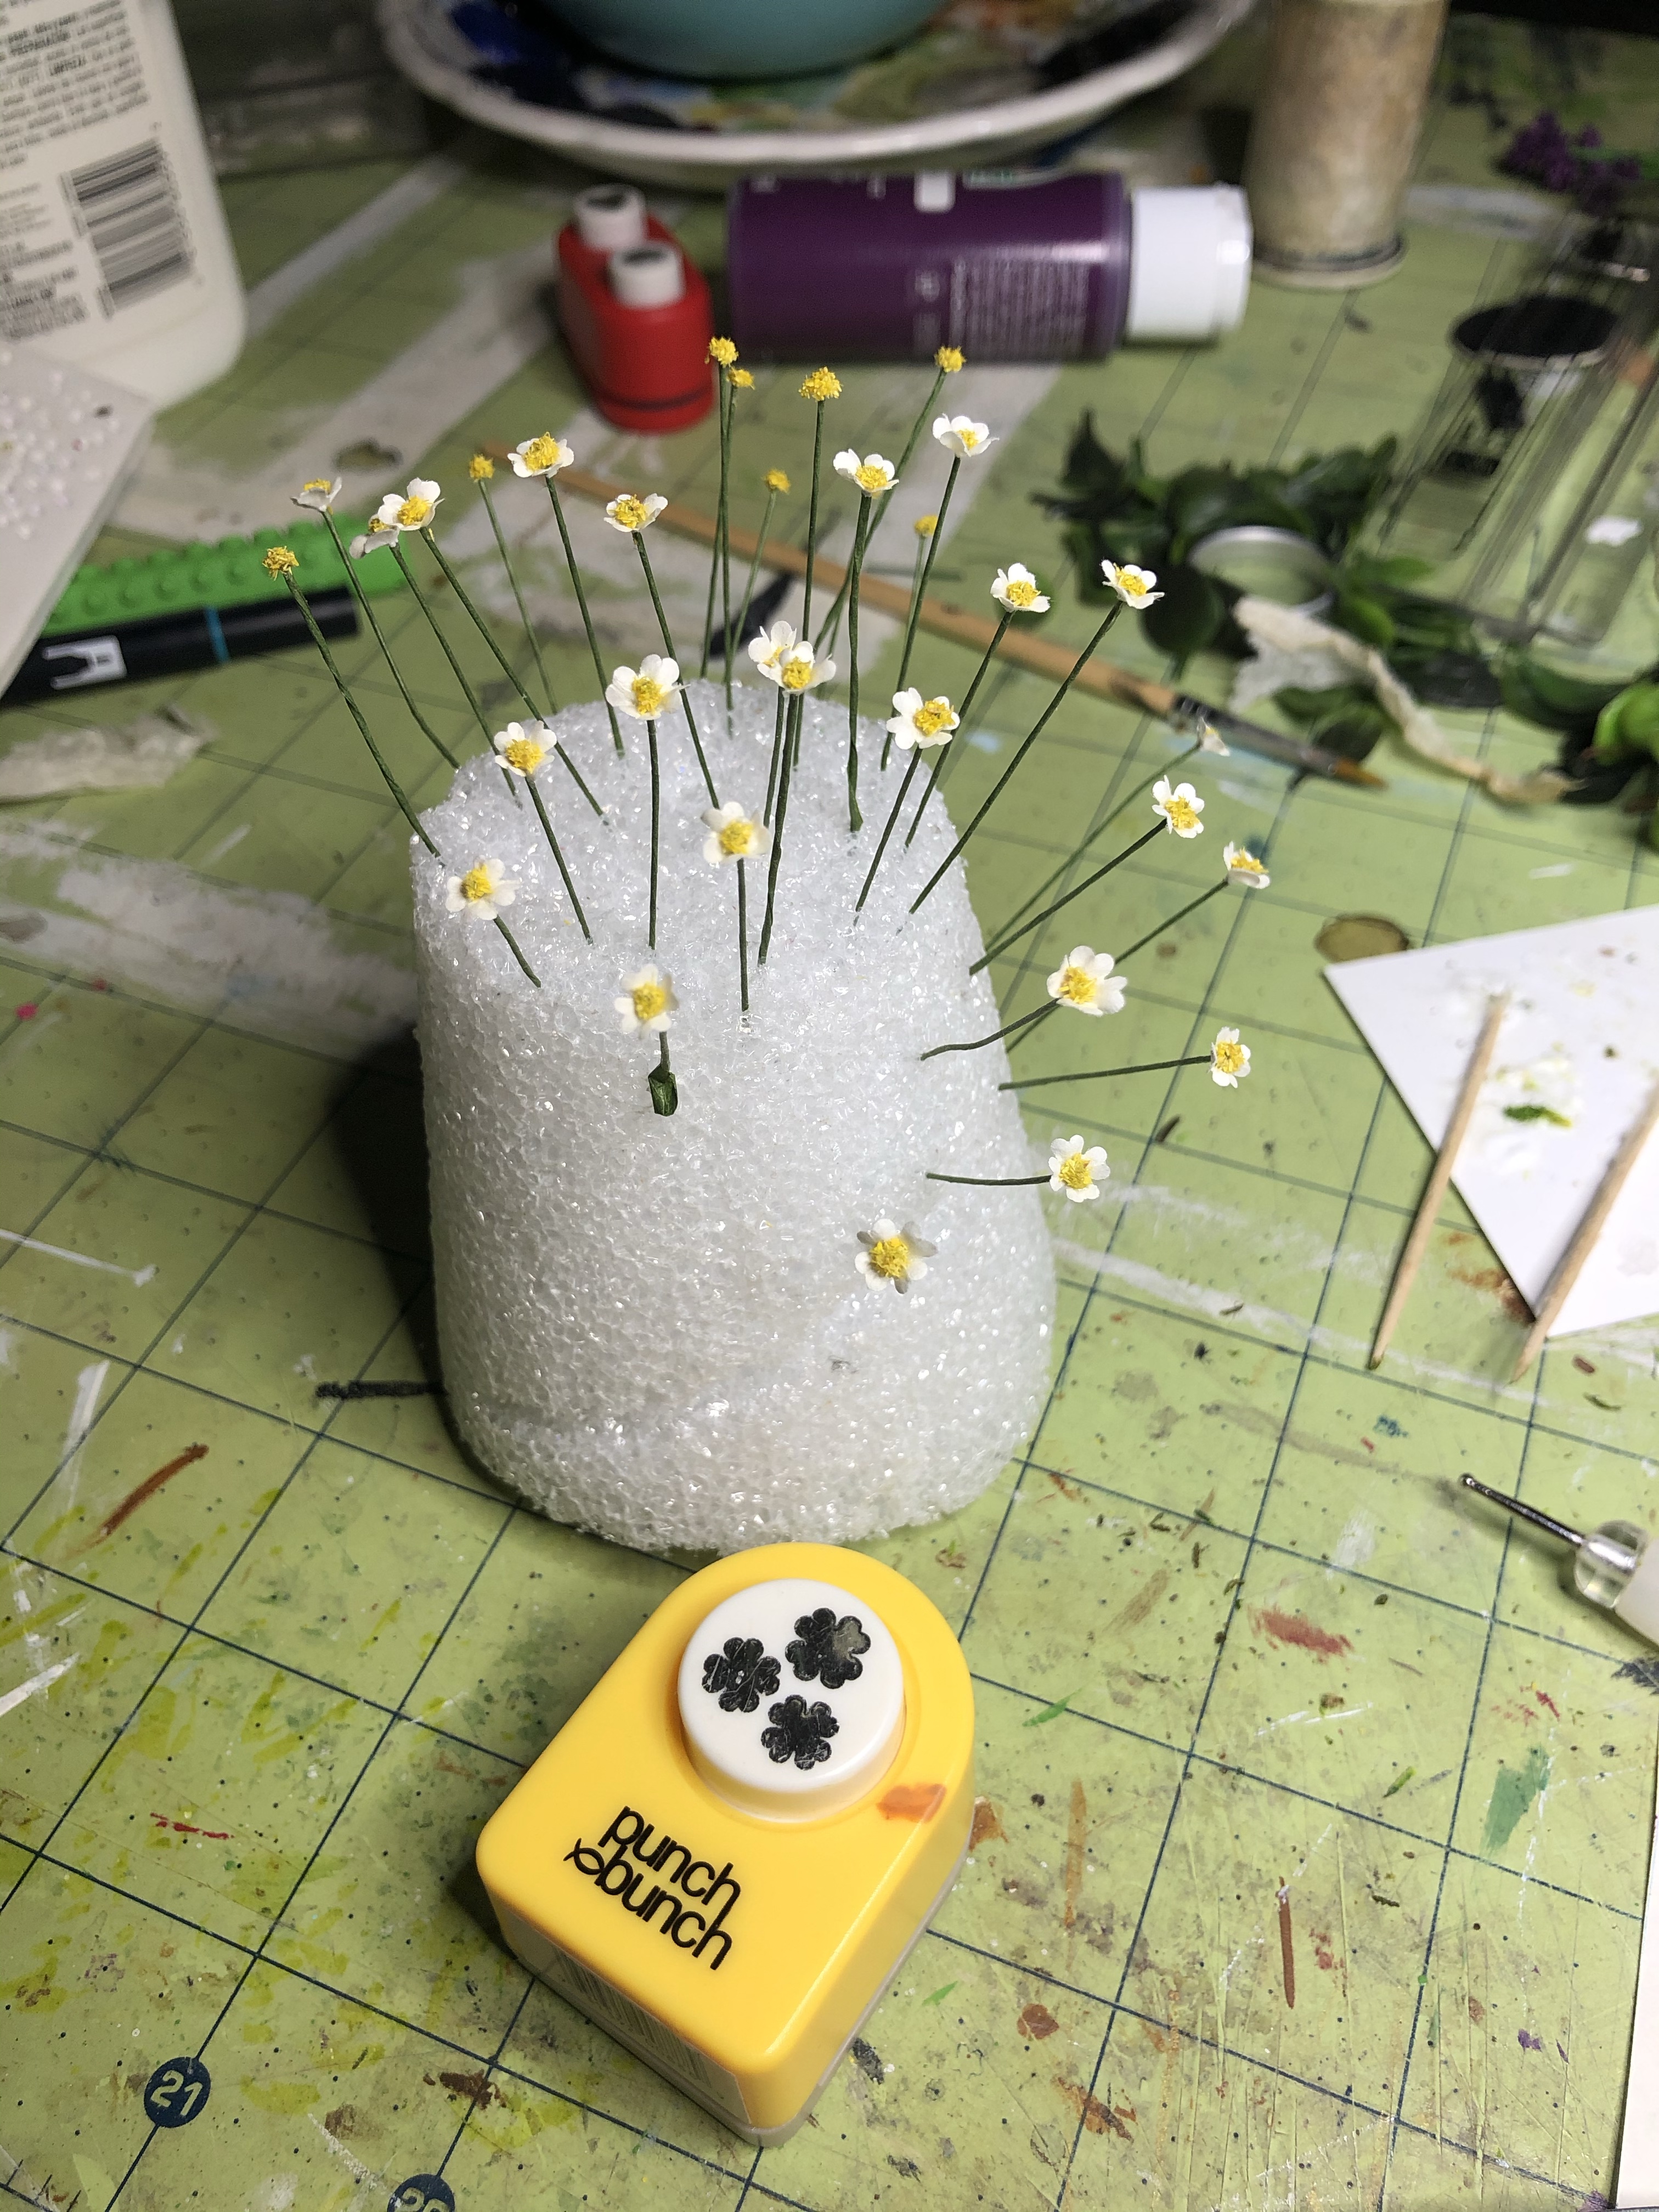
The next flower I’ll be working on are cosmos, or at least my artistic rendering of cosmos. I’m using the same typewriter paper, yellow flocking left over from my flower shop build a few years ago, glue, and wire. The paper punch is by Punch Bunch. They are really quick to make.
After the cosmos I’m thinking about trying to make little garden roses using the same paper punch. We’ll see how many I end up gluing to my fingers before I give up.
Awhile ago I learned A.C. Moore was being acquired by Michael’s. At first I wasn’t too concerned since it’s not the closest craft store to me and I rarely visit them. However, I remembered that they had a lovely selection of lanterns that I had filed under my “projects for a later date” folder in my brain. I’ve been making an effort to not buy supplies unless I am currently working on a project that needed the supplies, but this was clearly an “emergency”. So, I made the drive to my nearest store and picked up 4 lanterns that were 40% off.
The week after New Years, while I was getting ready for a week long trip, inspiration struck. I knew exactly what I planned on doing with one of those lanterns. Sadly I had to wait to start work until I returned. Isn’t that always the way?
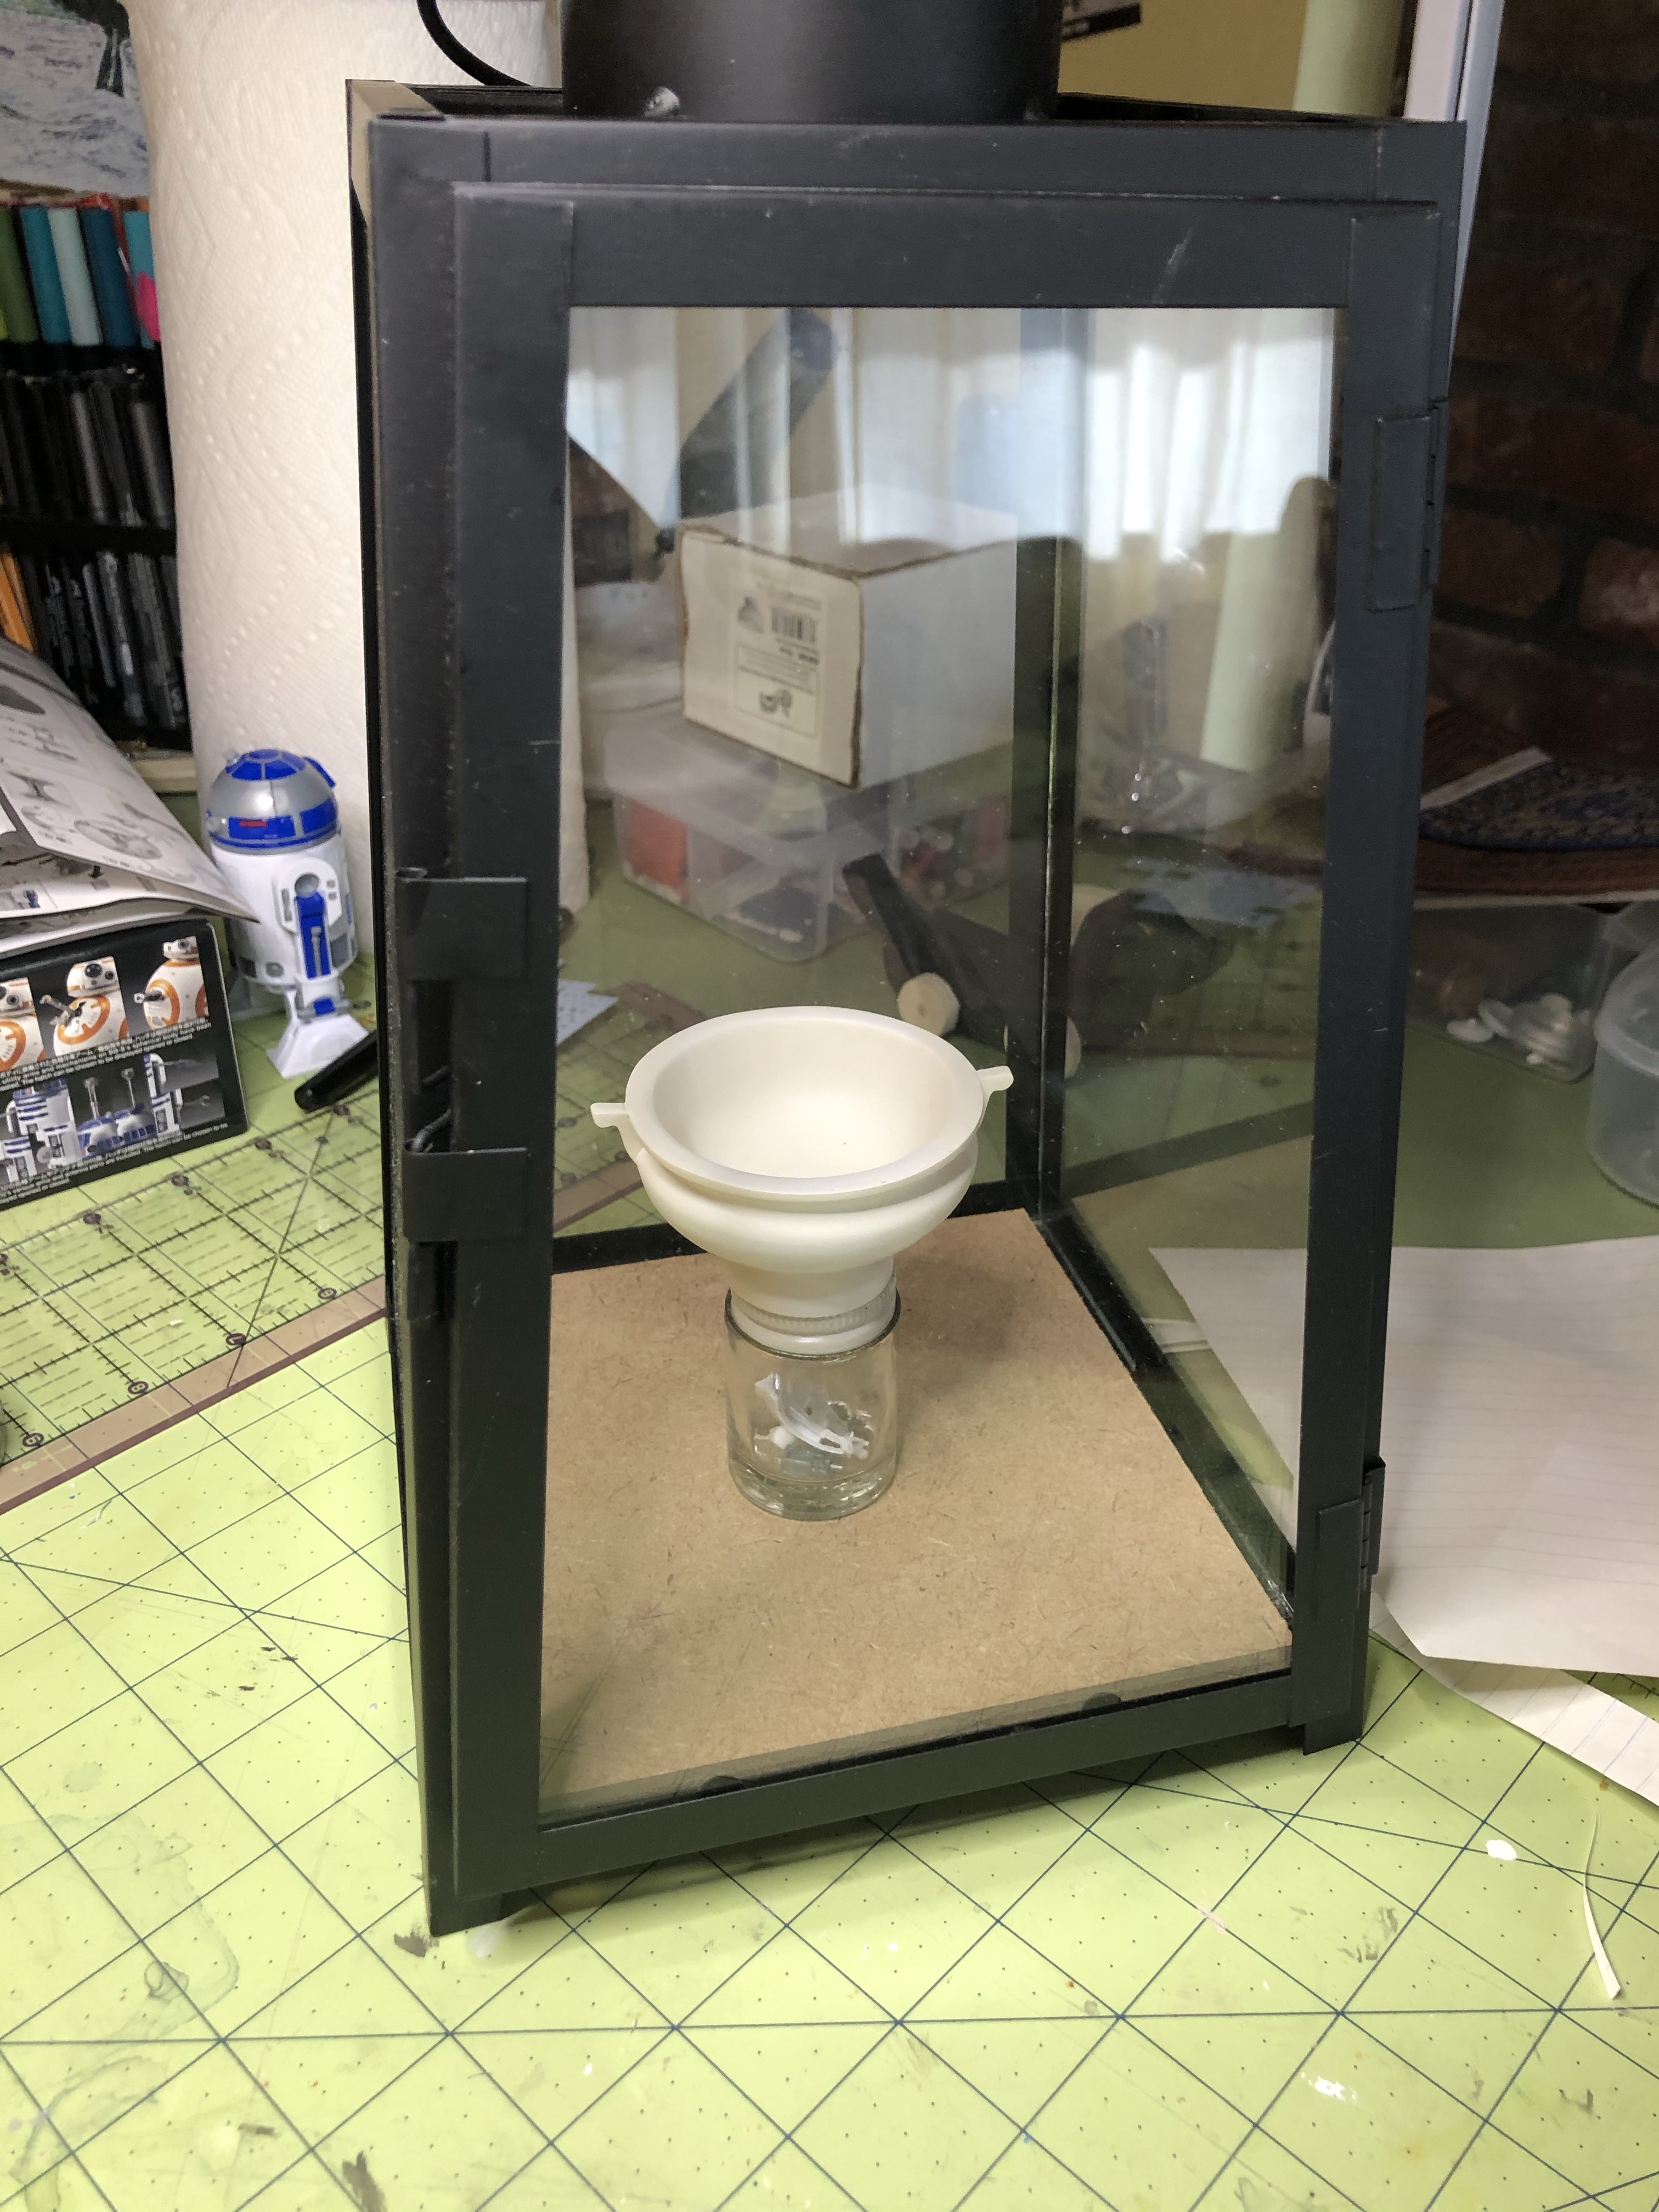
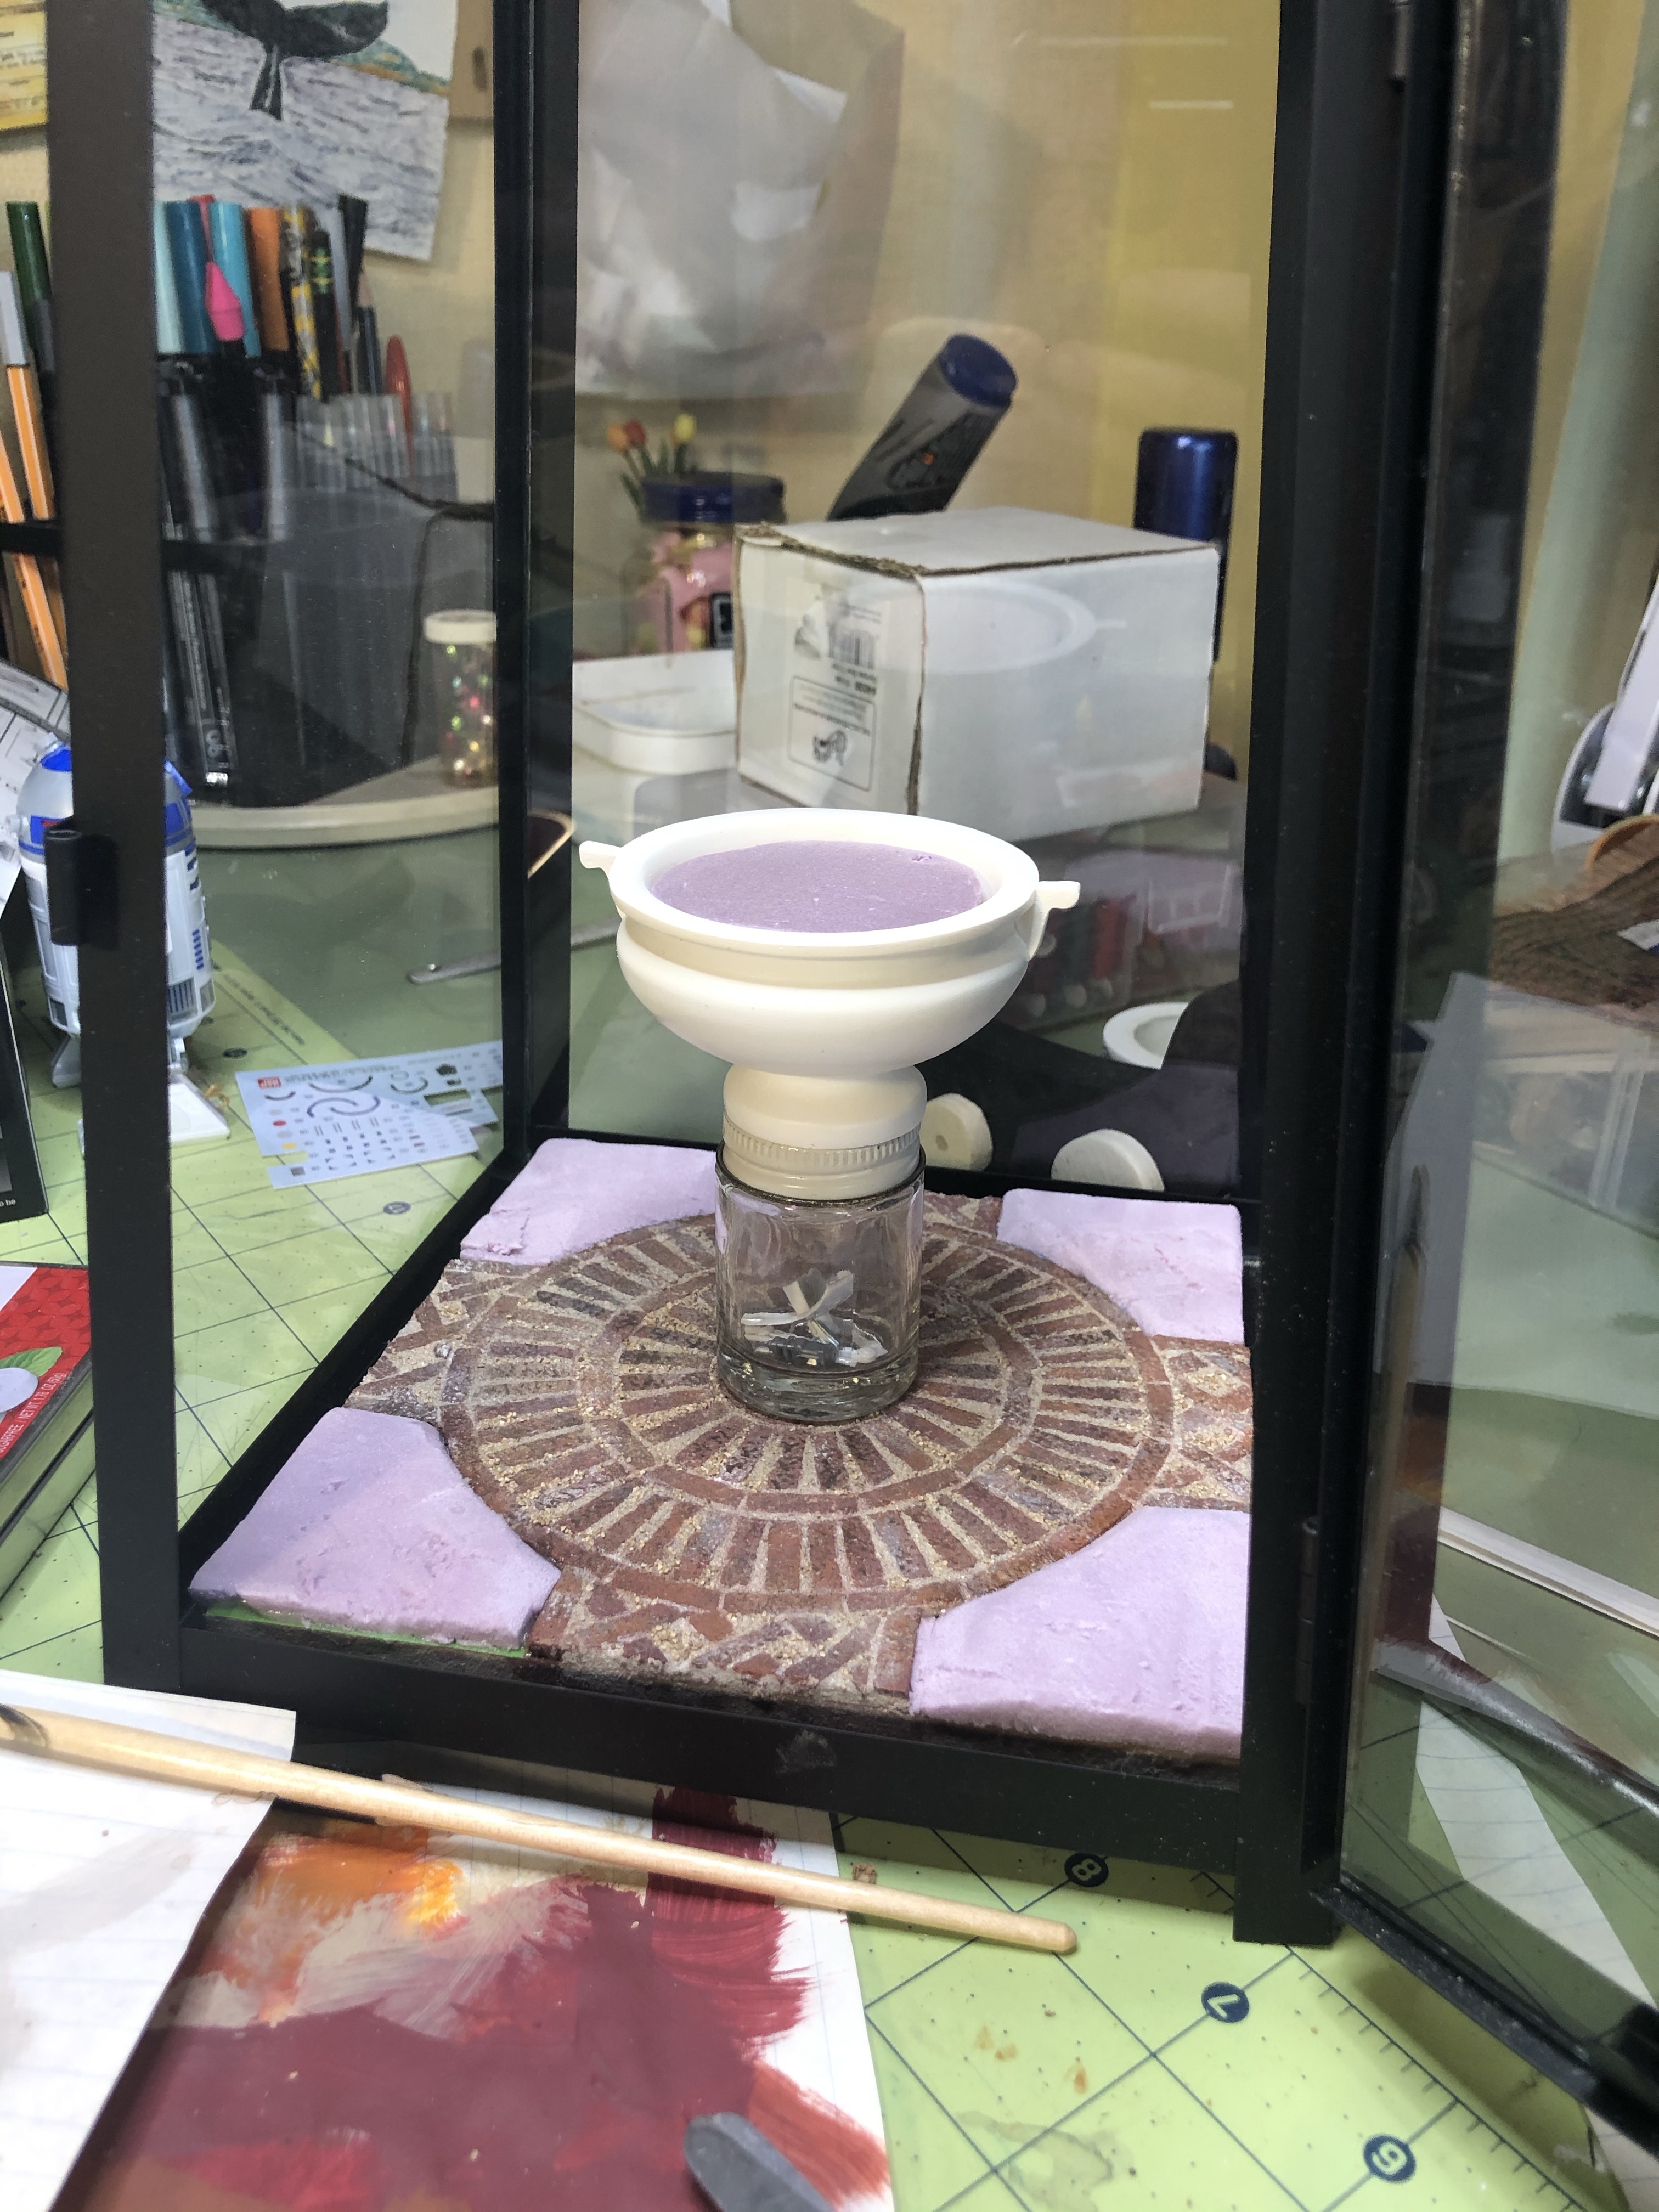
This is what I’m starting with. A simple black lantern. The top is open, it has glass windows, and a door on one side.

I have a mini urn that I purchased from Miniatures.com for a different project that didn’t pan out. It will now be the centerpiece of the lantern.
After cutting a piece of MDF for the floor I decided I needed to do a little hunting for inspiration. I always have a picture in my head, but I like having reference pictures to look back on. I wanted an overflowing garden urn, like this print by Michael Longo.
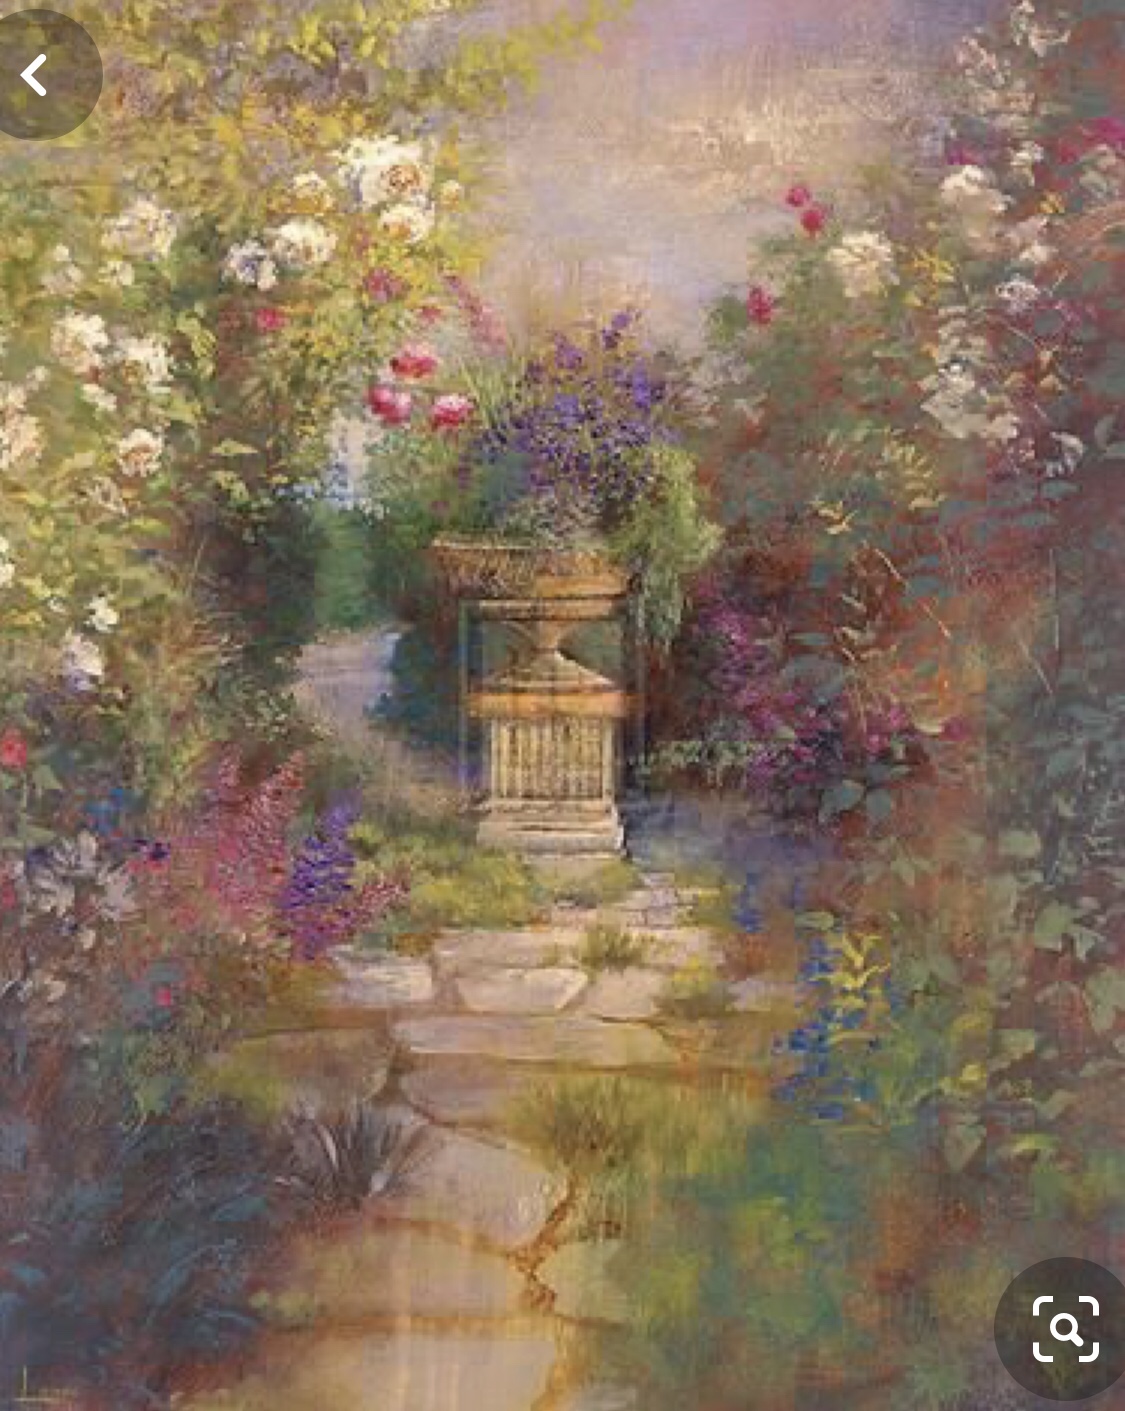
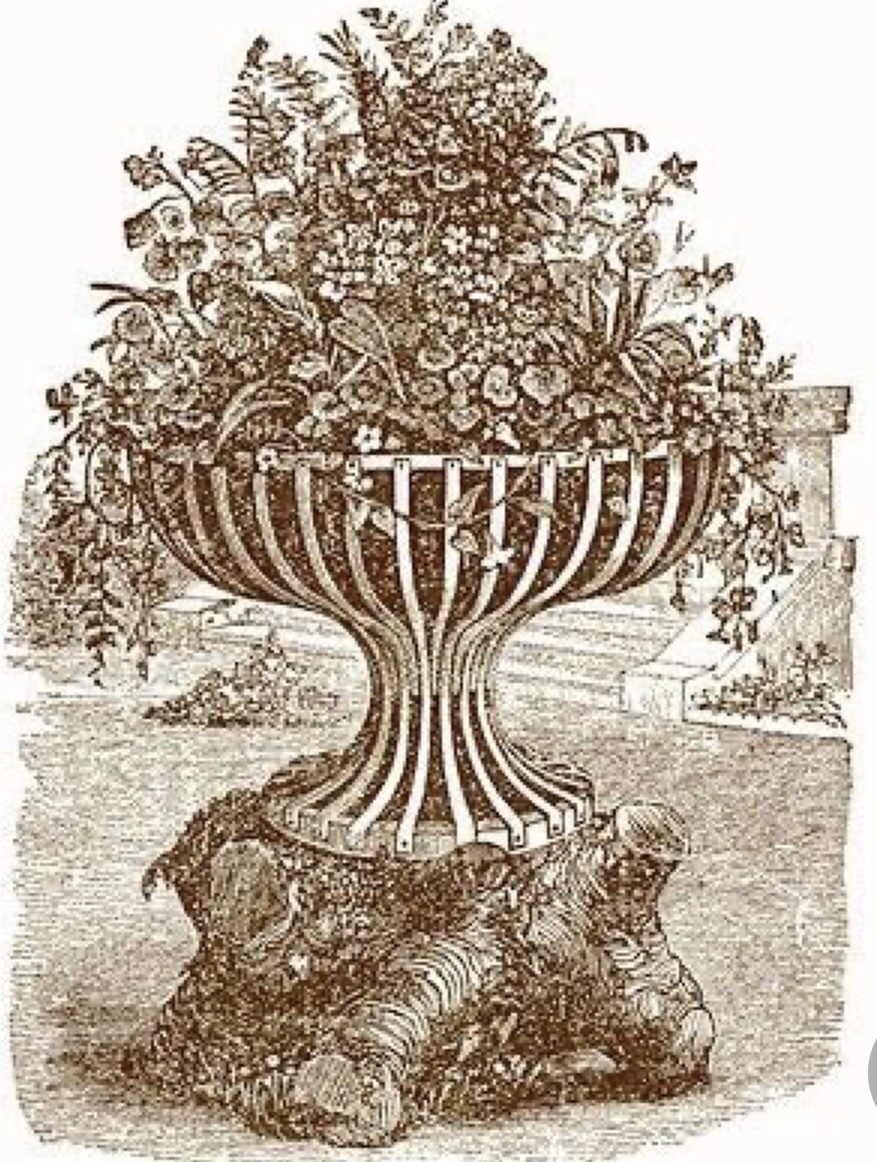
Or this one.
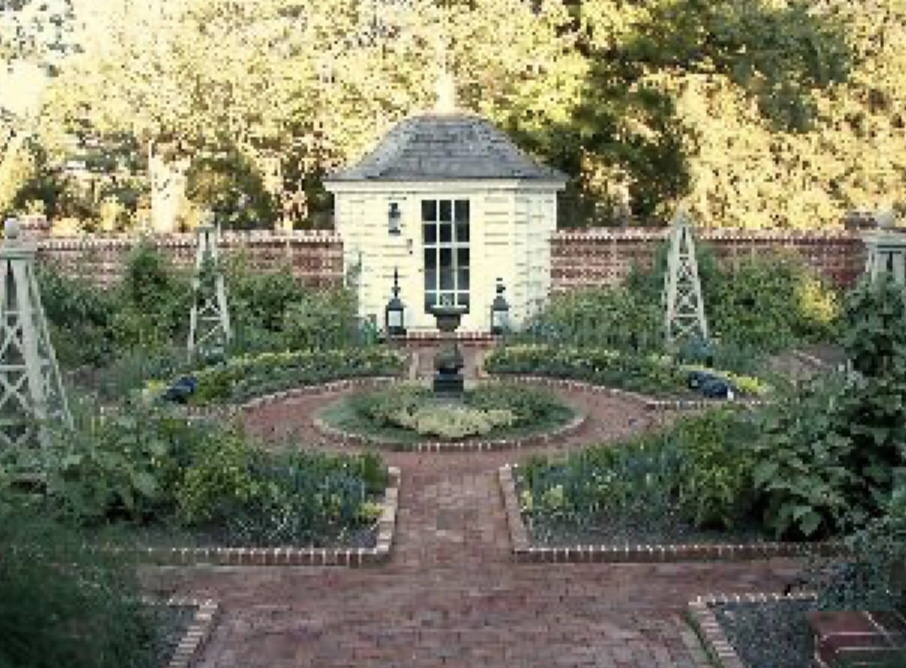
I wanted it to be the center of a garden with brick walkways.
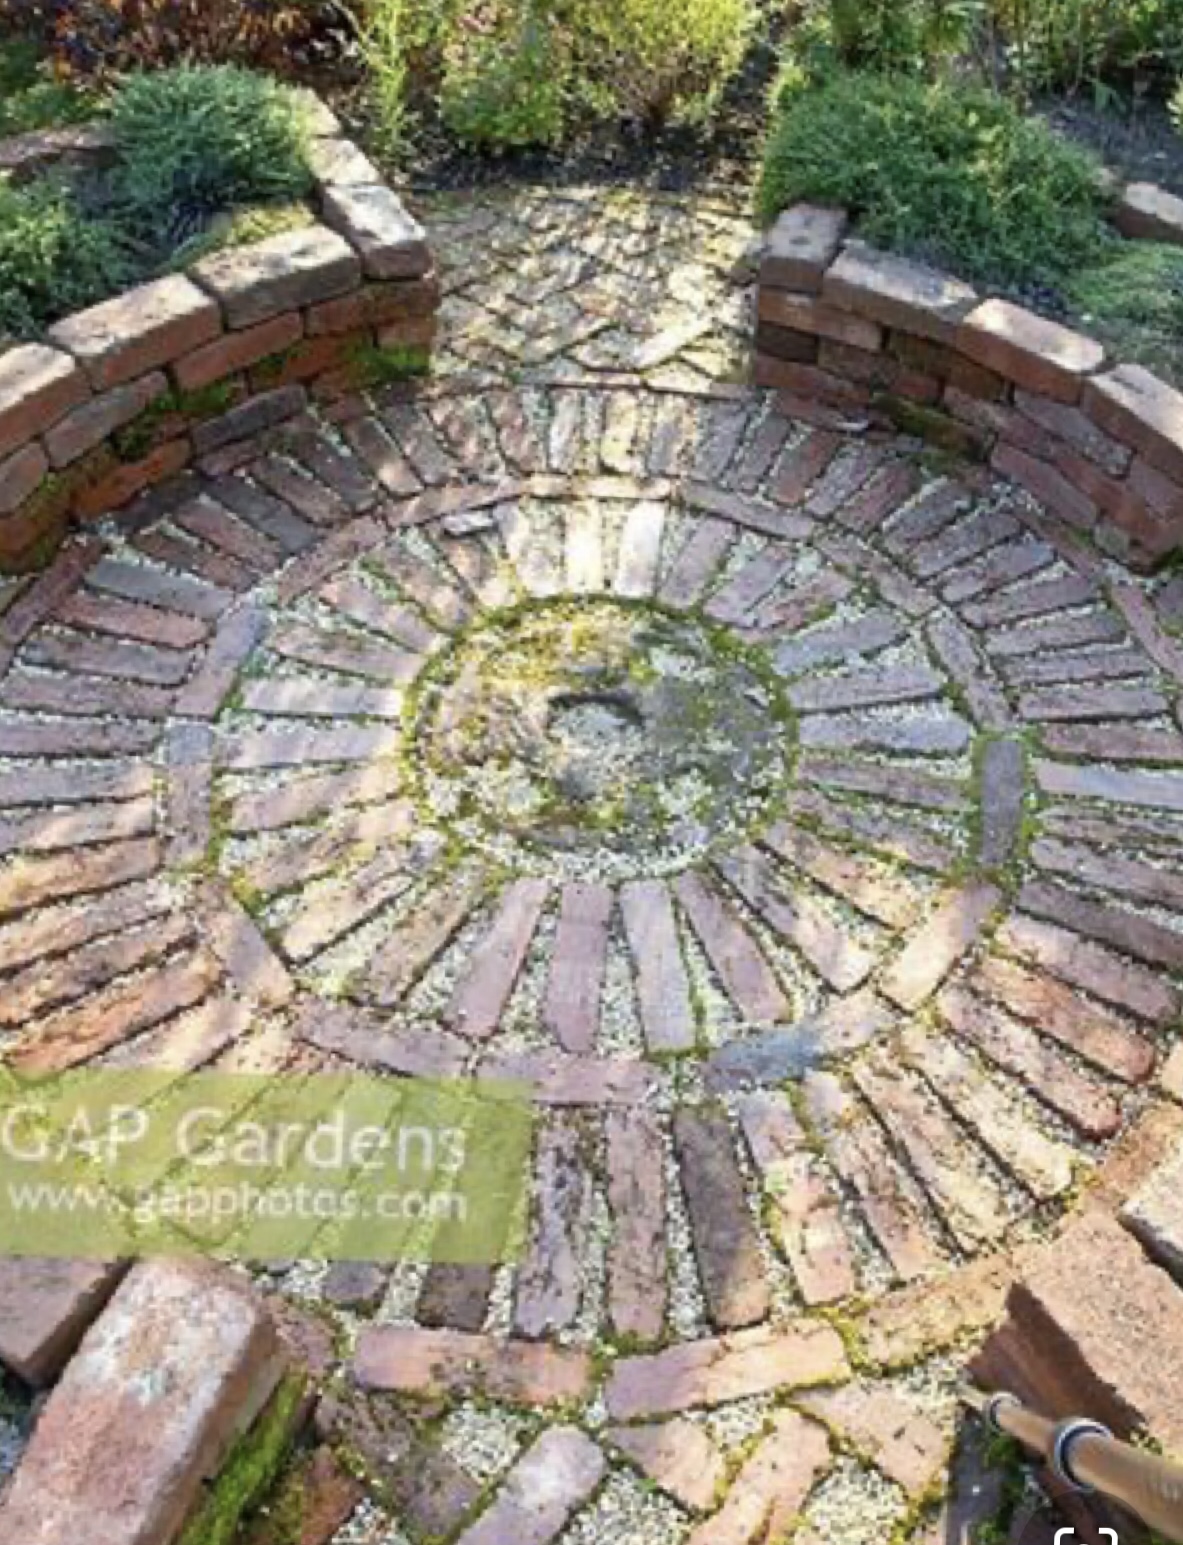
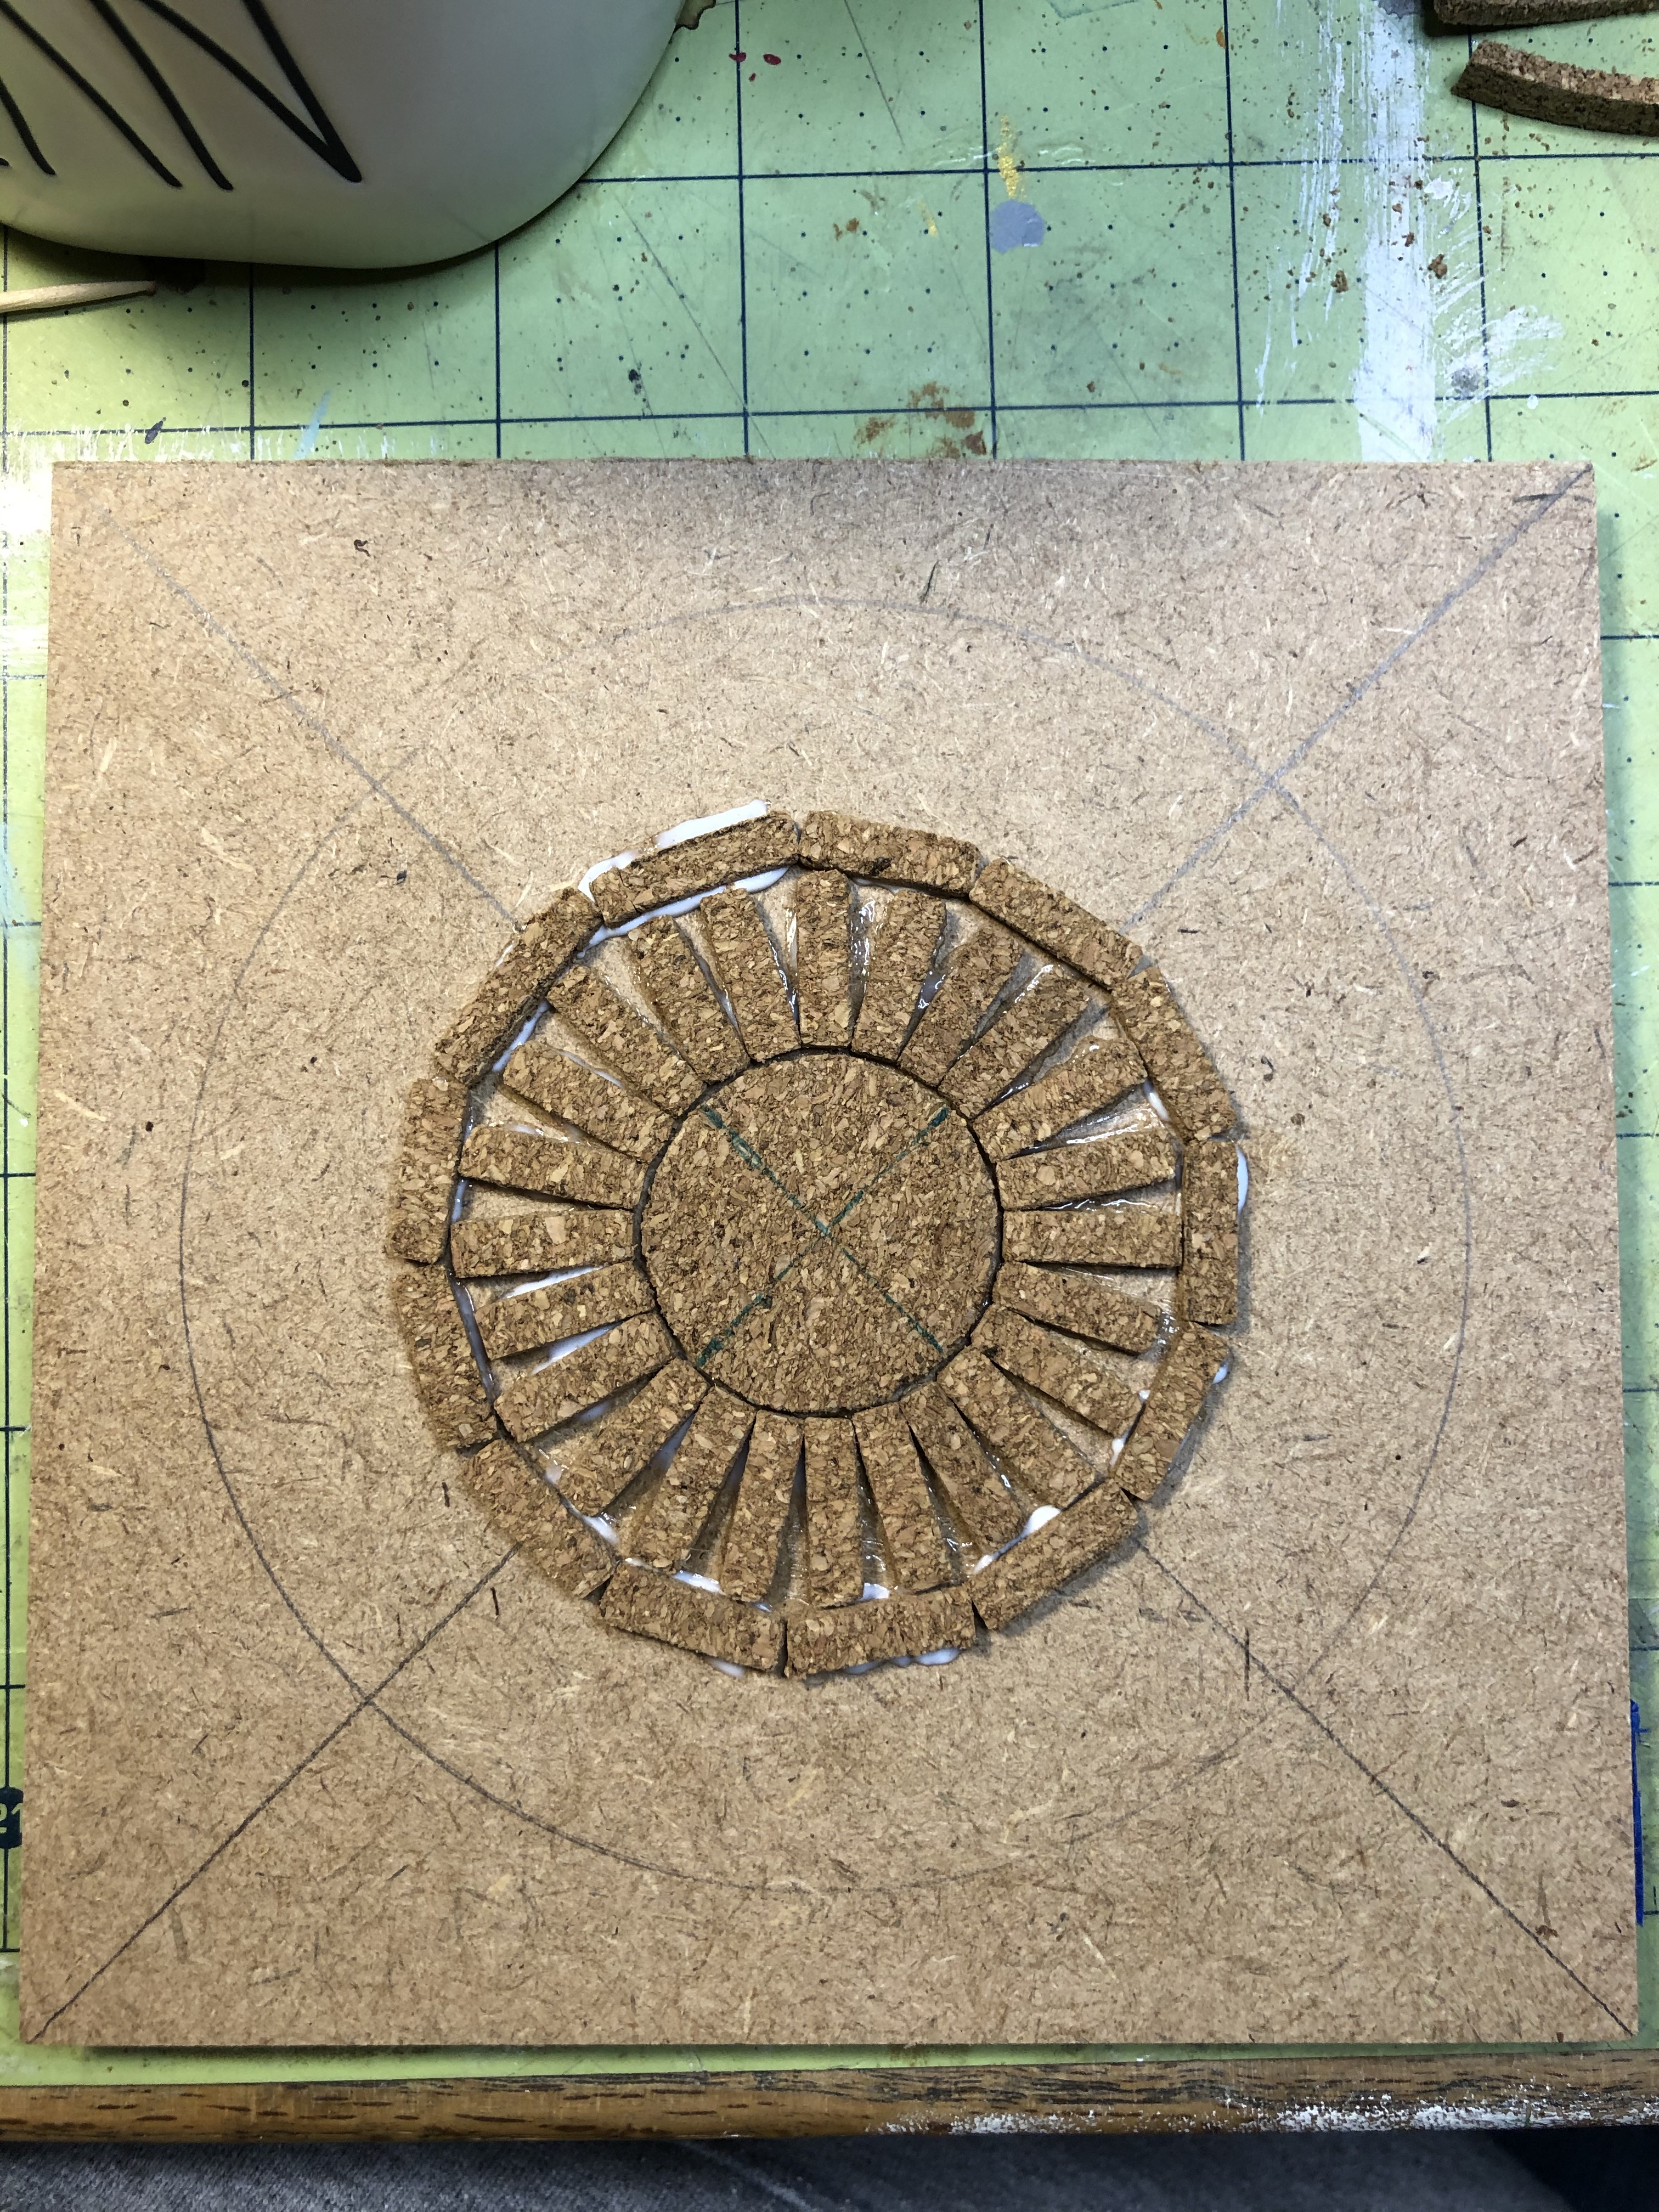
Eventually, I found the perfect brick pattern.
Keeping with my attempts to not buy anything unless absolutely necessary, I’m trying to use supplies I already have. I had saved all my scraps of cork from my last buildings facade and I decided to use those for the brick.
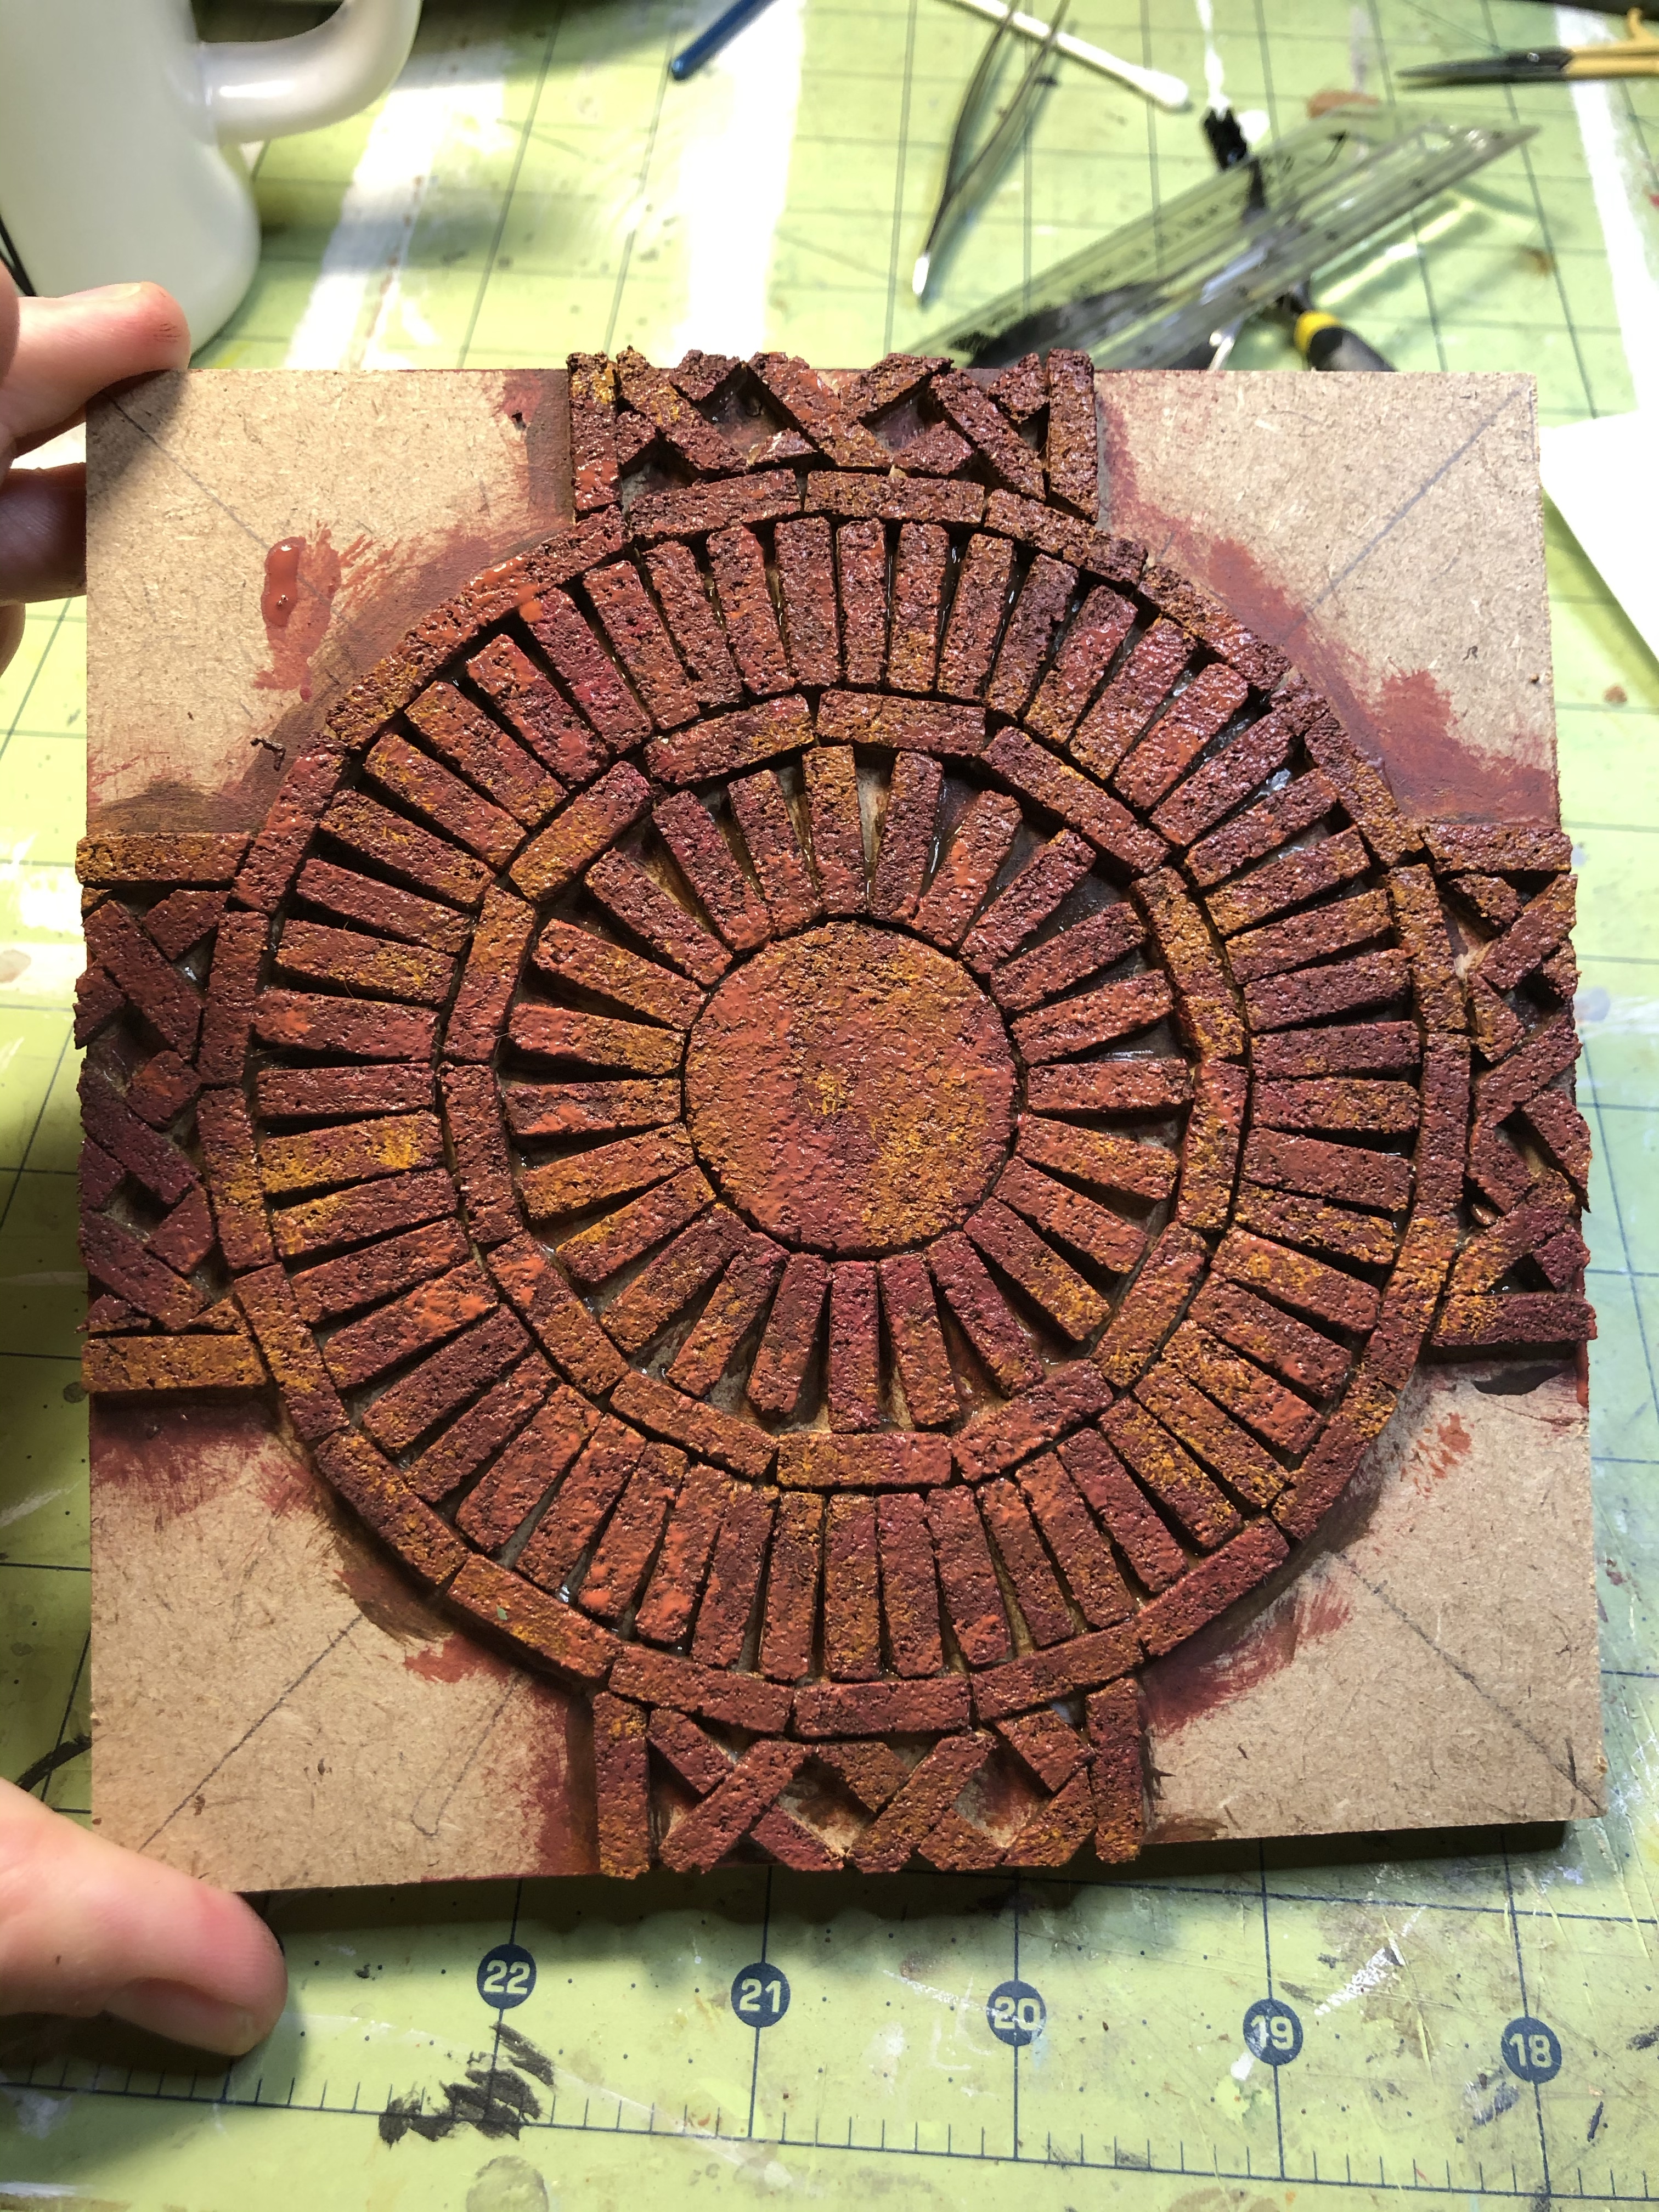
After the brick was all laid out and glued into place, I painted it with layers of red, orange, and brown paints. It turned out a little brighter than I had wanted, but overall I was happy.
Next I used grout we had left over from a tile project to fill in between the bricks. I learned that adding a little glue to the grout is important to help it from breaking off the edge of the project.
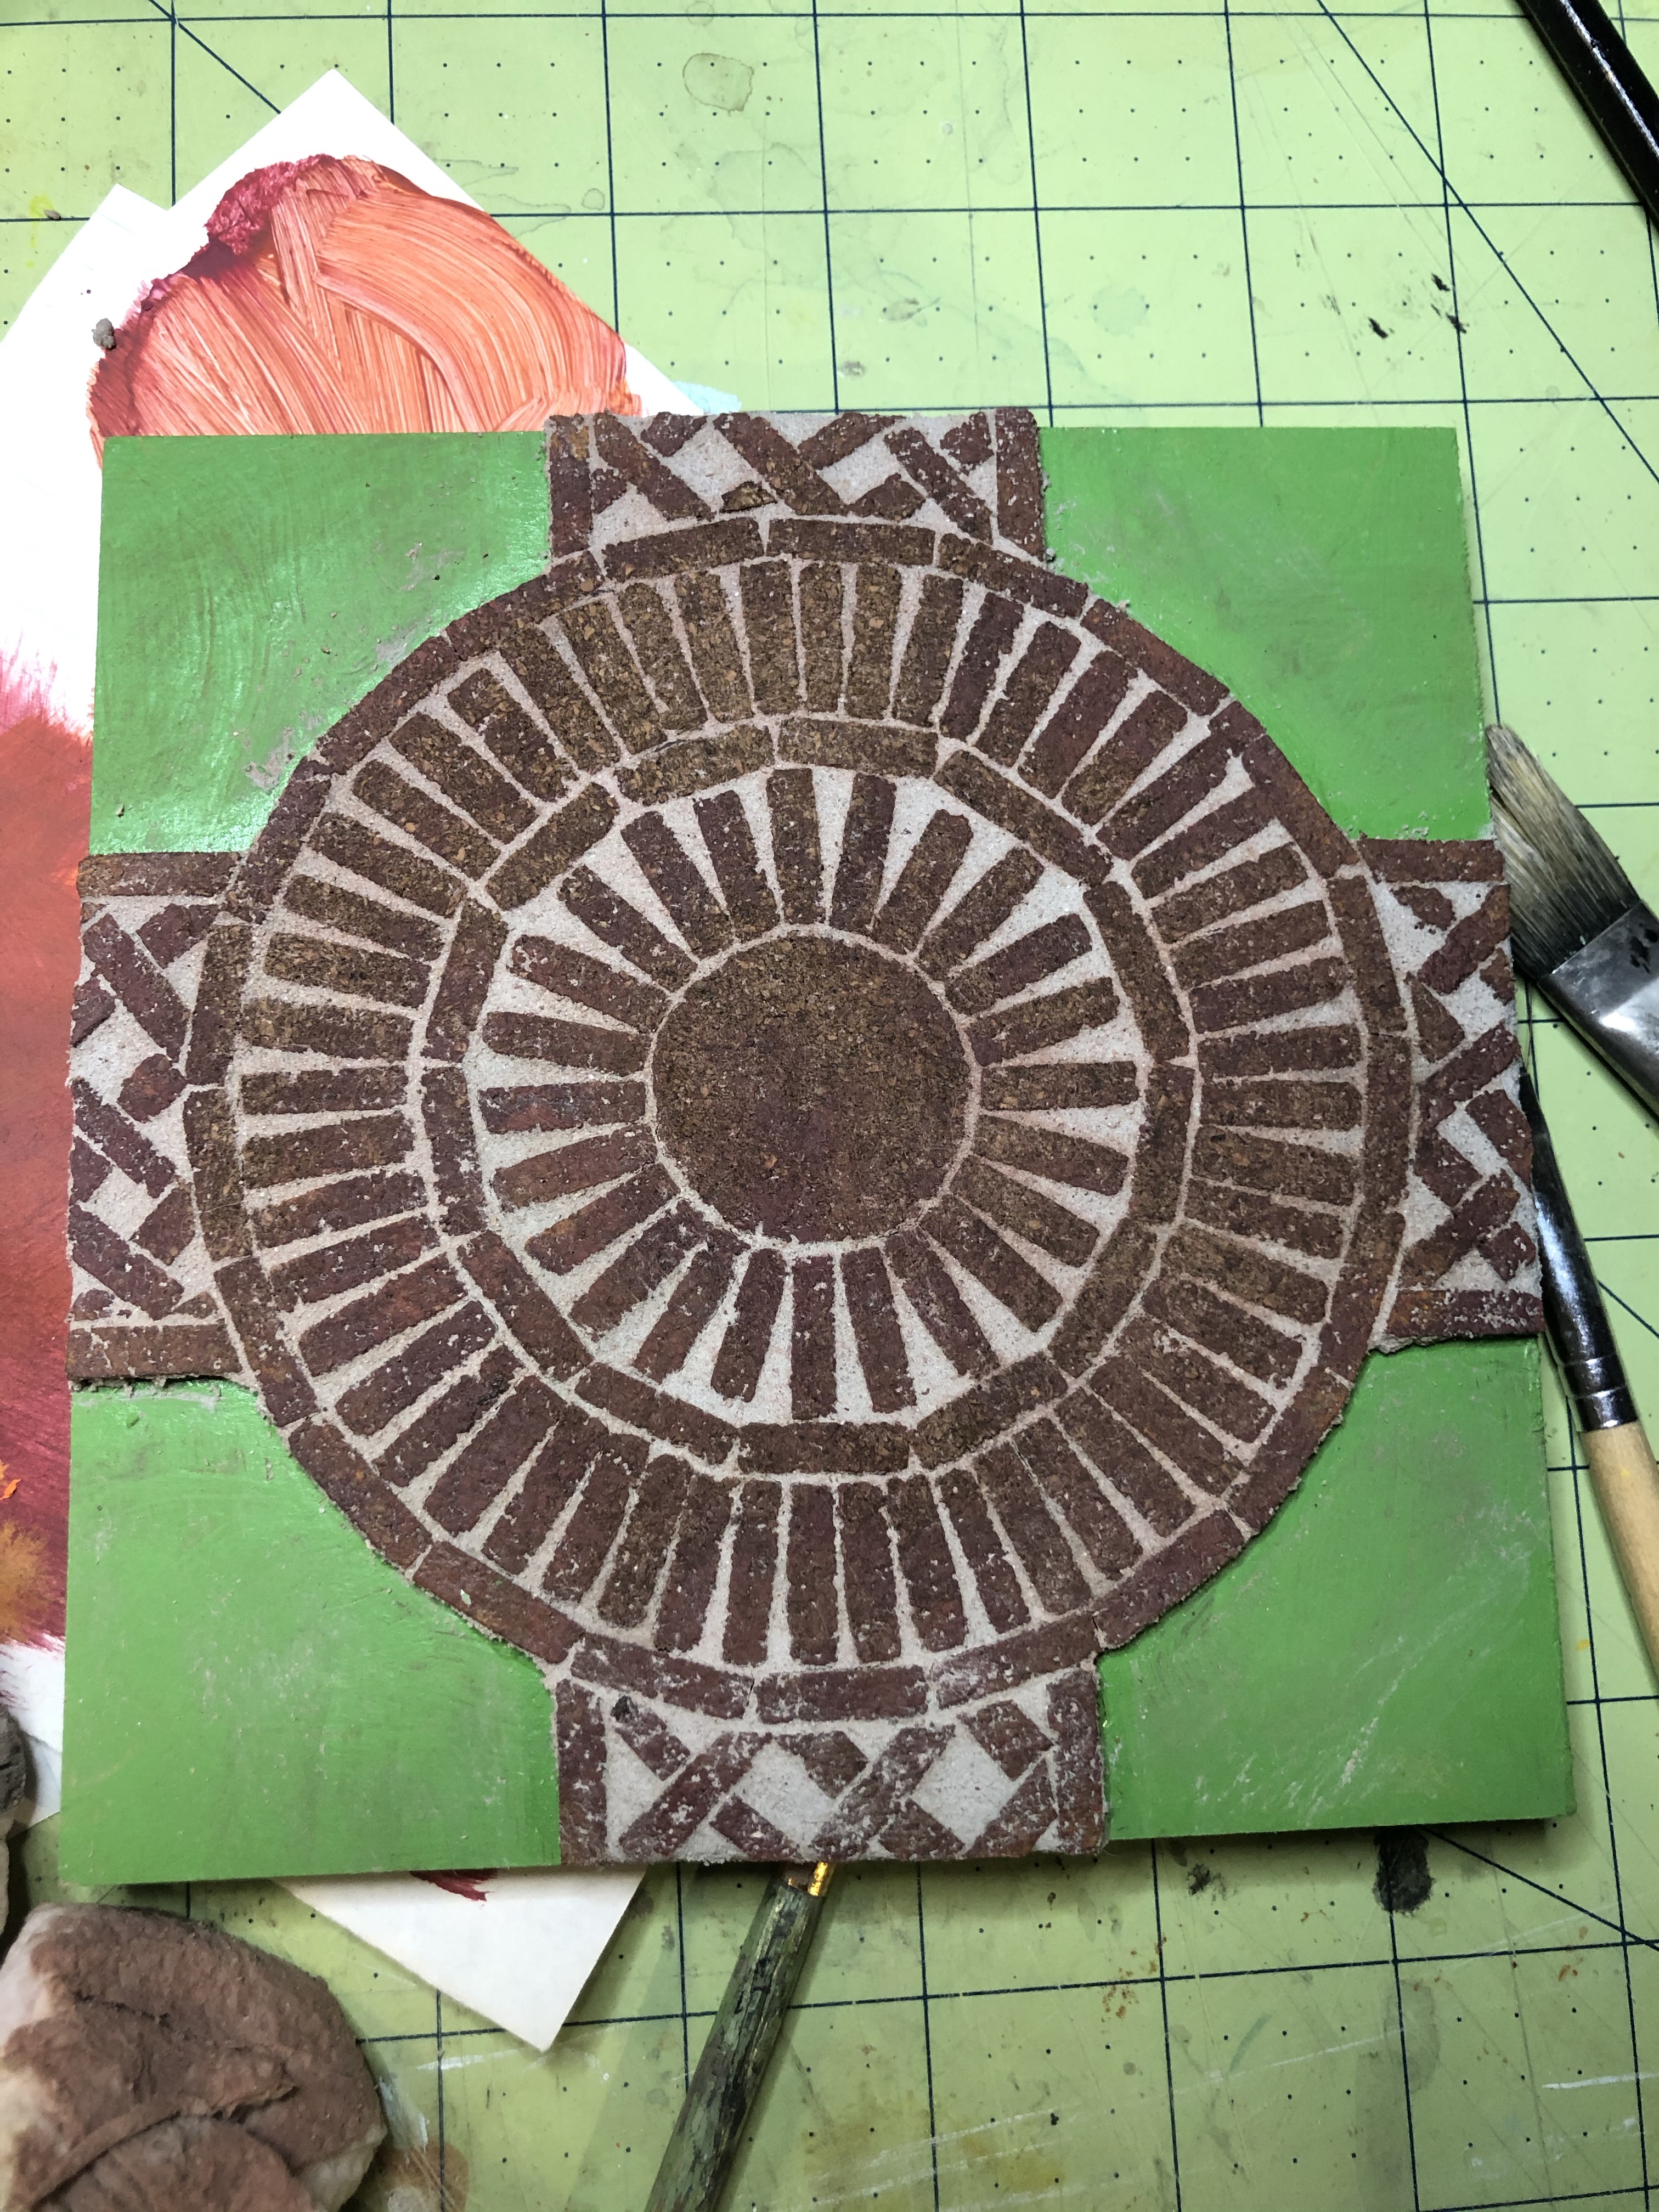
The grouting process ended up removing some of the paint. I wasn’t too upset since I wasn’t completely happy with the brick colors to begin with, but I needed repaint the bricks to give them more color variety. I also added sand between the bricks for some added texture.
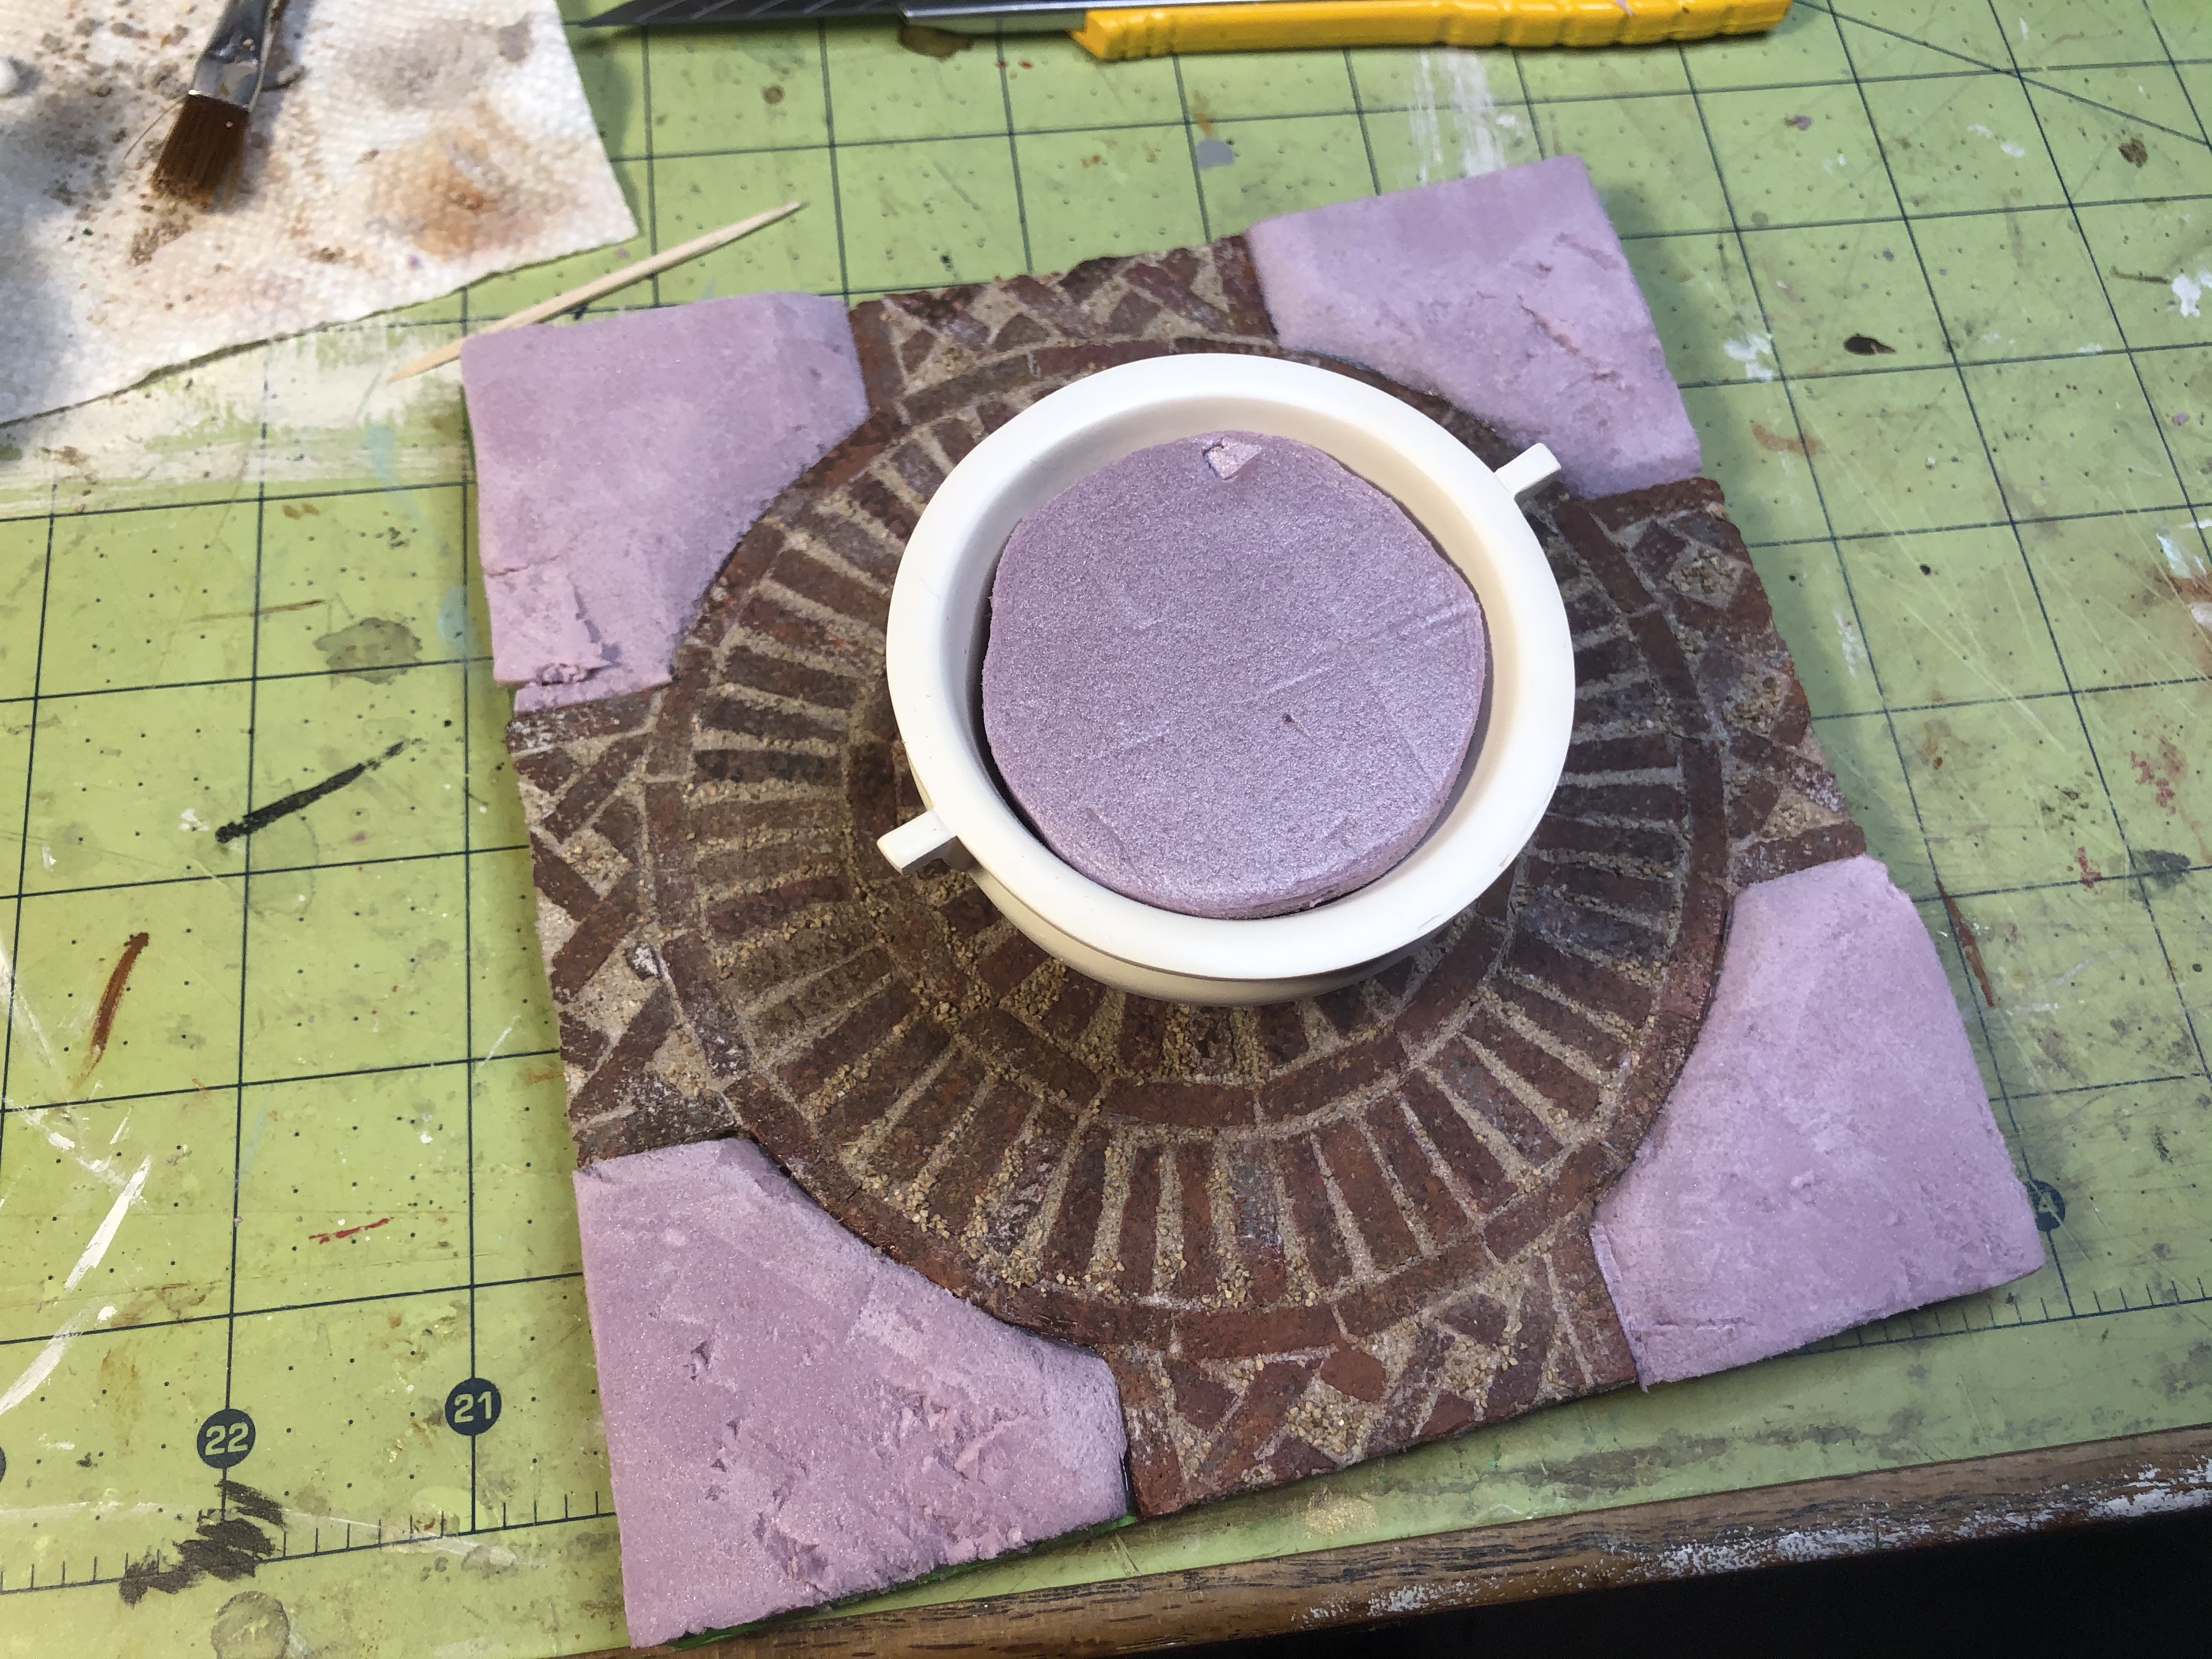
The purple is foam insulation I picked up at Home Depot. I like to use it for landscaping since its easy to cut and shape, and plants can be poked into it easily.
I had the ferns in my stash and used alcohol ink markers to color them. The roots are jute rope, glued to wire, and twisted to look more natural. The woody vines are tendrils cut from grapevine garland. I colored some onion skin paper with markers and used a paper punch to make tiny leaves. The leaves are just glued in place. The grass I used was found at a thrift store many years ago. I plan on adding more, but I wanted to add my plants and flowers first.

This is where I stopped today. I’m attempting to make a hydrangea bush with purple flowers. I’m using the same process I used to make the geraniums for my last build’s balcony. You can learn more about it here. I need to figure out how to make the leaves. I’m thinking about trying to cut some out on my Cricut.
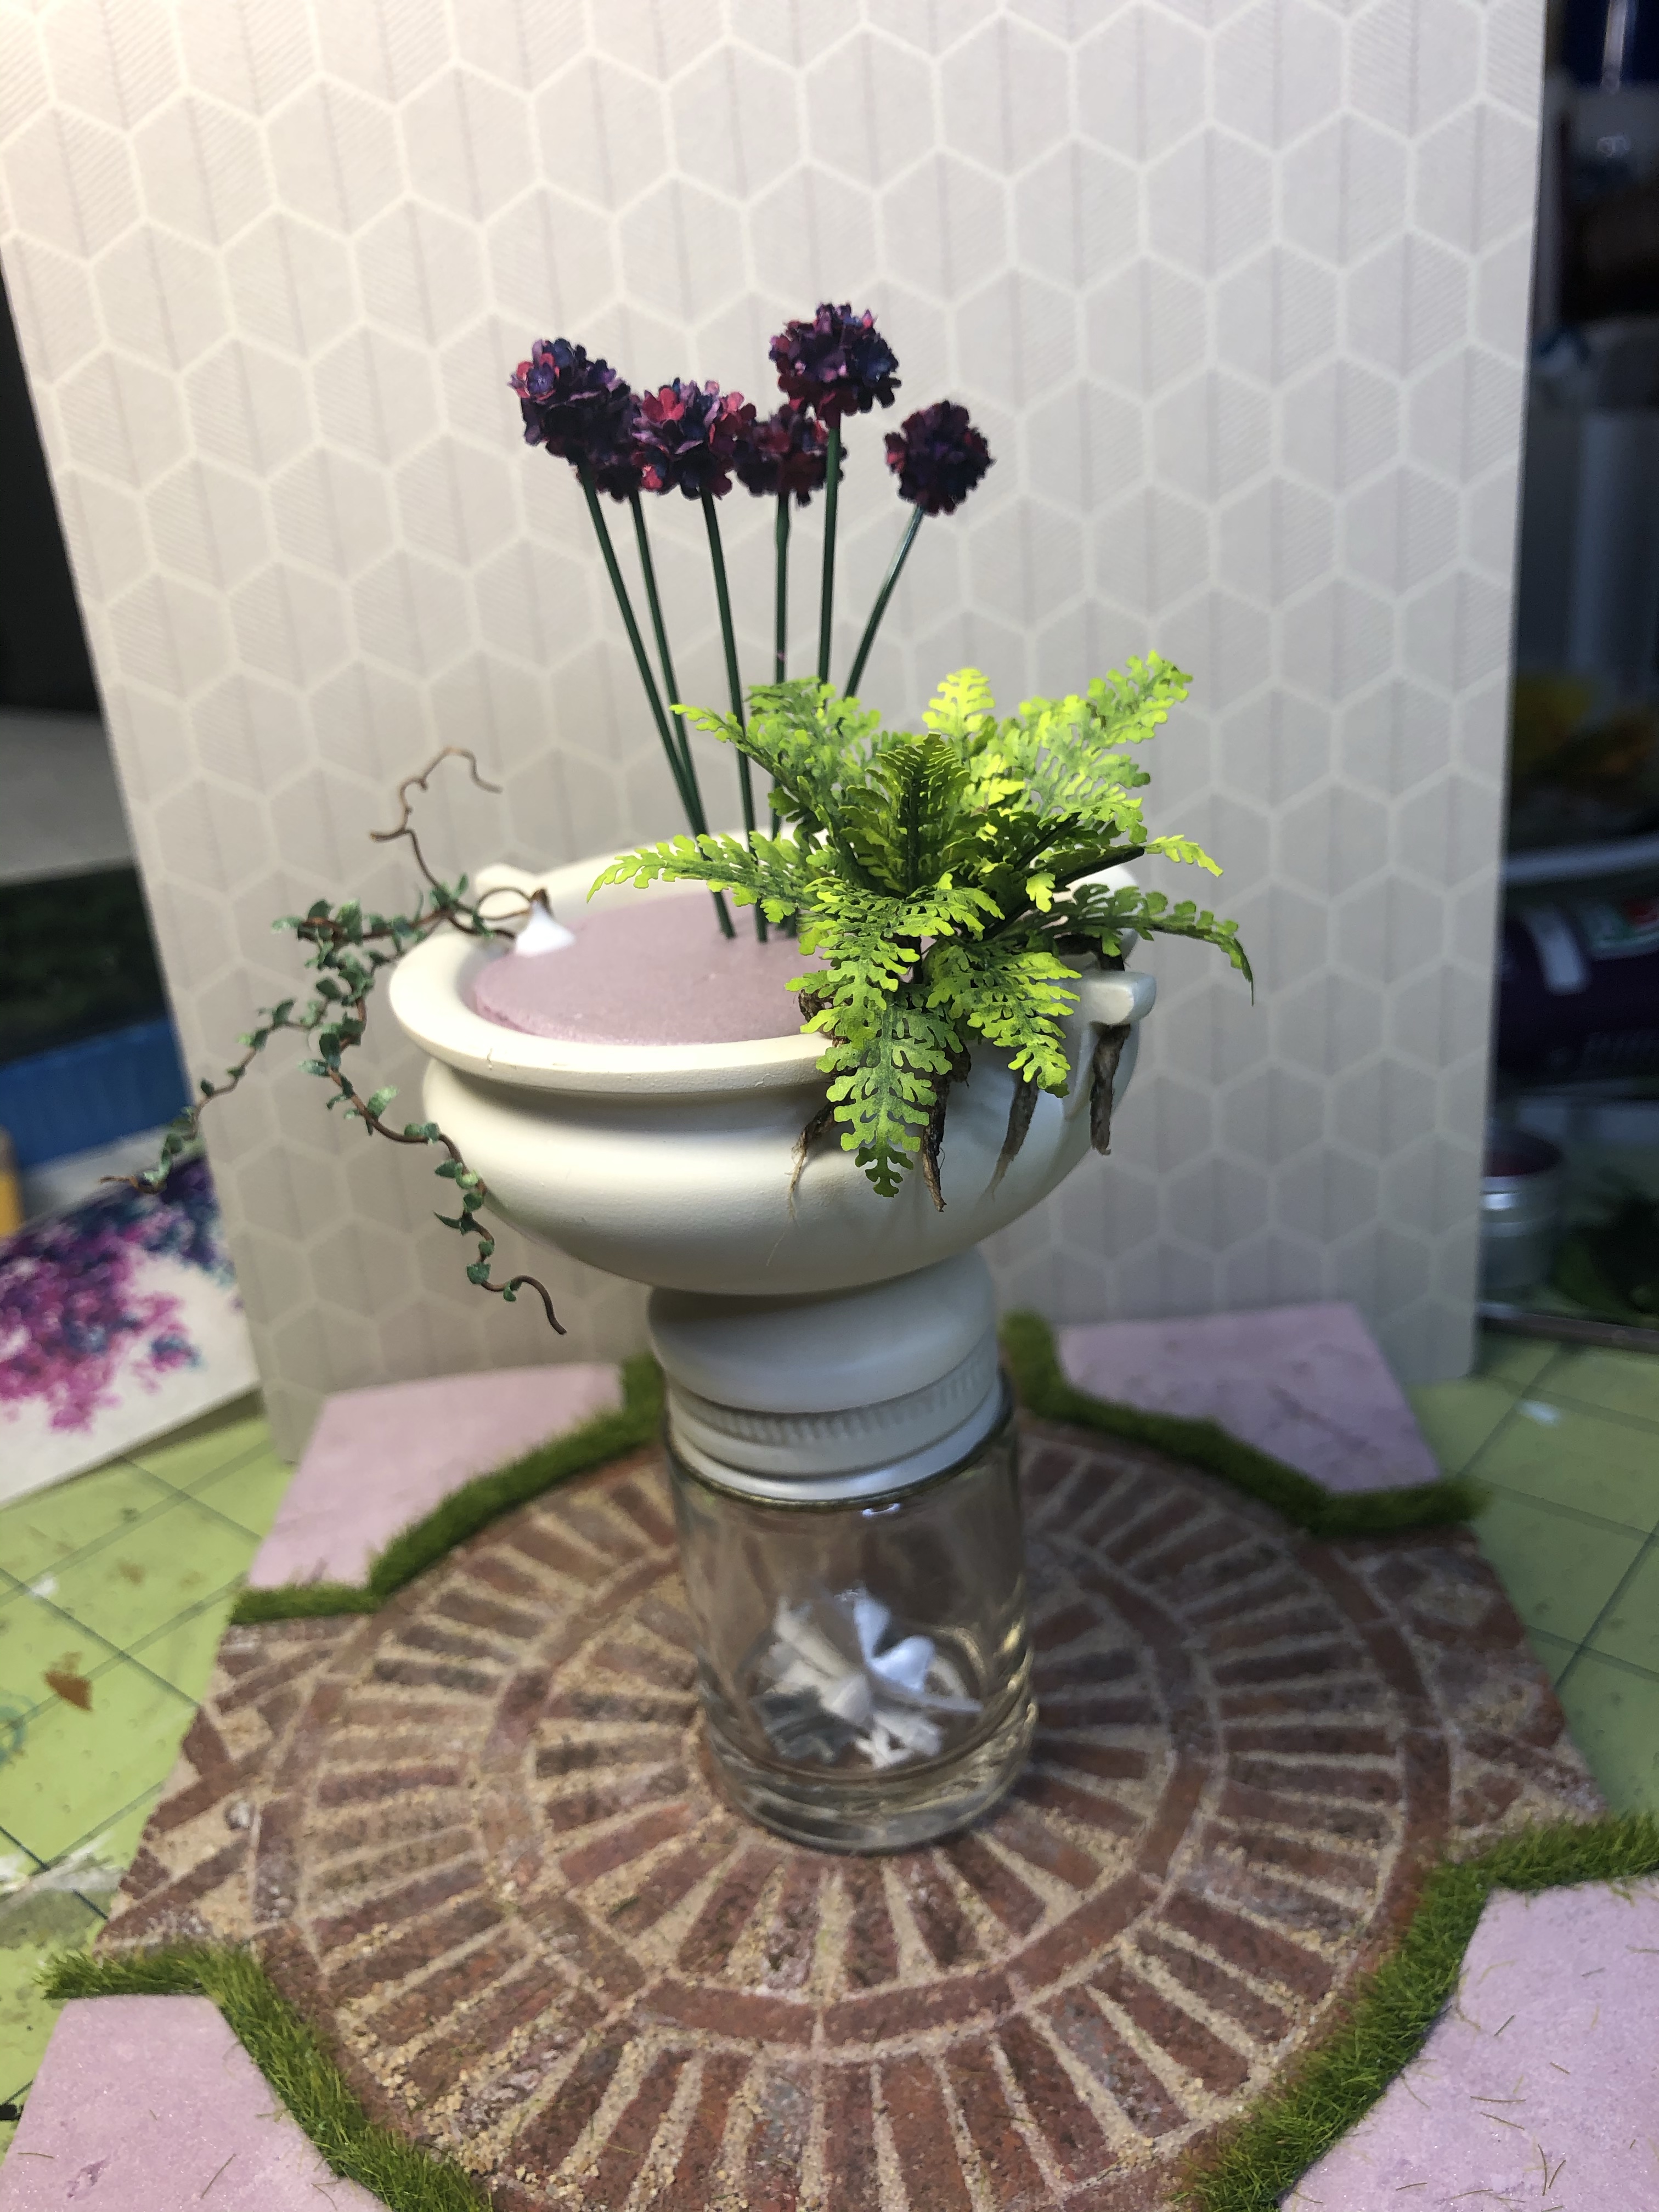
I still have a ways to go. I still need to add moss to the bricks, age the urn (which I should probably do before it’s too full of flowers), make the pedestal for the urn to sit on, and make a small garden worth of plants. I always forget how time consuming making tiny plants is, but I do love doing it.

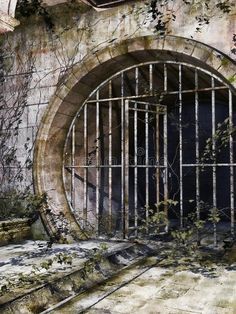
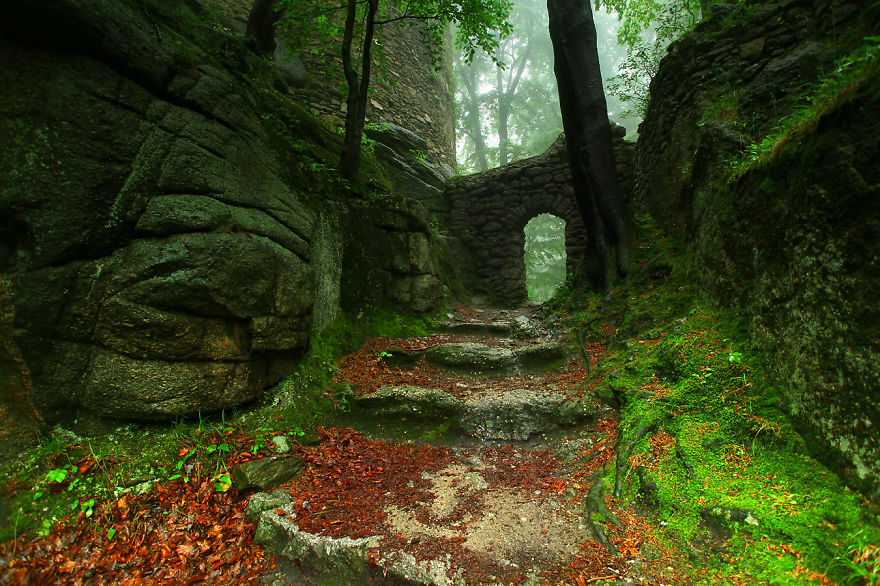
And finally, idea #3. This one embraces the idea of it being an inside scene. Just not the inside space most people think of.
A tunnel.

A tunnel with brickwork and walkways.
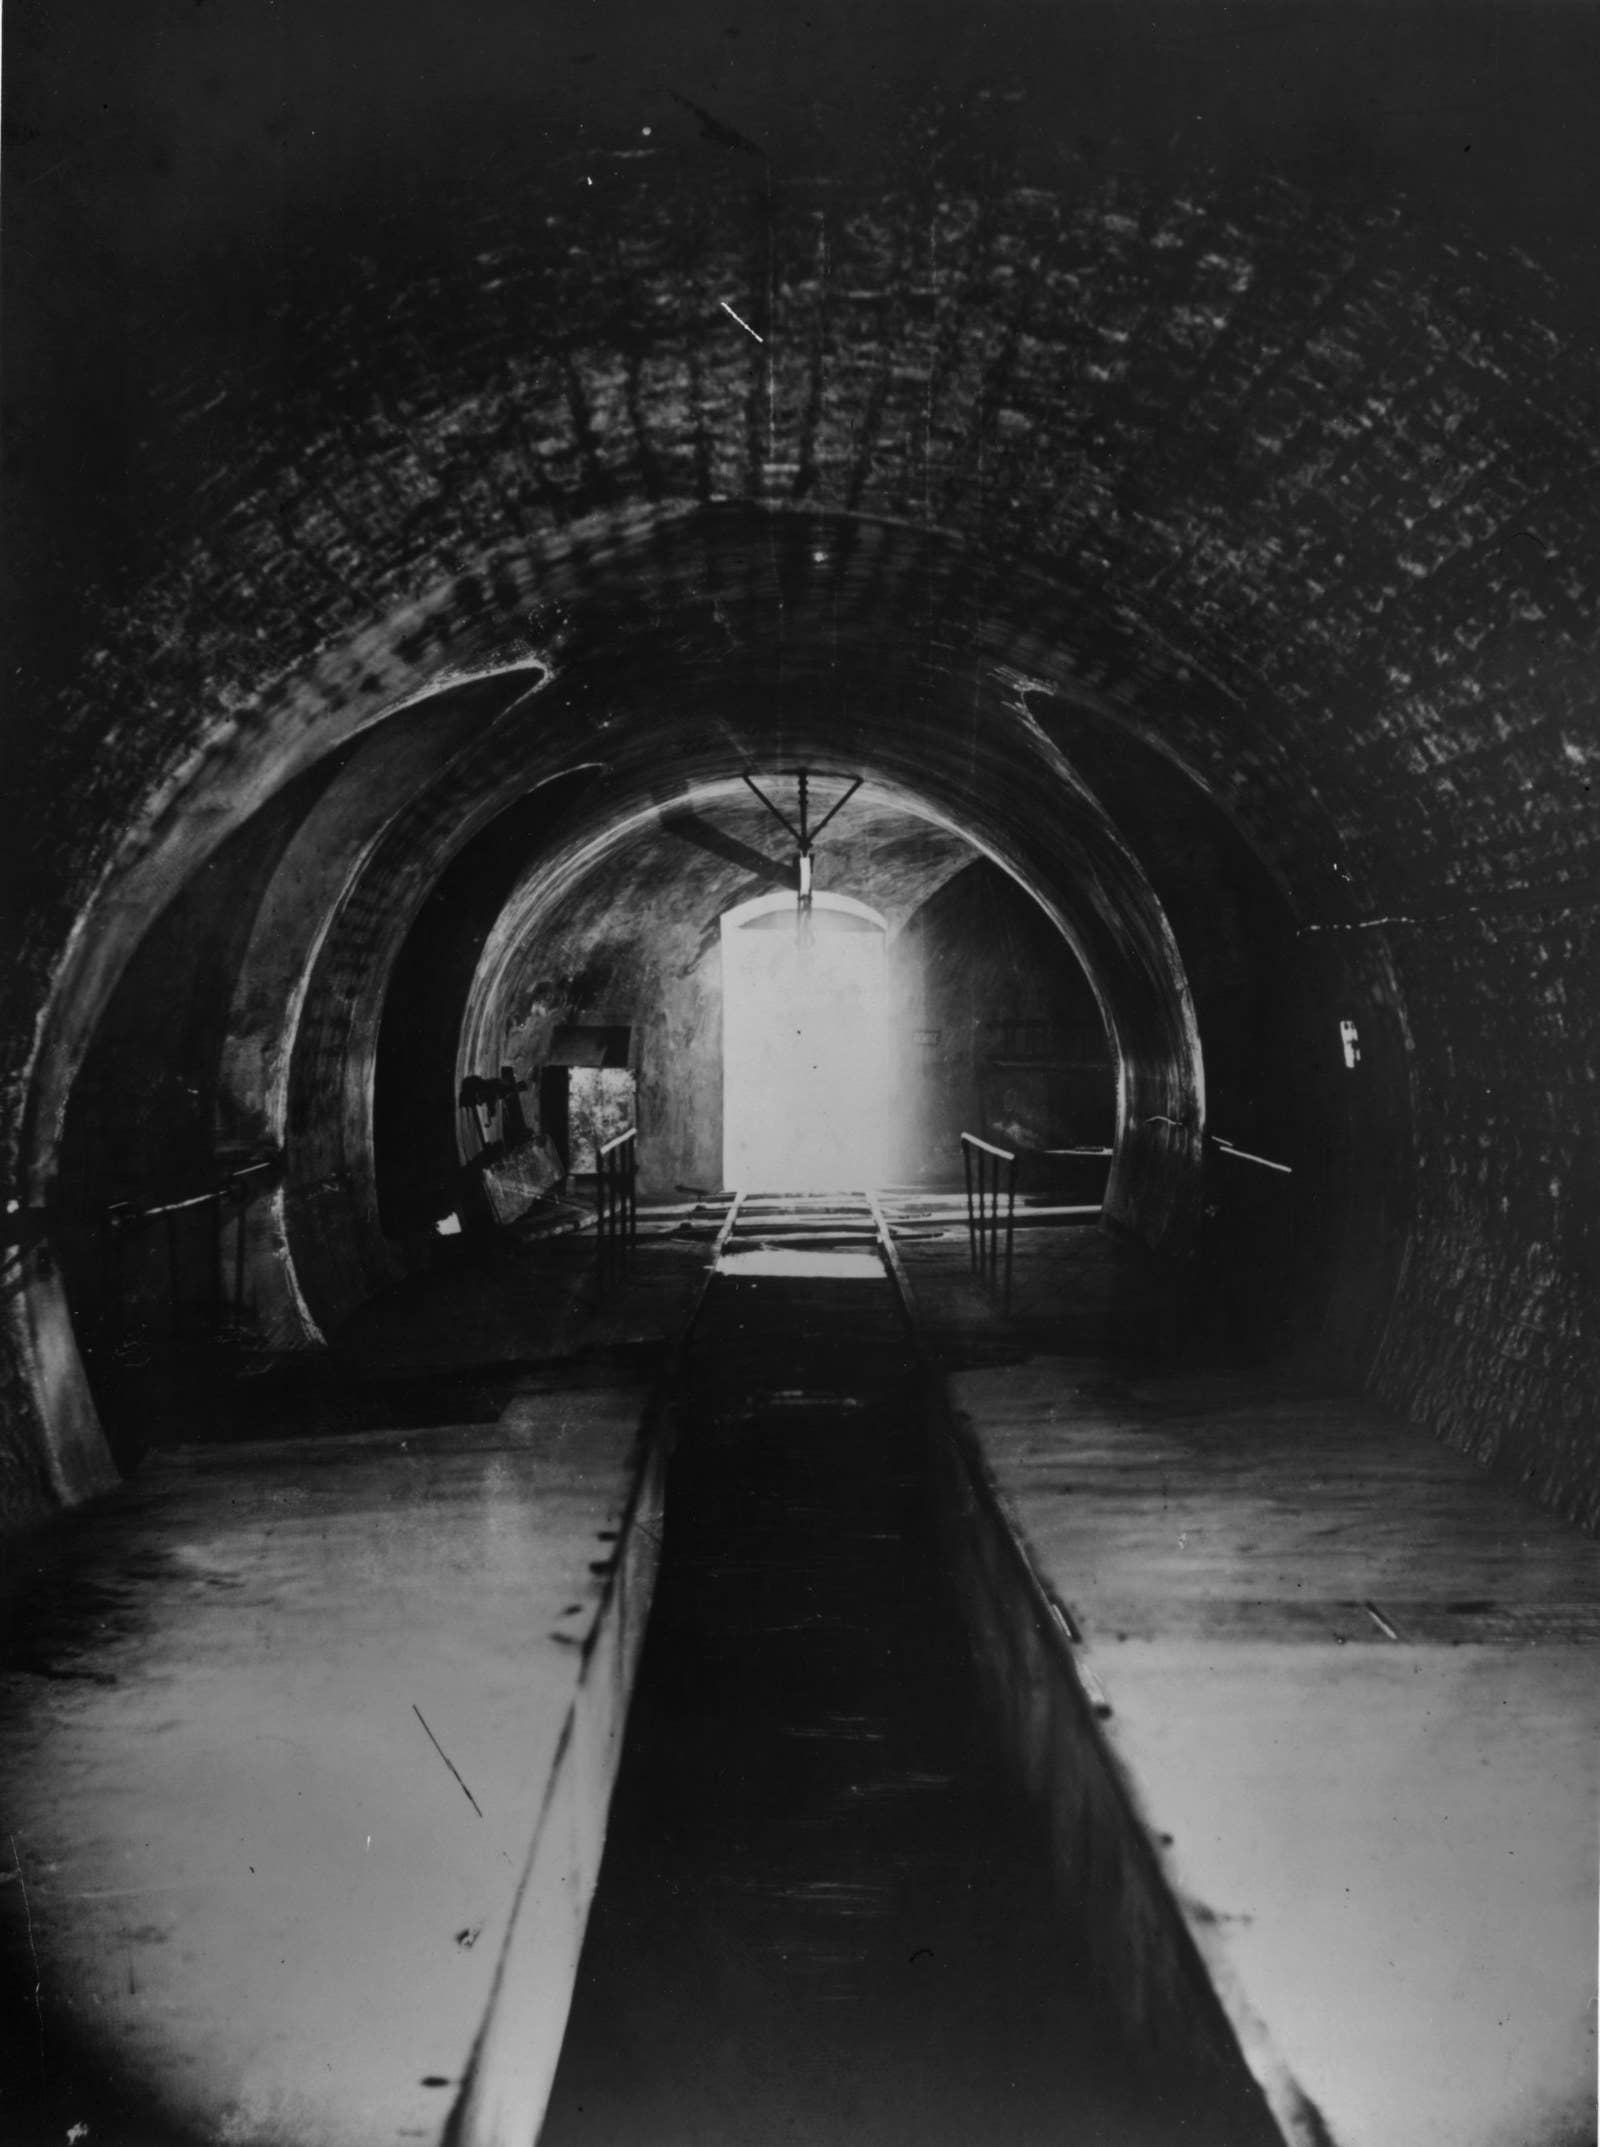
Possibly some ladders and murky water.
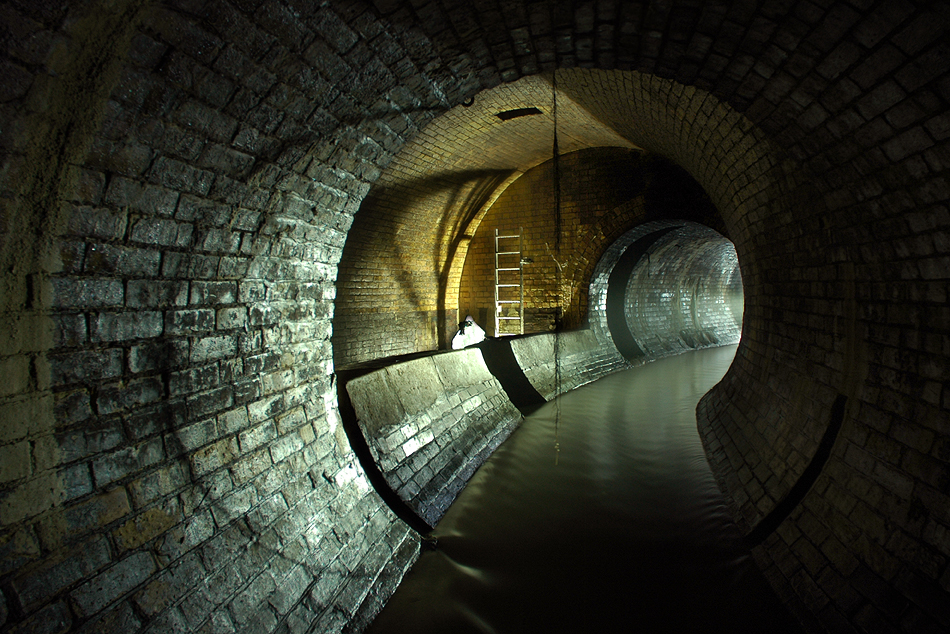
Pealing paint, rust, and water stains are a must.

And a rusty gate or grate, to keep the critters out (or in), will be necessary.
And there you have it, the last of my 3 ideas. It’s hard to say which one is my favorite. I kind of love the idea of all 3 of them. I’m thinking once I receive the kit I’ll have a better idea of which idea to go with. I just hope I don’t come up with more ideas before then.
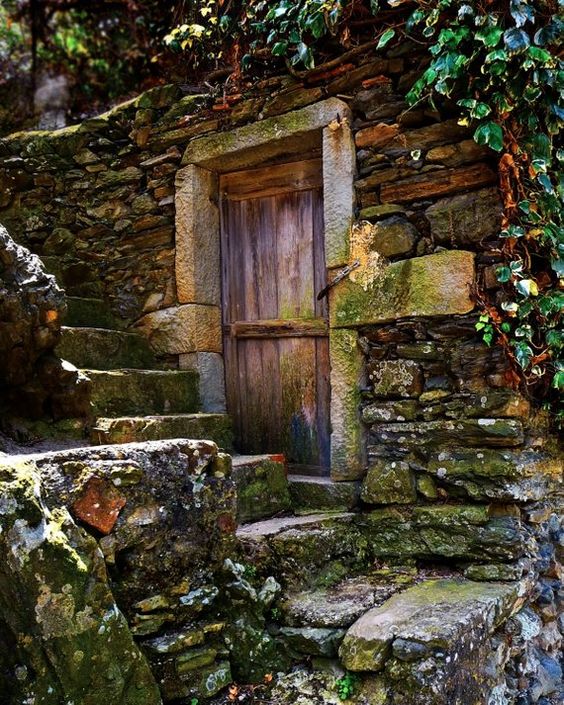
Idea #2 is similar to idea #1. It involves being the outside of a building. However the setting is a little different.
Idea two would also be rich in history and unique architecture.
However, the inspiration would be the stairs, waterman’s stairs to be exact.
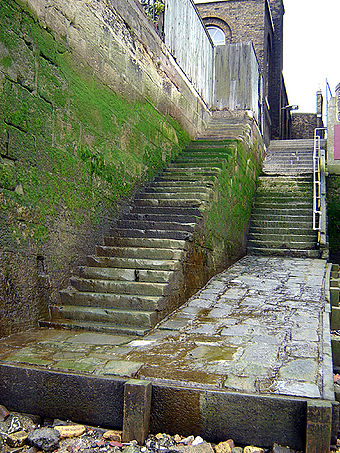
It would include rusted metal, algae, and watermarks on brick and stonework.
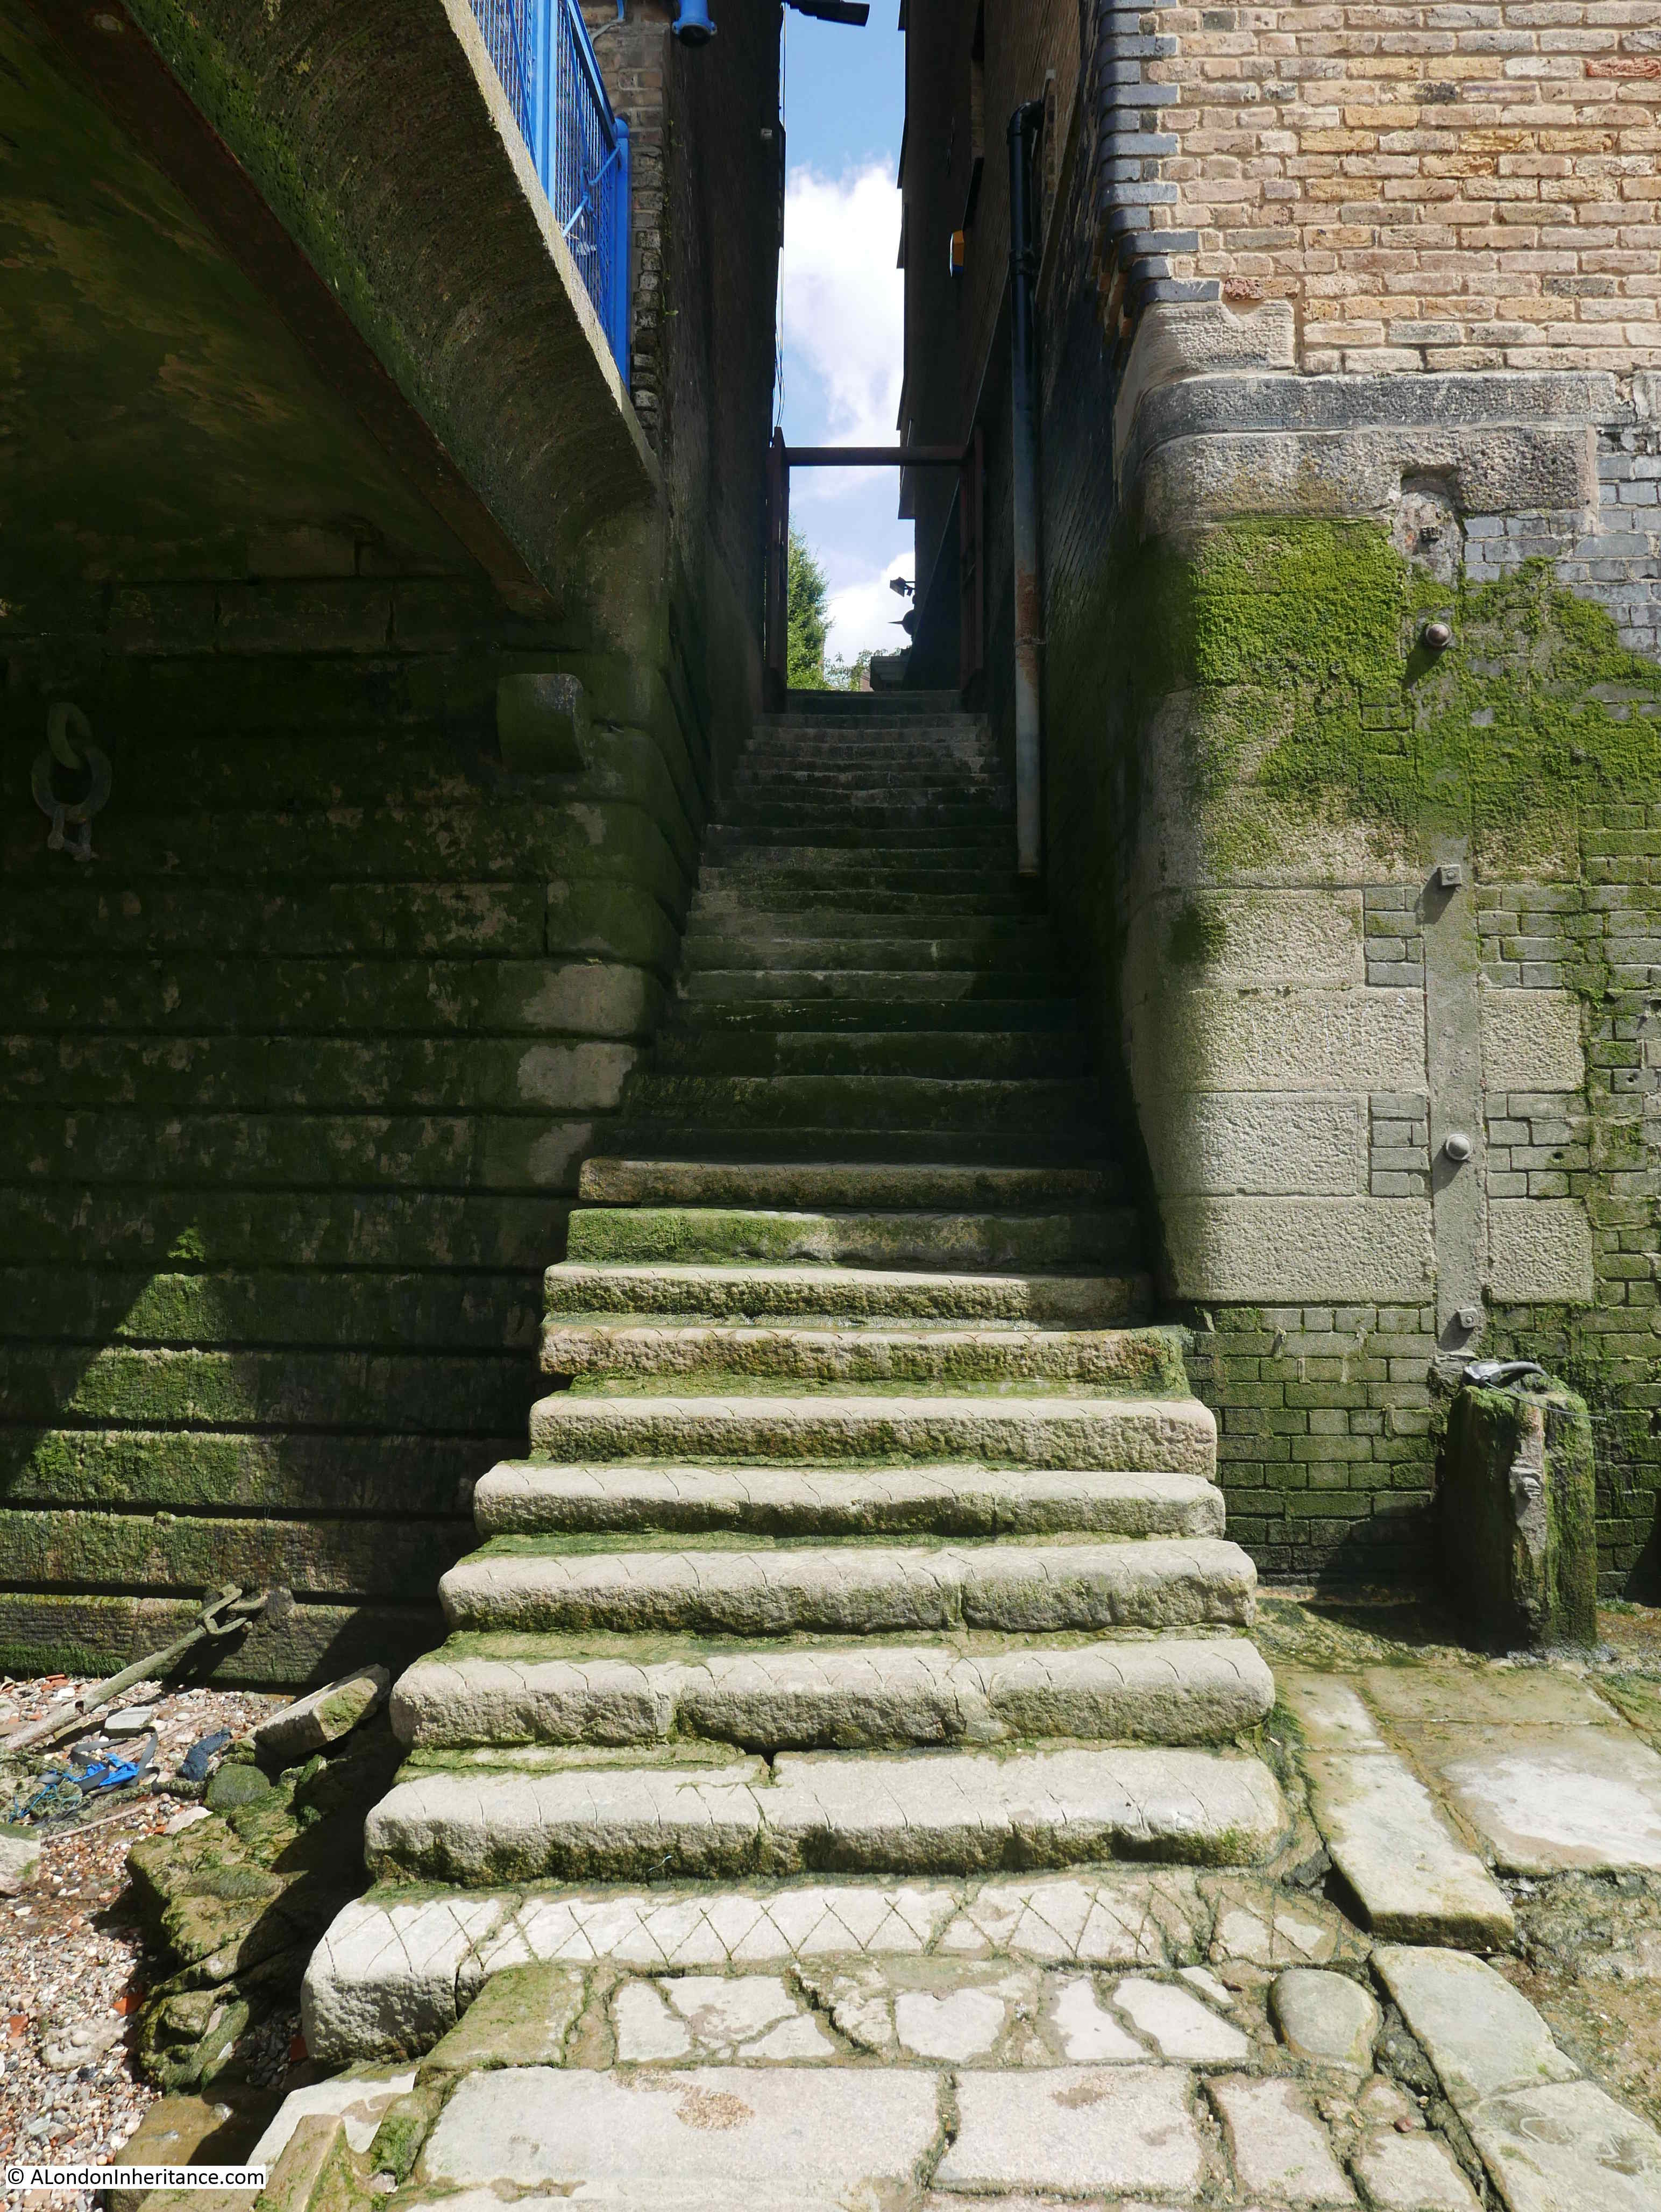
It would be set at low tide so that things like old wooden pier pilings, rocks and sand, and maybe a few lost treasures.
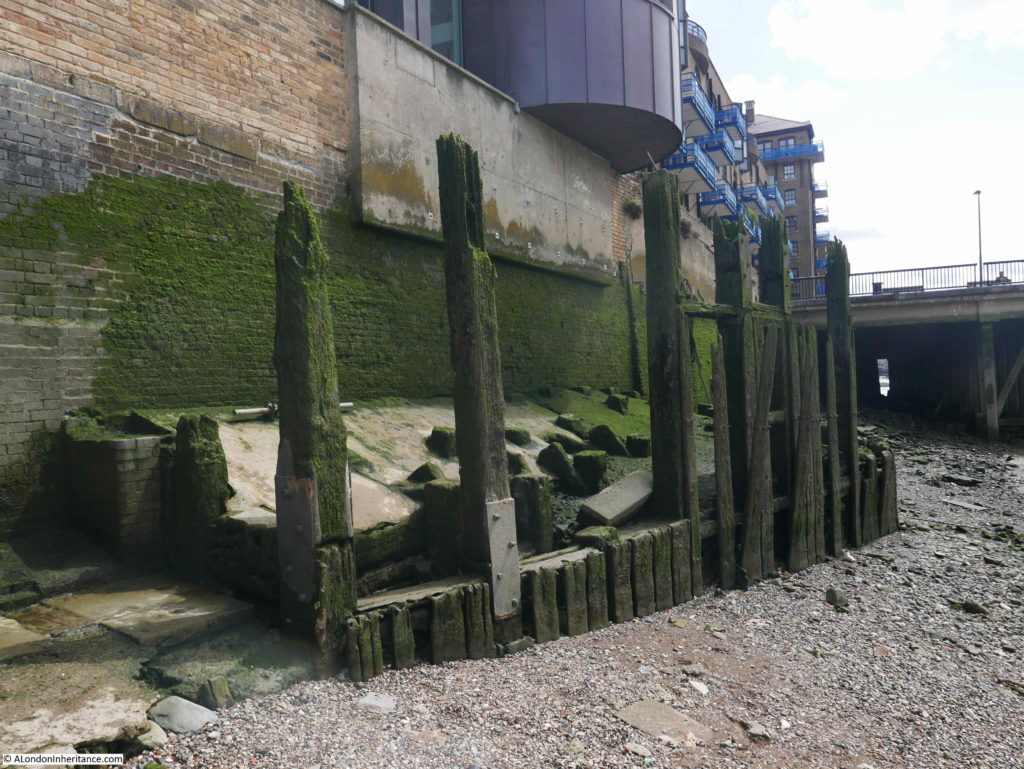
And that is idea #2. A little less whimsical than idea #1, but lots of fun details none the less.
And next up: idea #3
I’m excited about the new HBS Creatin Contest Kit. My brain sprung into action as soon as I saw it.
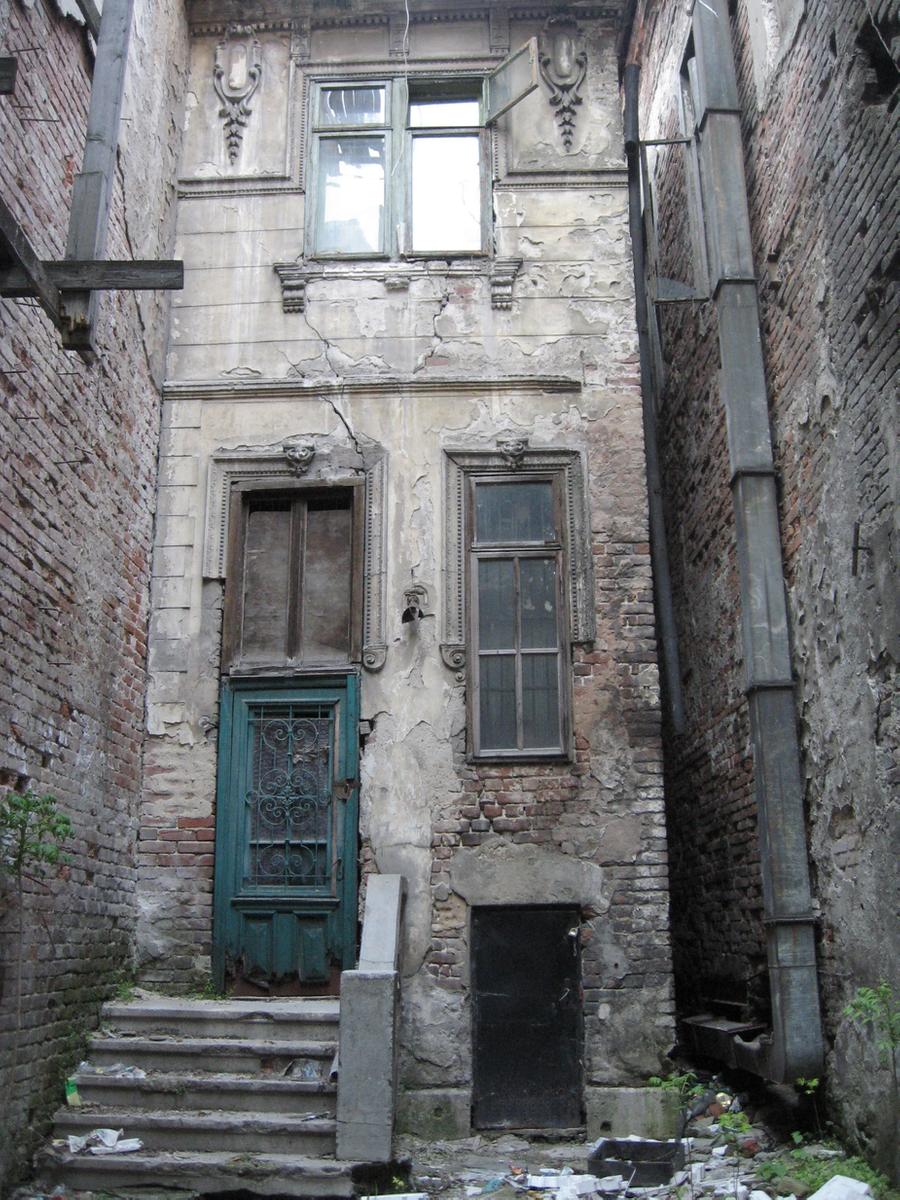
My first impressions when I saw the kit was that it was meant to be the inside of a room. So my unconventional thinking thought it would be cool to make this the outside of a building.
I’m thinking something rustic and overgrown.
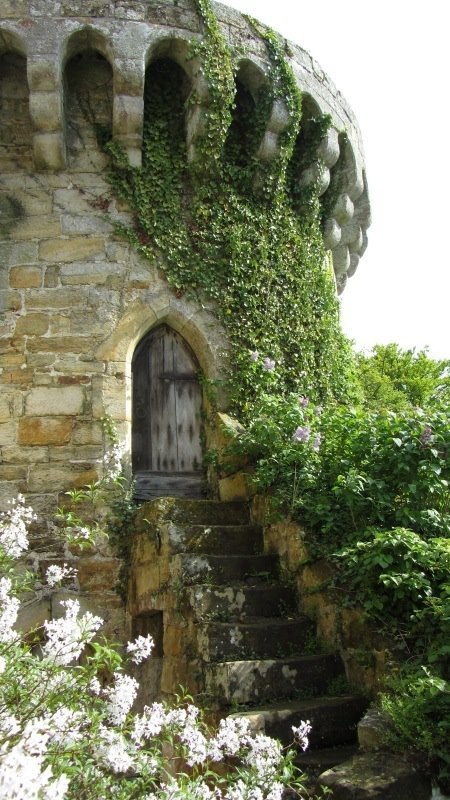
Maybe the outside of an abandoned building with stairs, moss, and stonework.
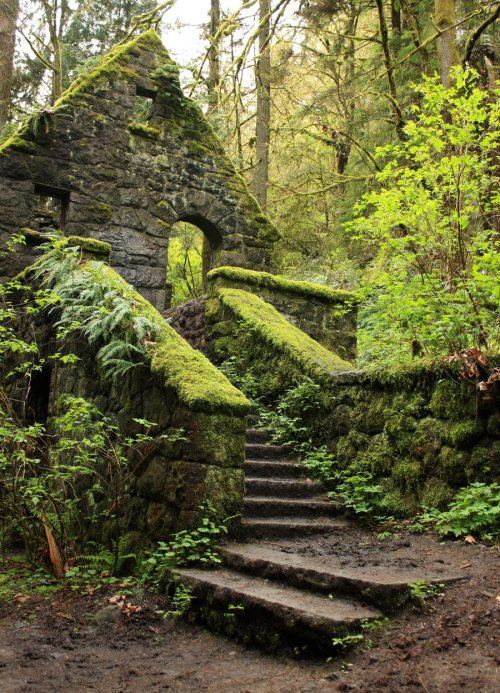
Some trees growing up through the ruins would add a whimsical touch.
A unique door would be a must.
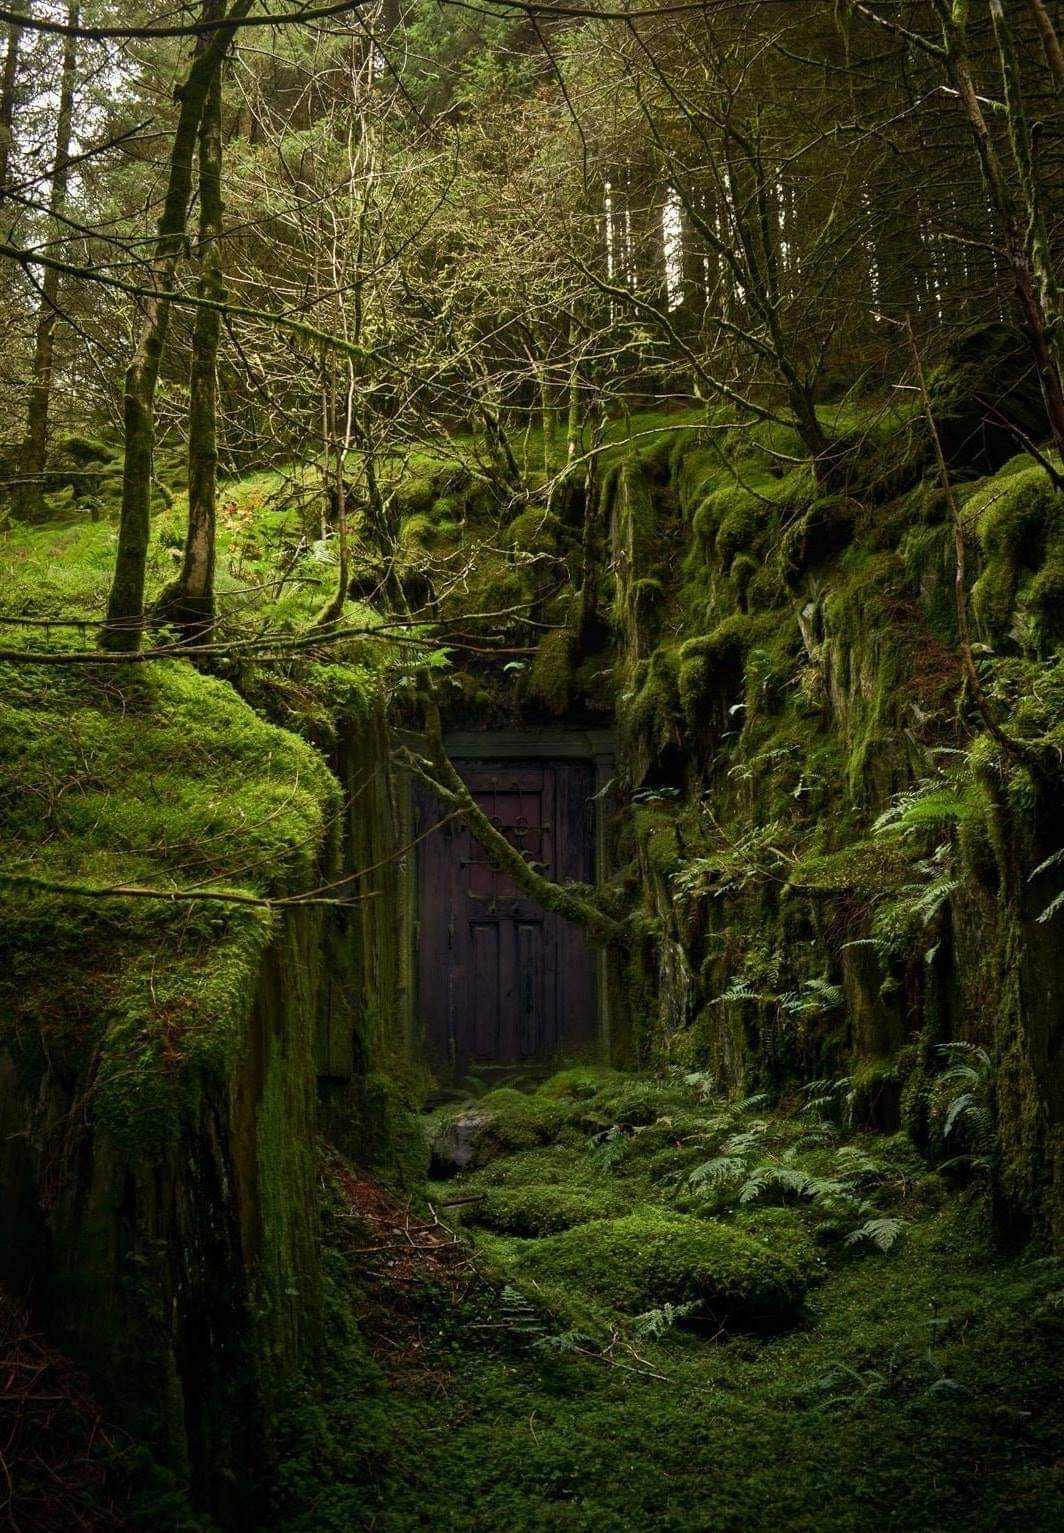
Something old, that time has forgotten with lots of texture and history.
That’s idea #1.
Next up: idea #2
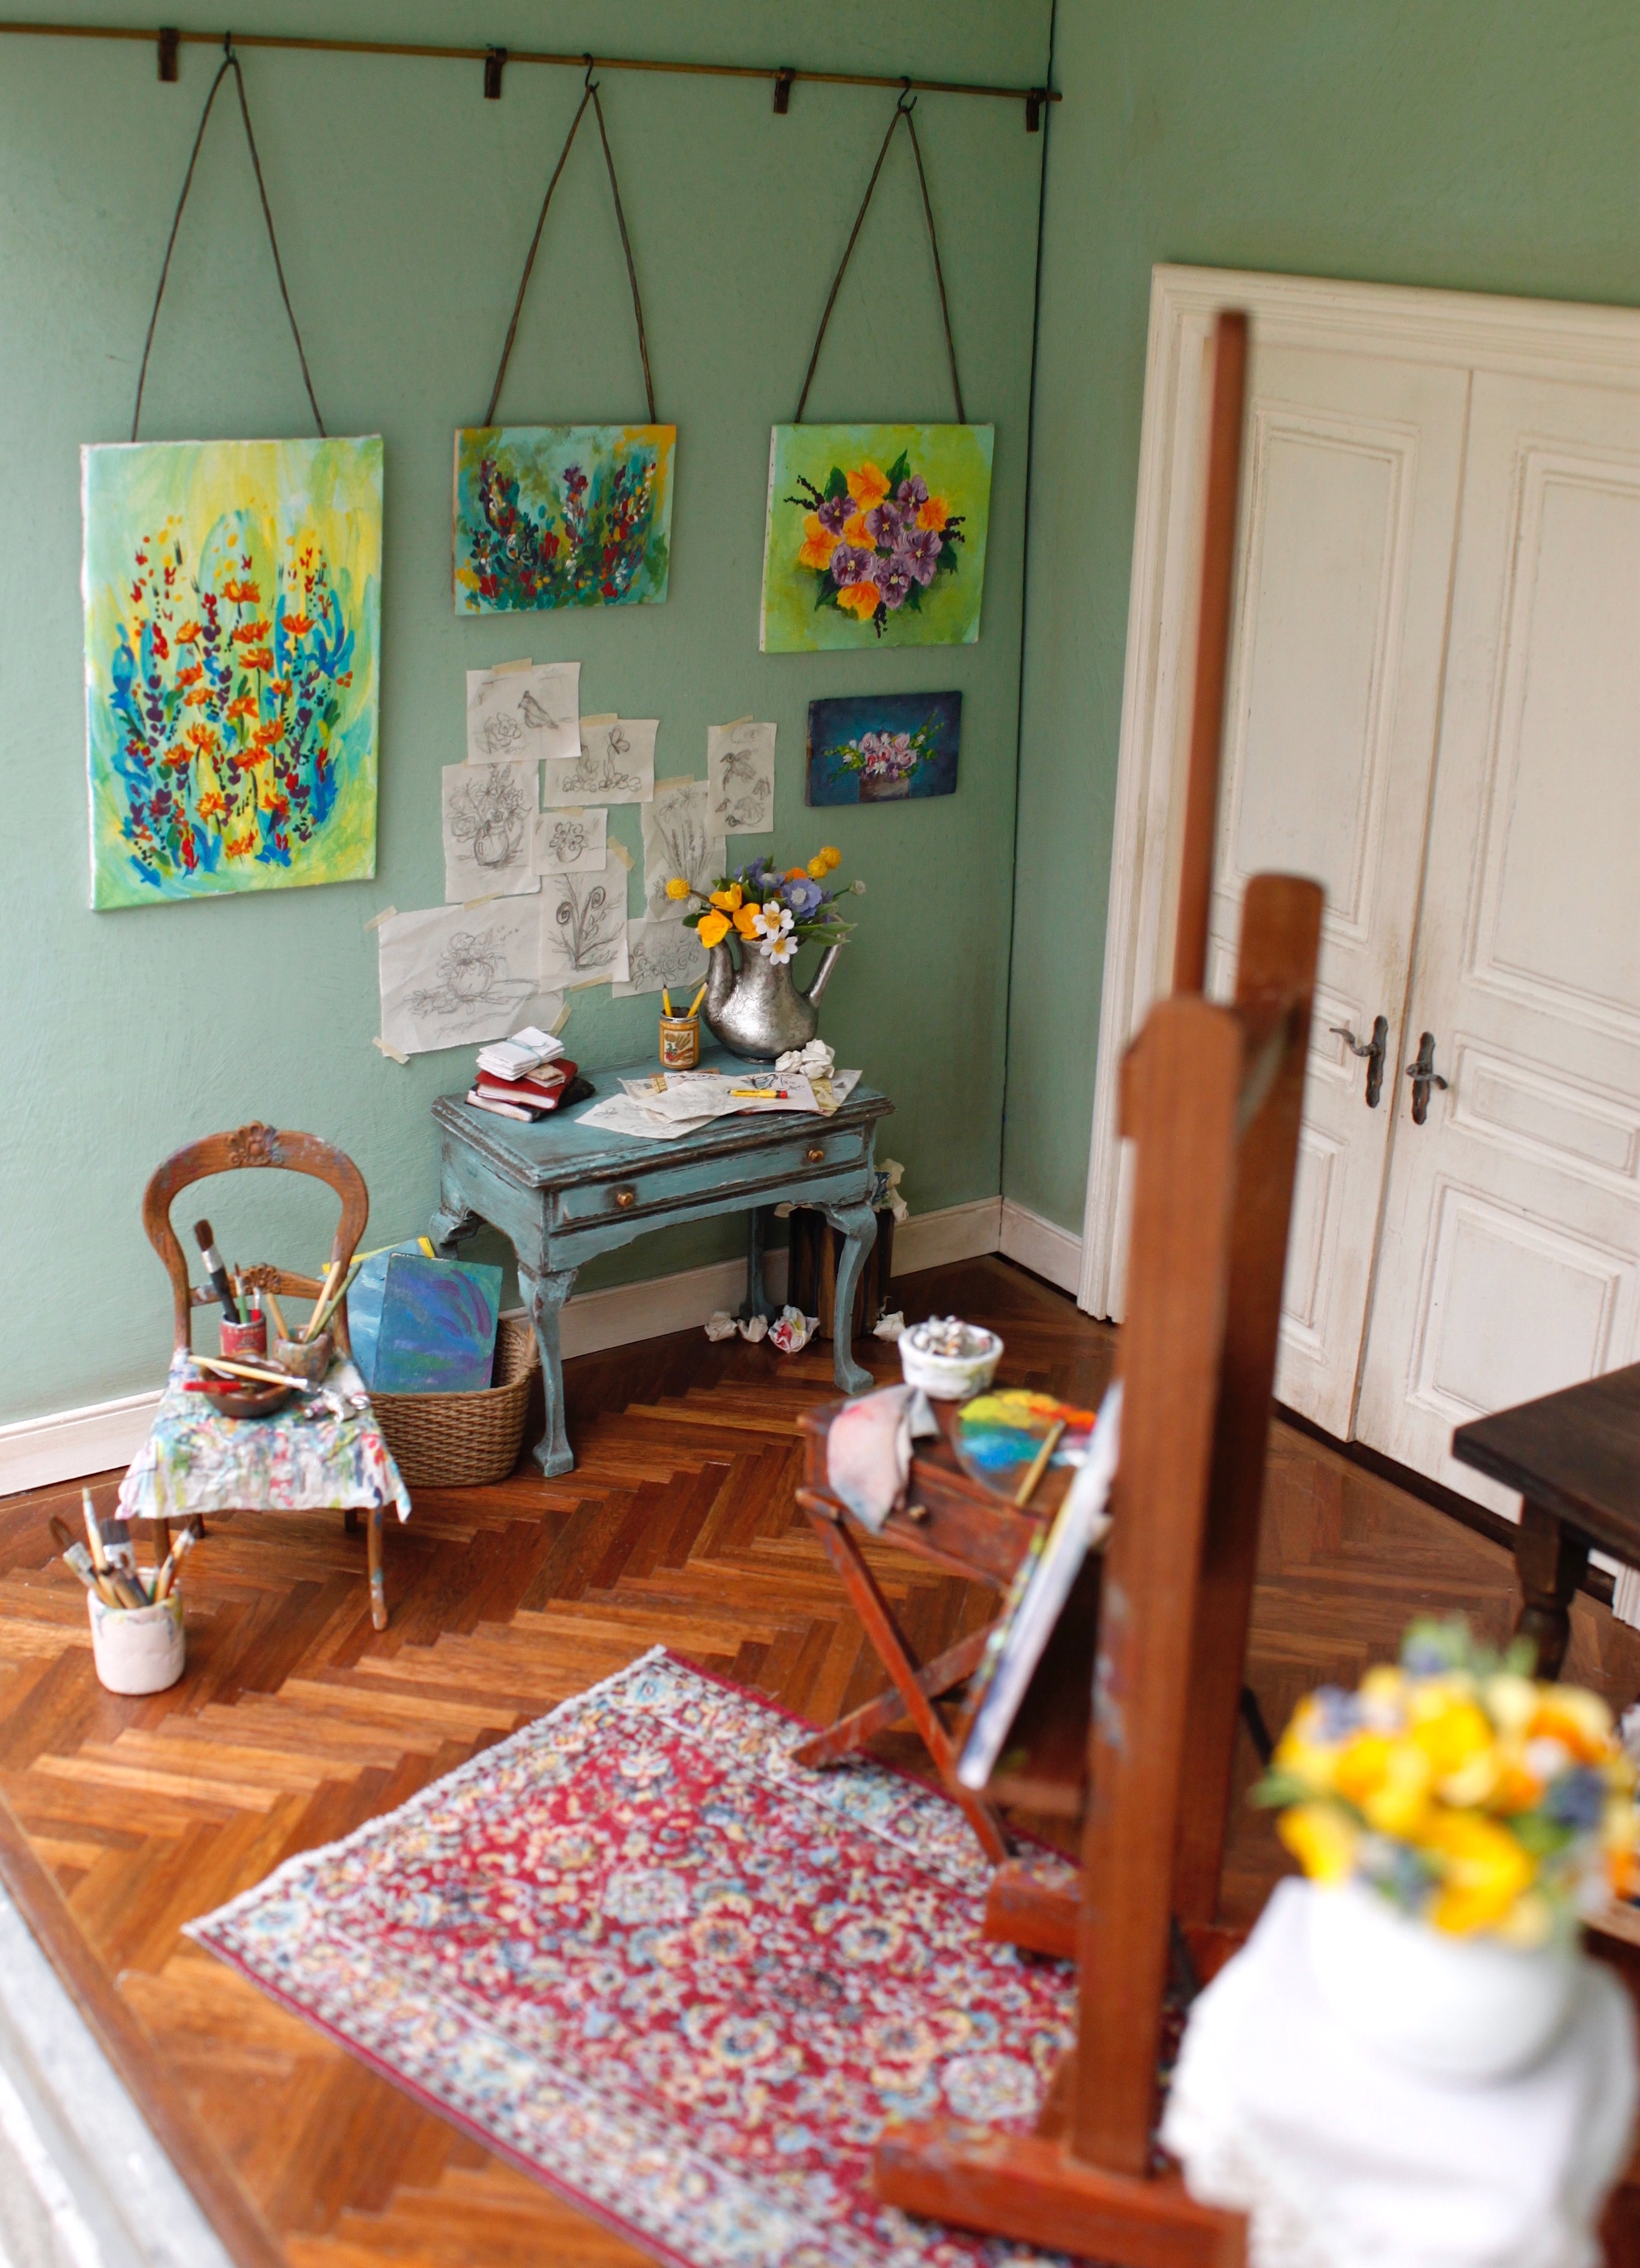
The final corner of the studio: the supply table. Looking at pictures of artists studios through time I came to the conclusion that artists are either pretty organized and neat or a total mess when it comes to their space. I seem to fall into the total mess category. I initially. wanted to go the direction of this artist being a total mess, but decided that she prefers things simple and somewhat clean.
The ladder is something that I’ve had in my stash for a few years, I’m not exactly sure where I got it. Two of the picture frames (one rectangle and the oval) are from Earth and Tree Miniatures. The other rectangular frame was made by me. I had to guild them with paint.
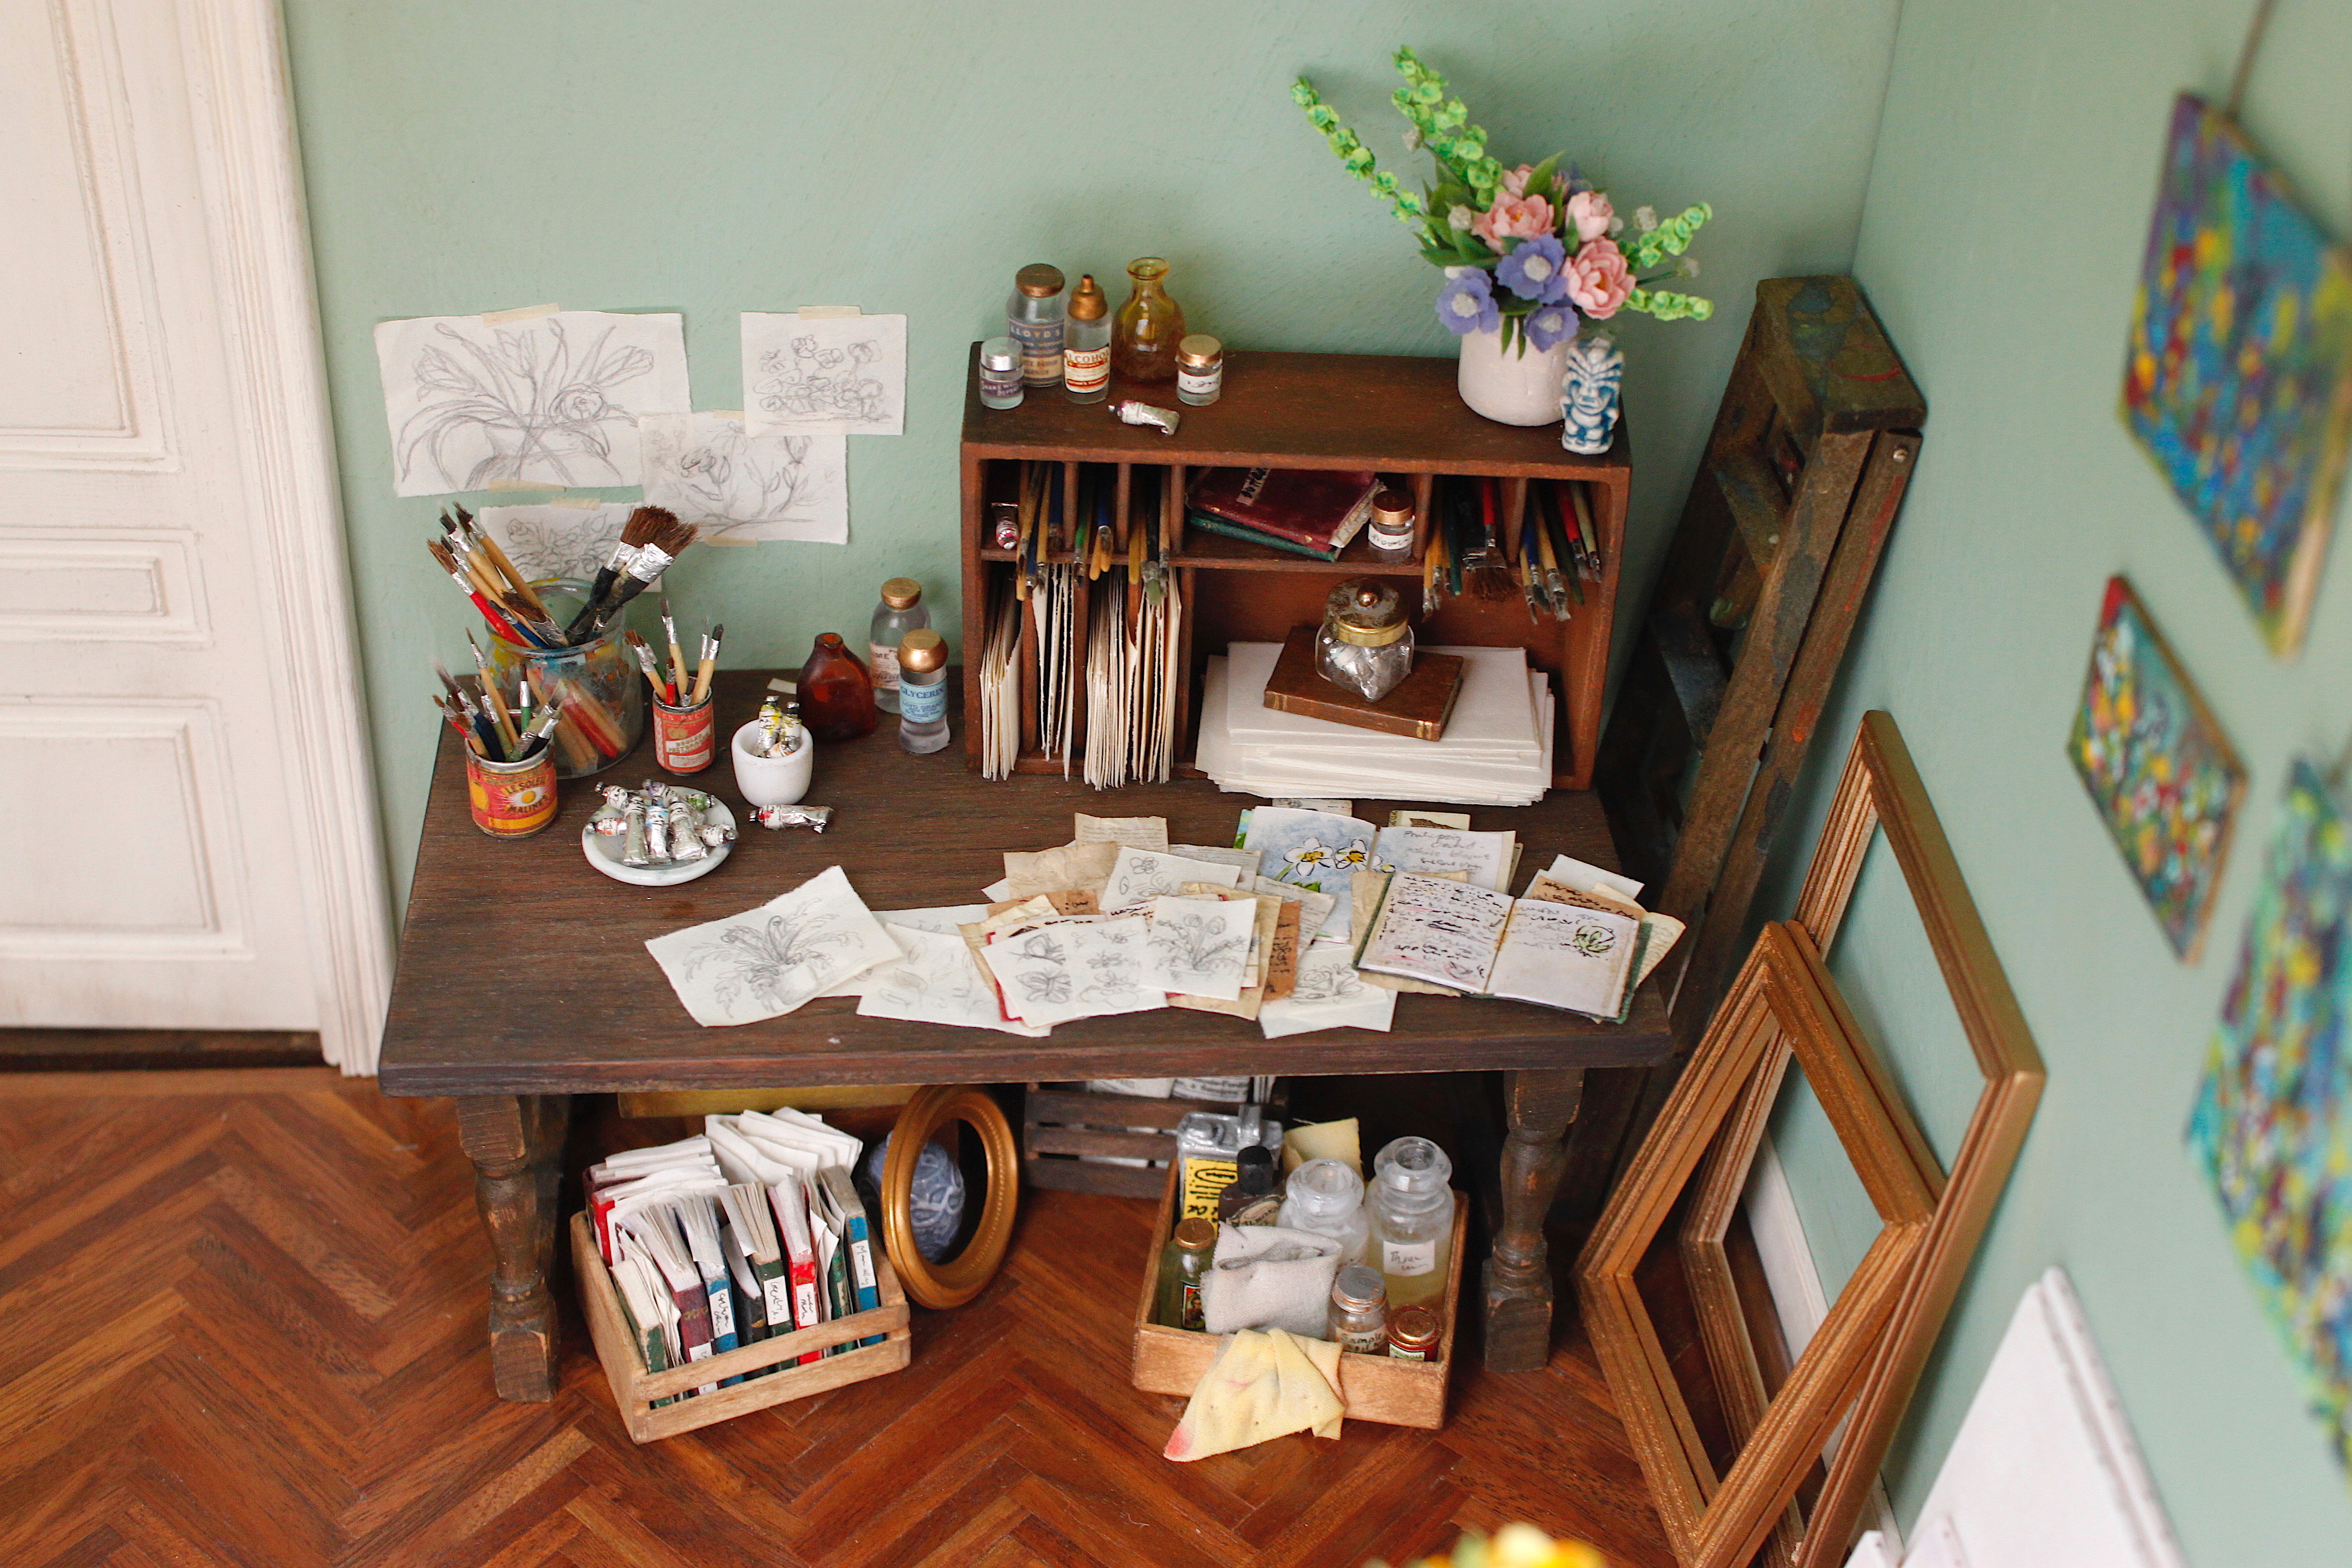
The table was ordered from Miniatures.com . I didn’t like the original top, so I softened the glue in the microwave and pulled it off. Unfortunately, once the glue was soft the whole thing fell apart. It was pretty easy to glue back together. I ended up replacing the top with a piece of walnut. I painted the rest of the unfinished wood to match the walnut coloring. I never have luck getting the stain to look right, so I usually faux finish with acrylic paint. I added some black paint to give it a bit of a patina and then a light sanding to give it some wear.
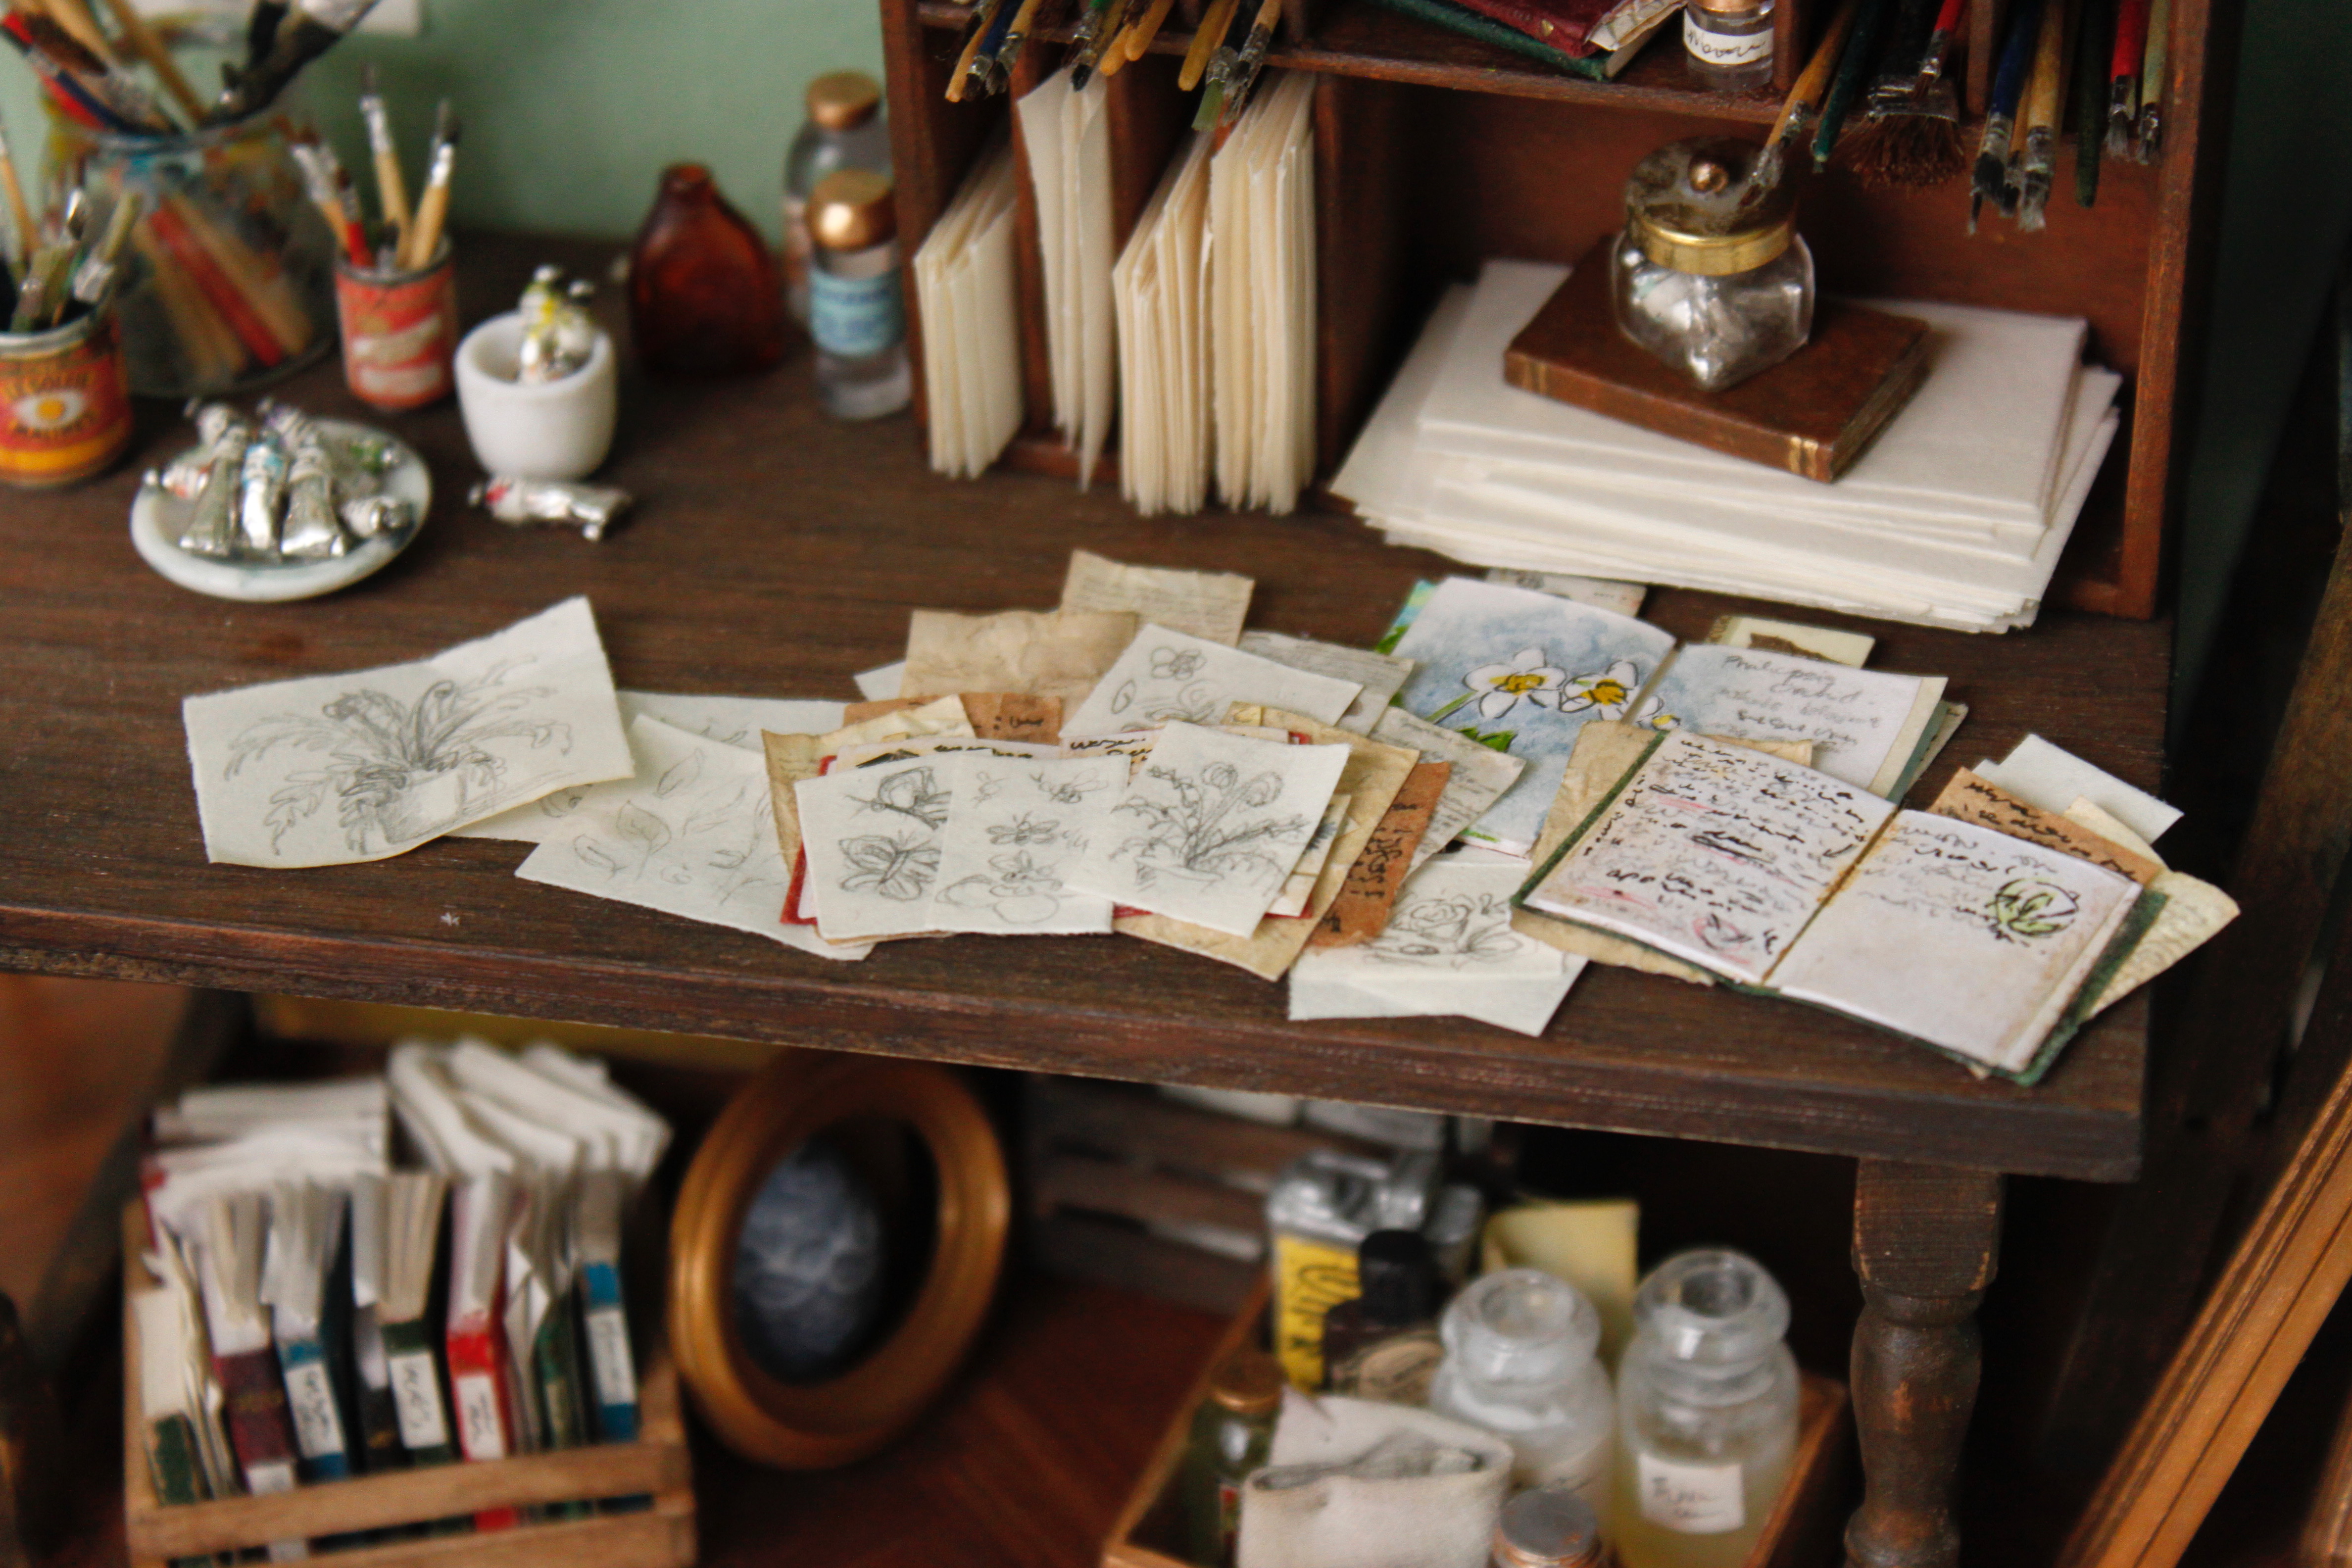
The journals and drawing are just quick little sketches. The plate full of paint tubes was picked up at Earth and Tree and then dirtied up with paint. The little white cup is from Miniatures.com . It had a shiny plastic finish that I was not happy with, so I sanded it and it ended up looking a little bit more like pottery.
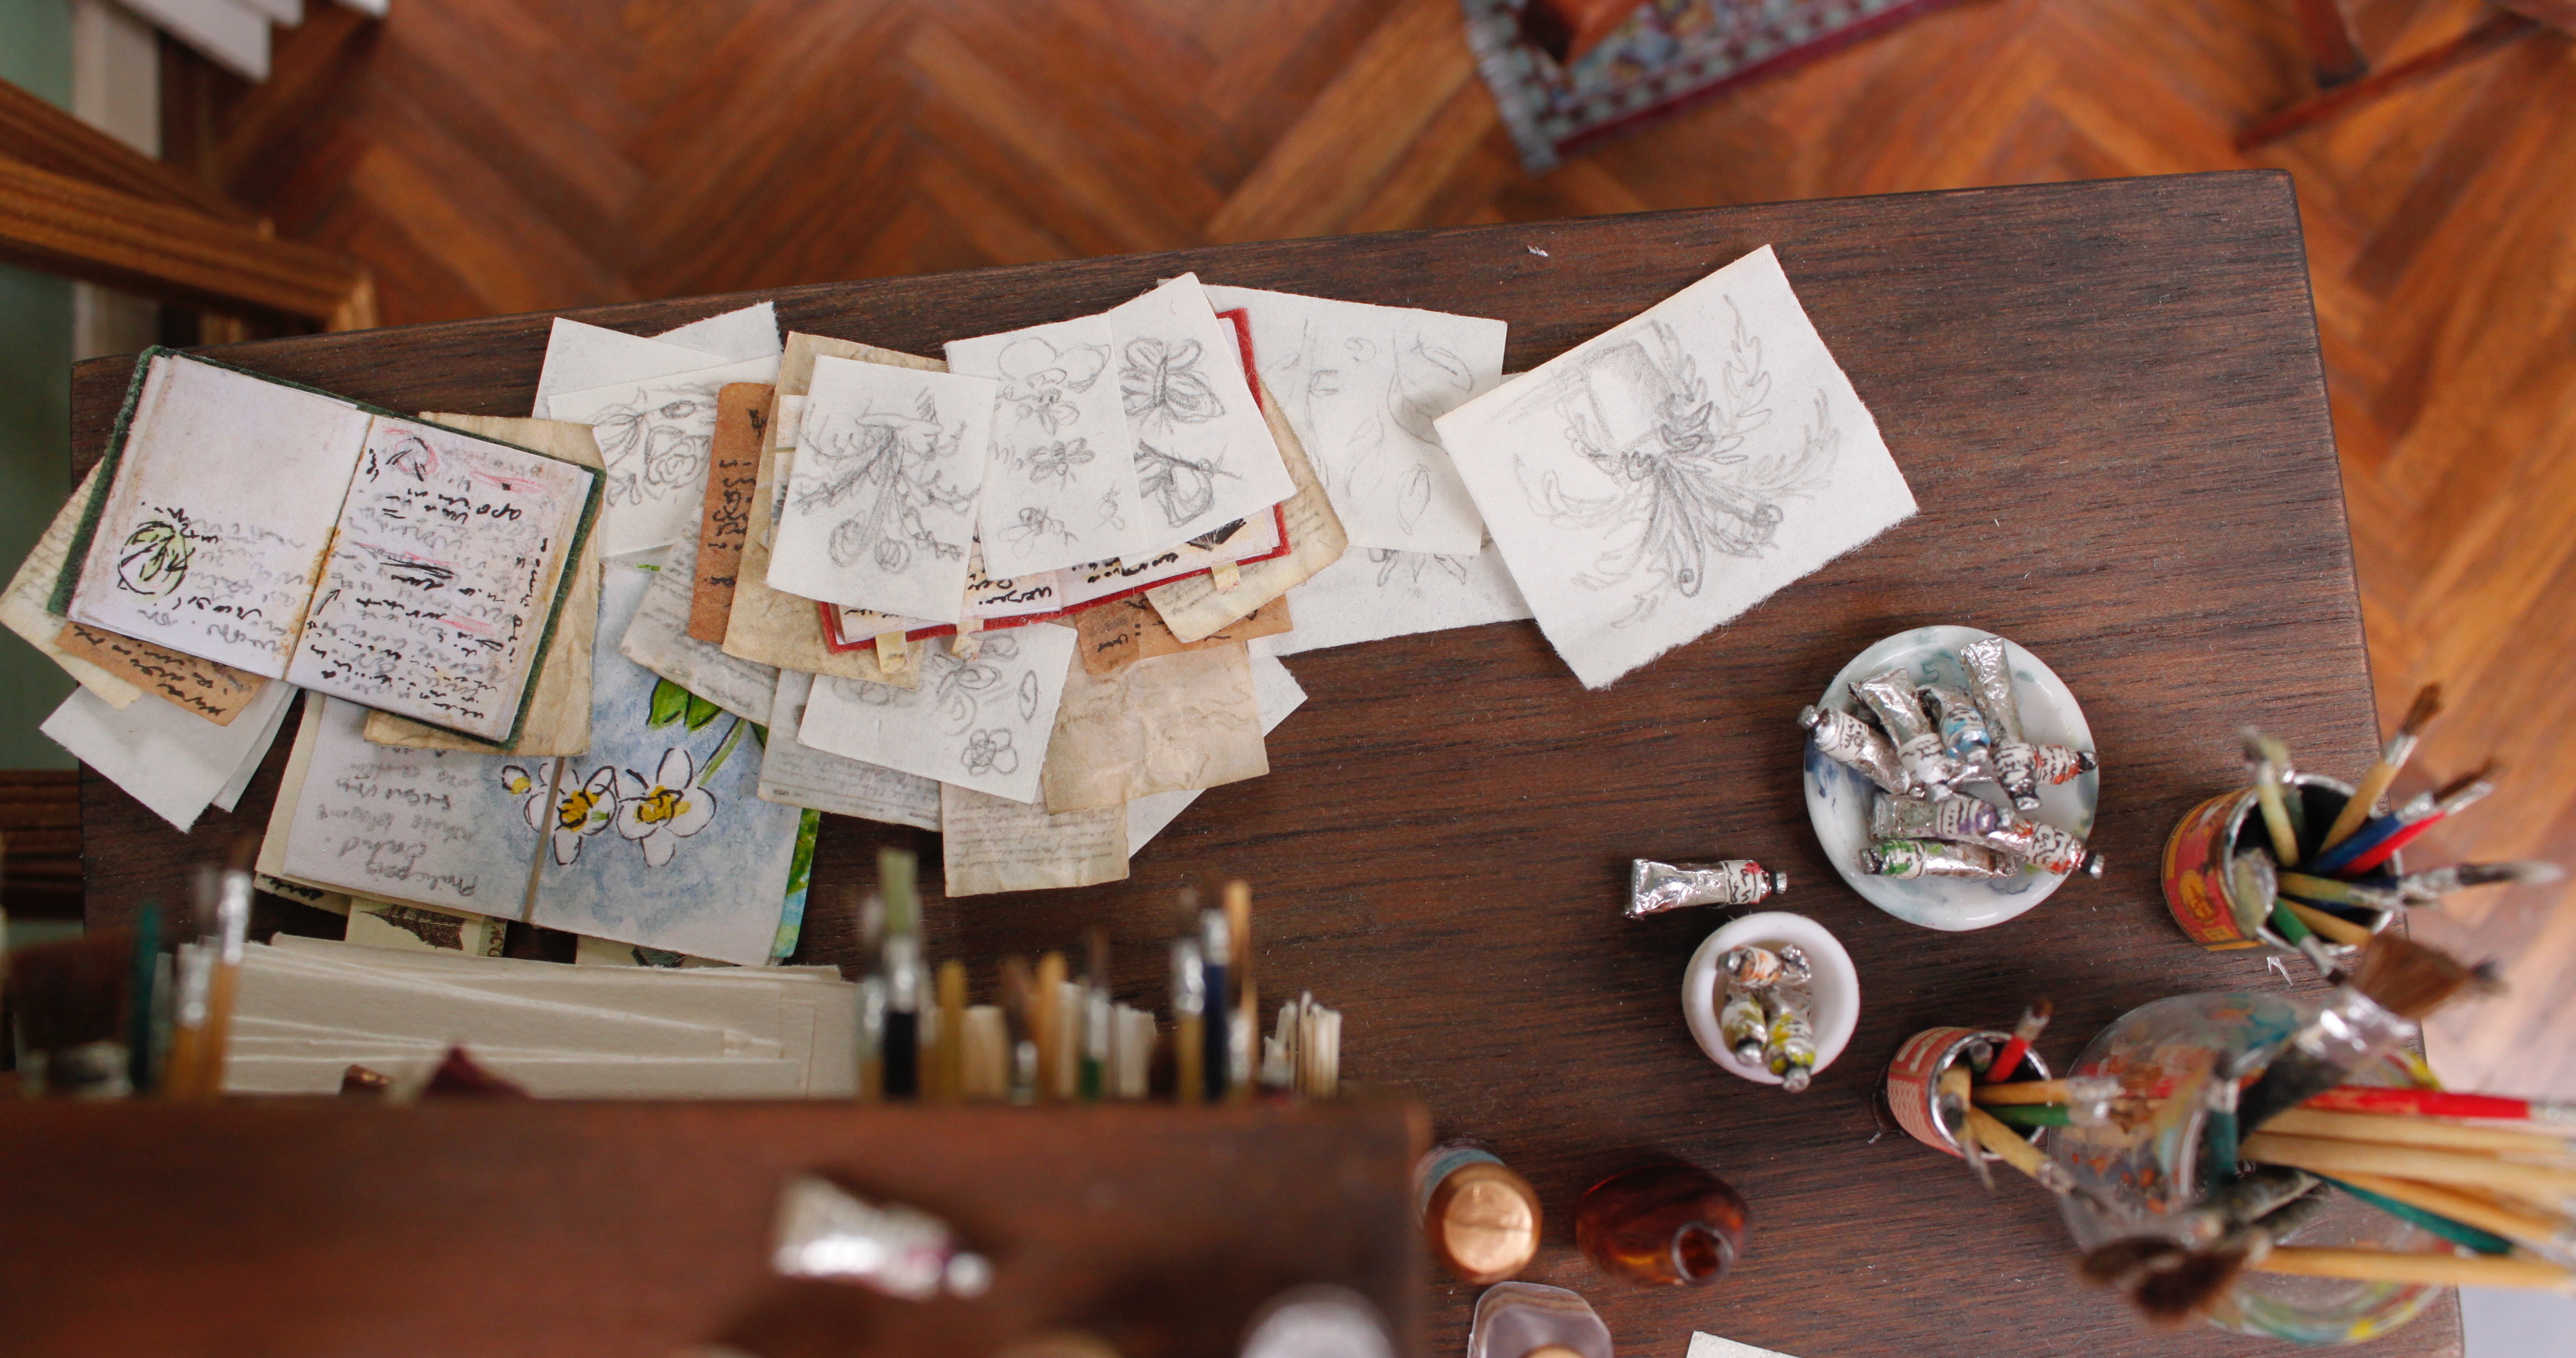
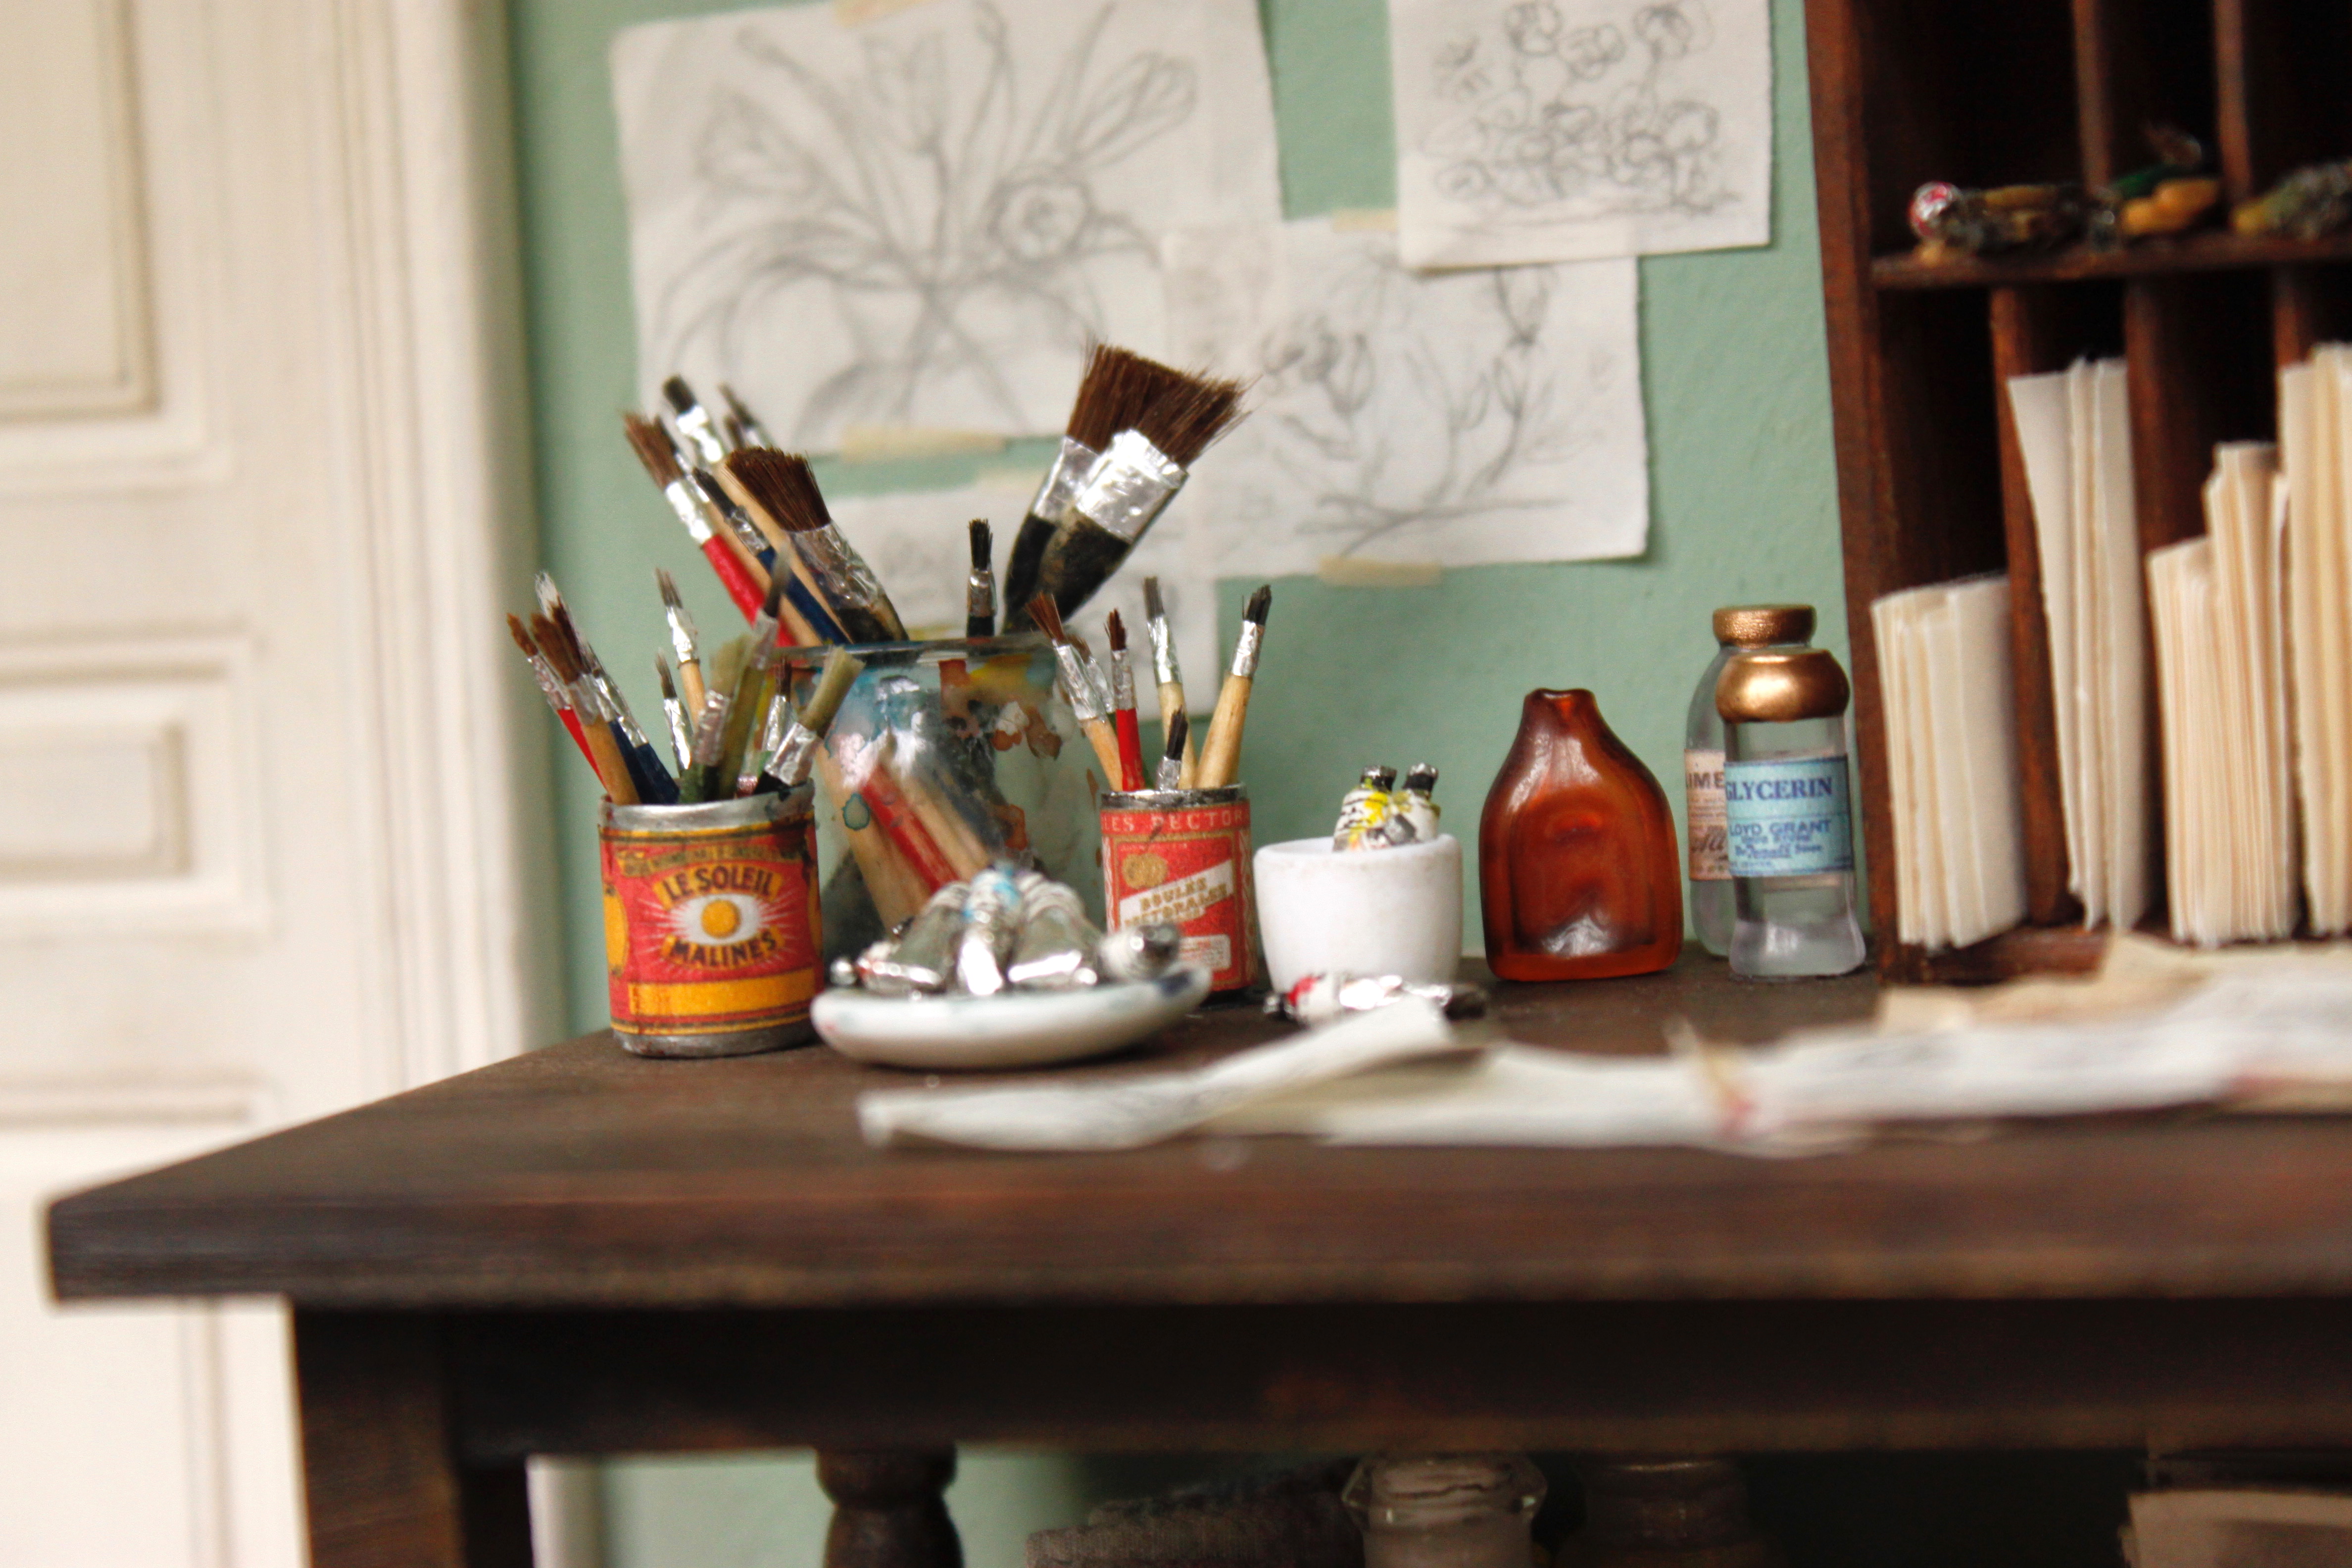
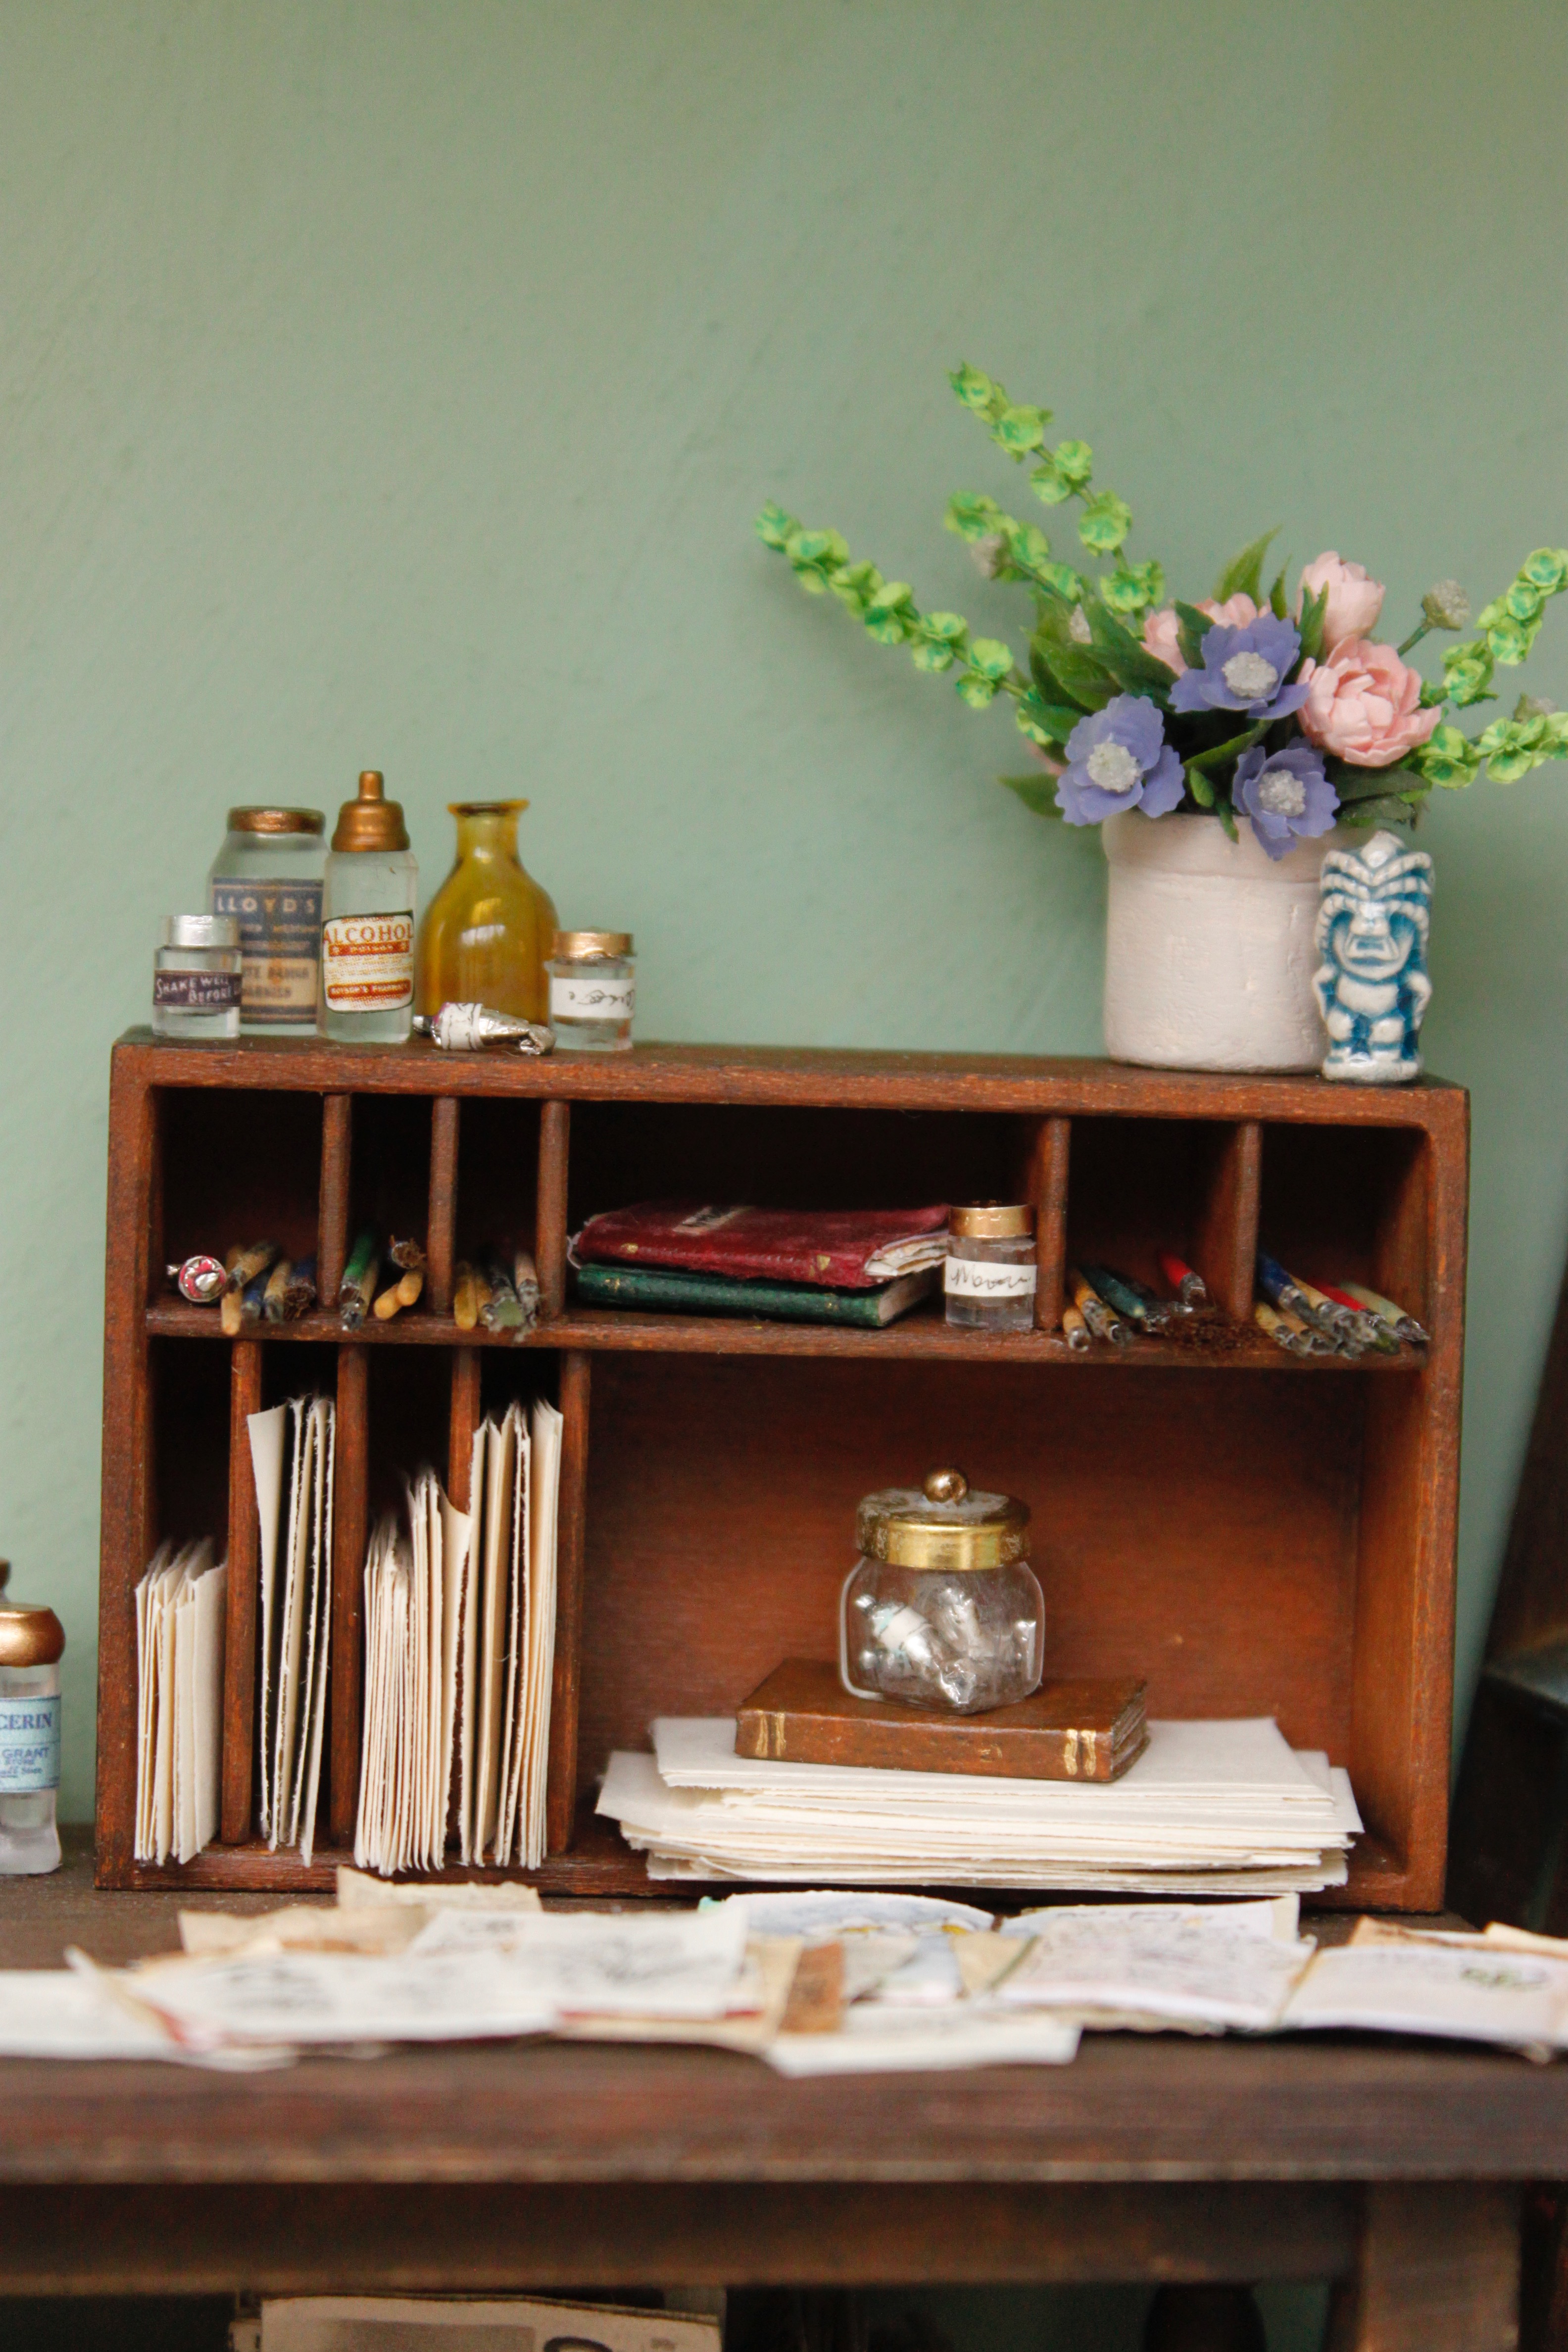
The cubby storage piece was made by me. It’s made from bass wood and painted with acrylic paint. The various bottles and jars were picked up all over the place. The flowers are more paper. kits from The Miniature Garden on Etsy. The earthen ware crock was made with a miniature plastic canister, some masking tape, super glue, and baking powder. The. little tiki is a bead I had purchased on Etsy many years ago. I have one left for this year’s project. Then I’ll have to find more. The paper is typewriter paper cut to size. The paintbrushes and paint tubes are all made by me.
The glass jar was purchased from Miniatures.com. When adding paint to this canister, and other storage containers, I found that using water color paint worked best. I wanted the paint to look transparent and the water color paint did exactly that.
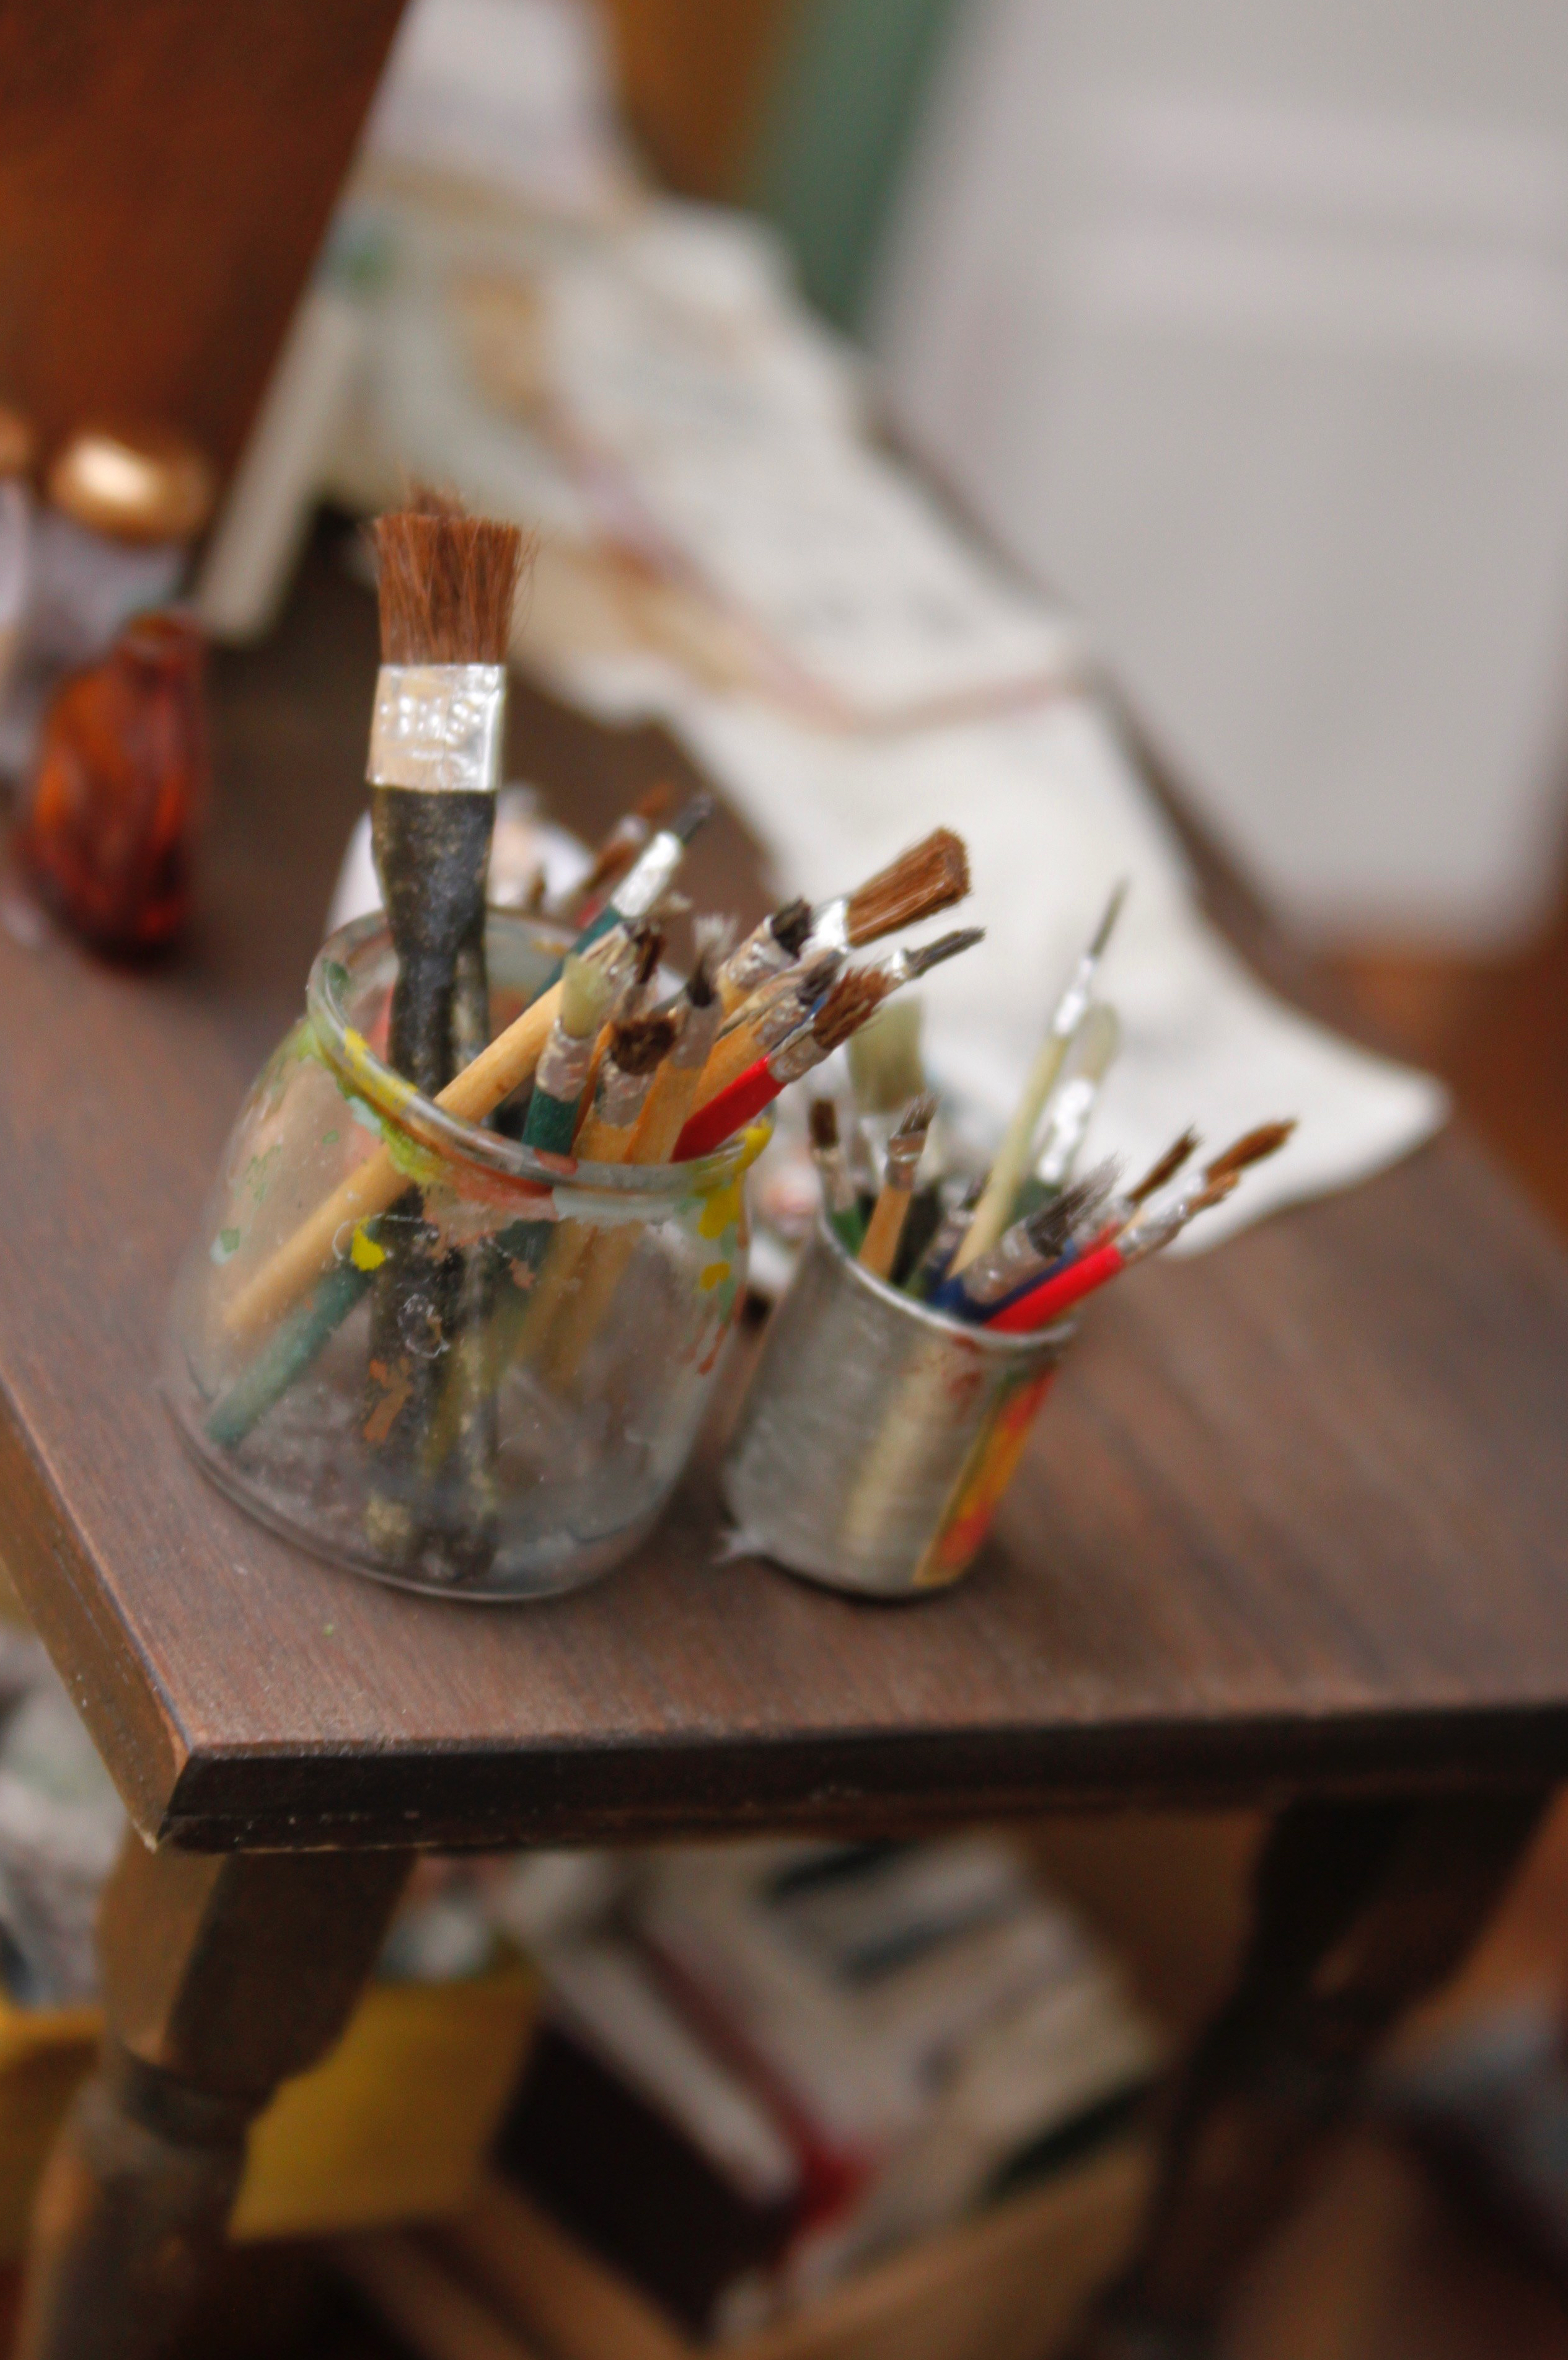
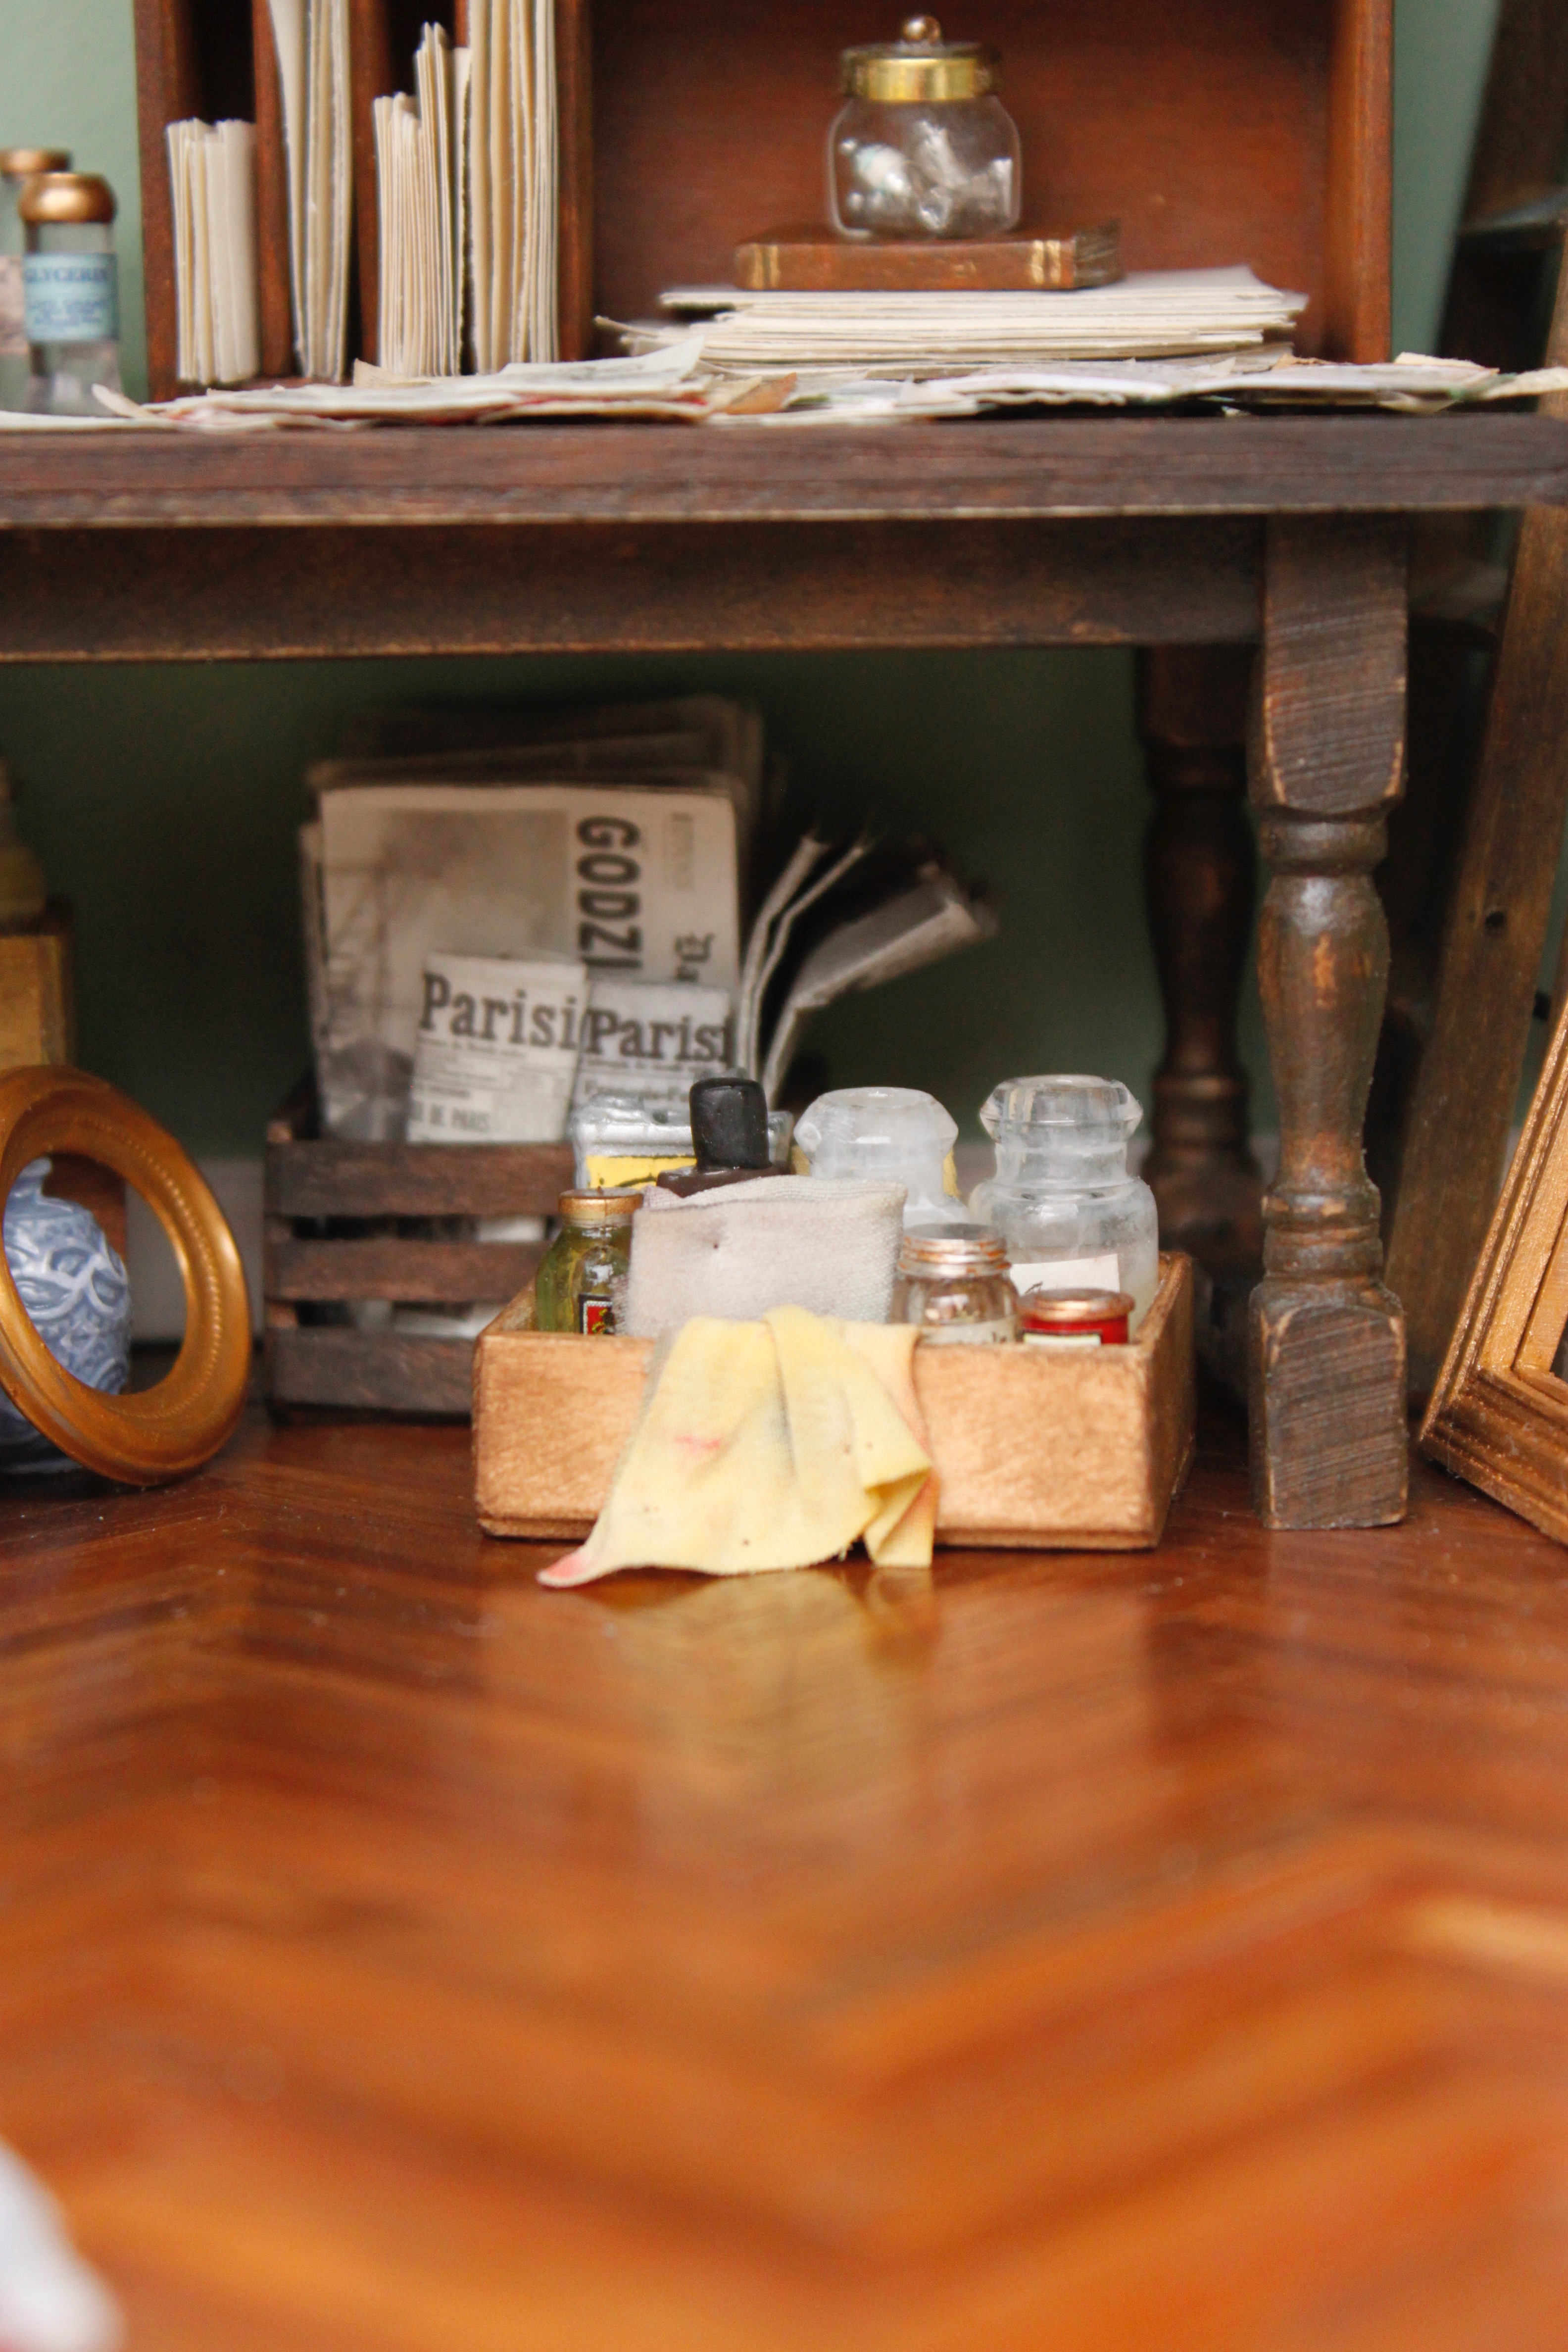
Under the table is where she hides her mess. Crates full of old journals, unused frames, jars of chemicals, and paint are stacked up so that they are out of the way. Some of the crates were bought and others were made by me. All of them were aged and painted to look well used. The books were bought and then altered to look worn and loved.
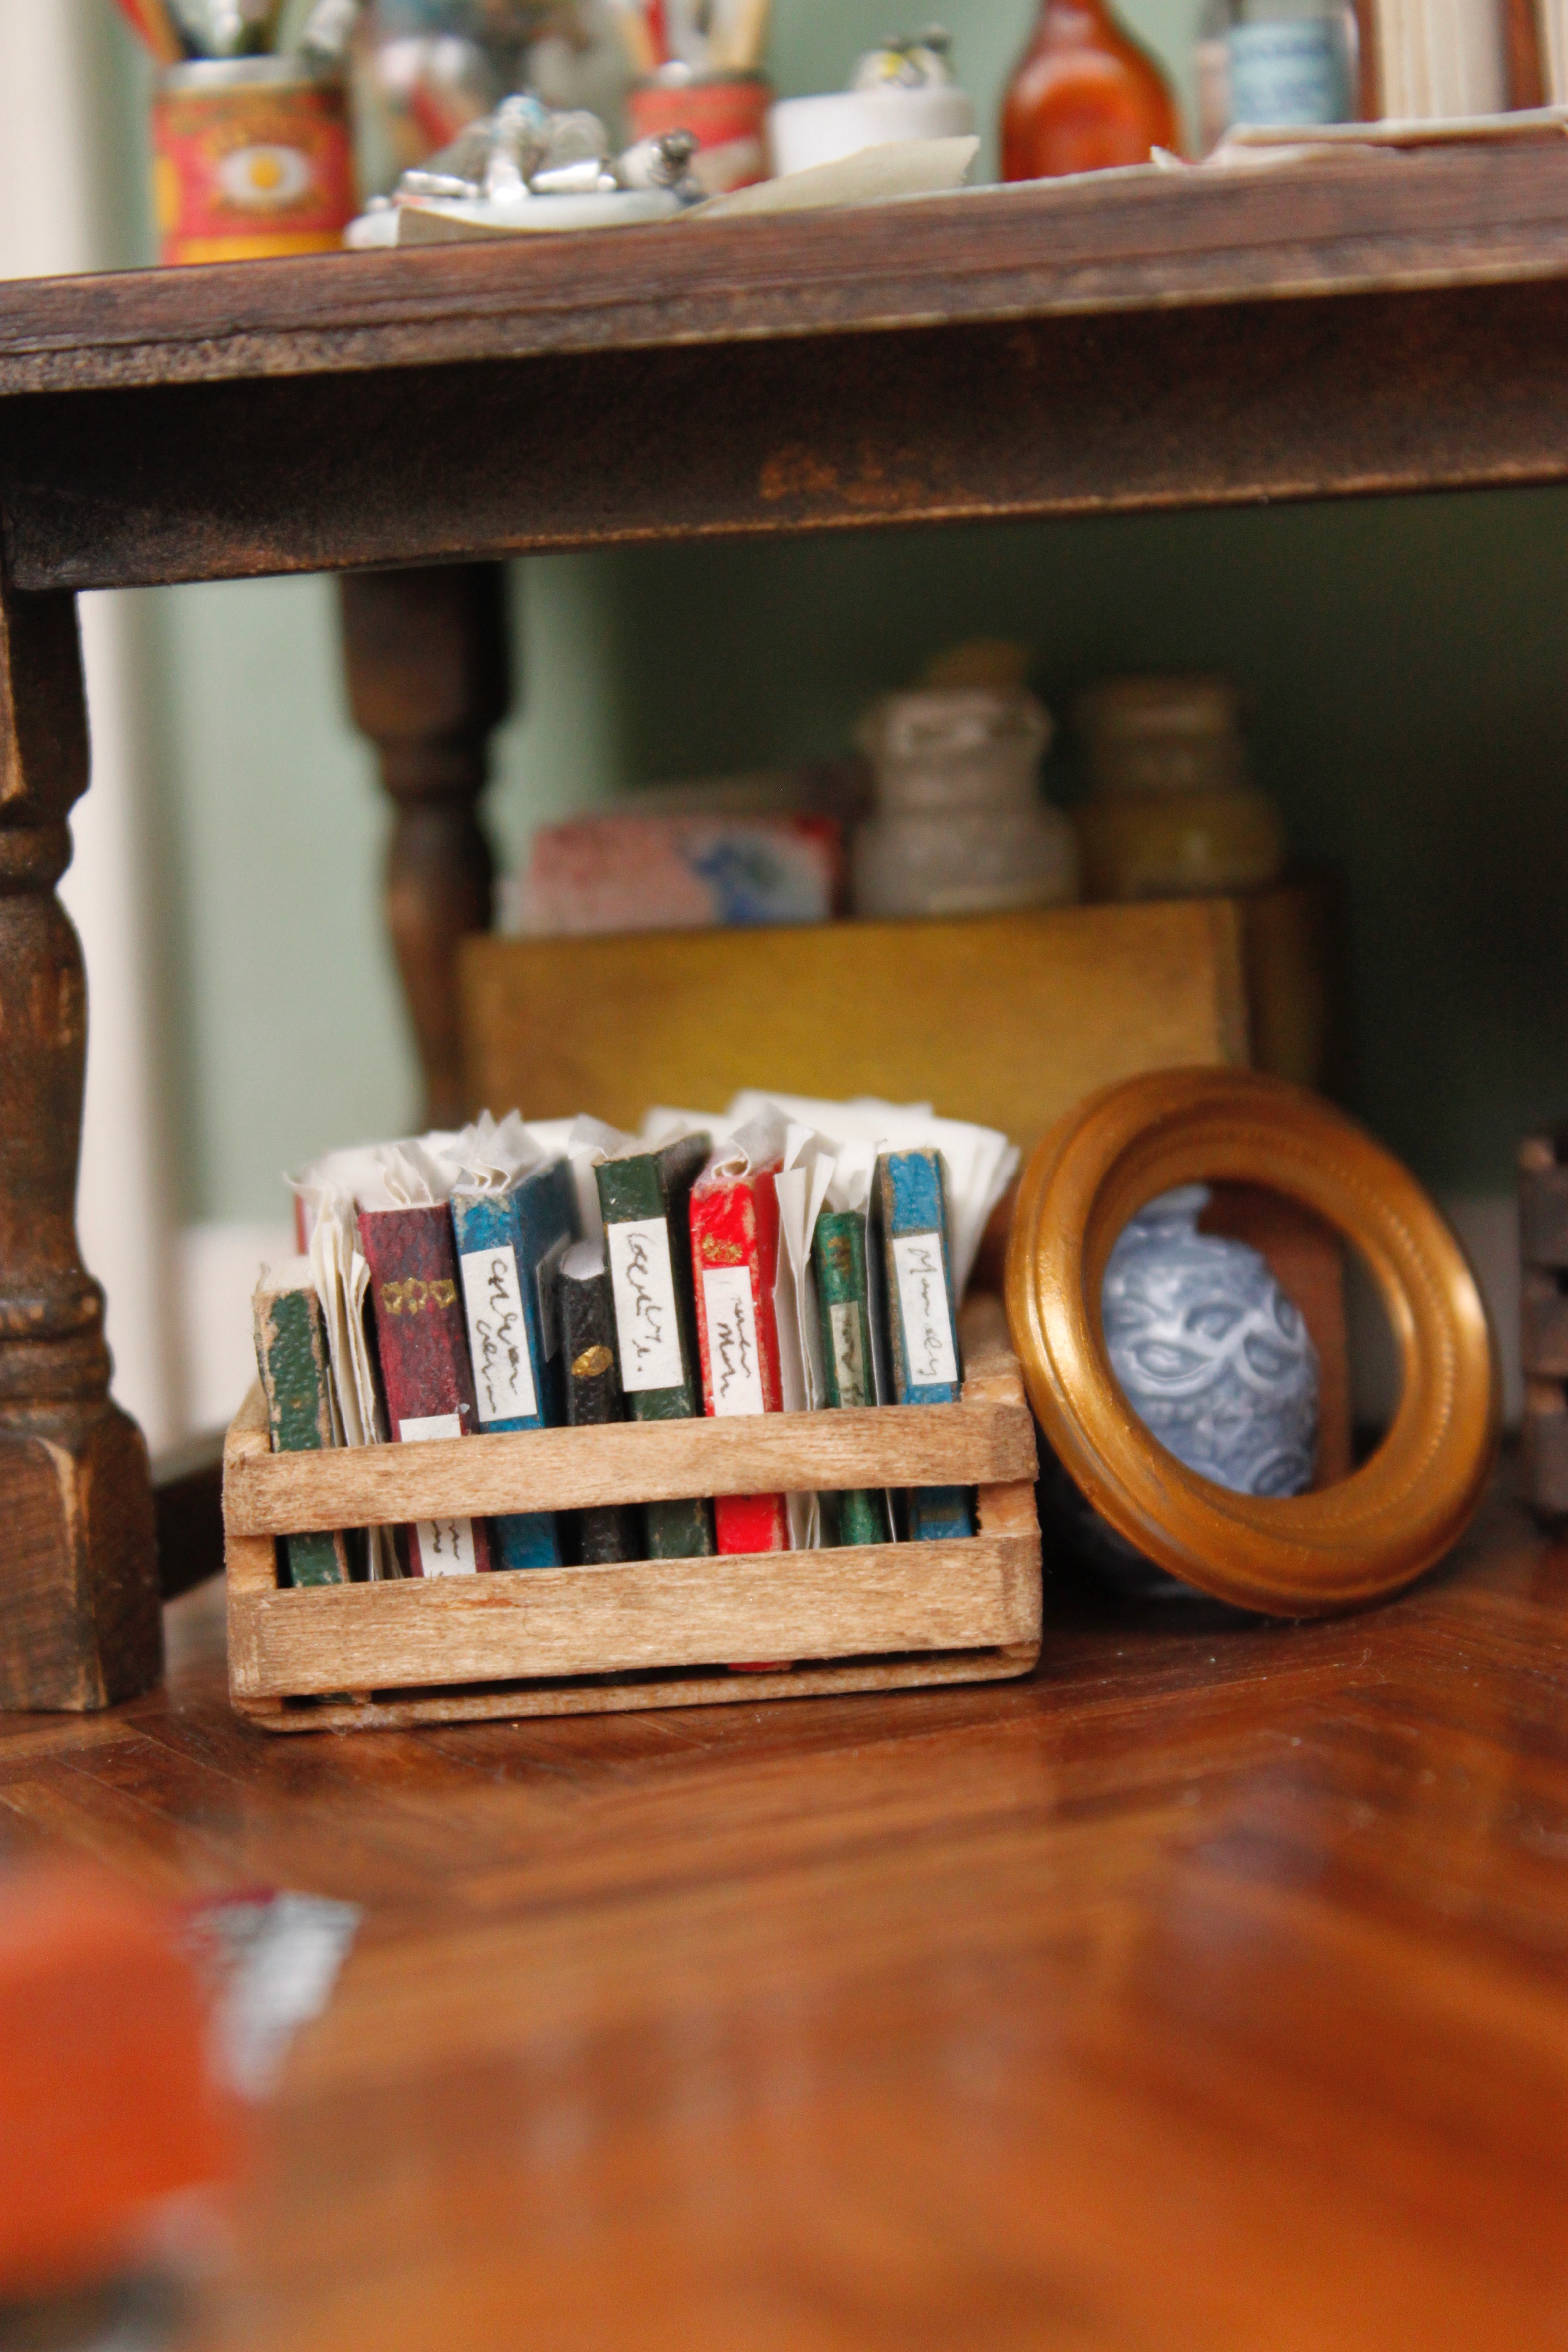
More miniature news papers waiting for their turn to be used. My favorite Easter egg in this build is one of the newspapers. The headline is Godzilla Attacks. You can just see it poking out there in the back. The rags were colored using water colors and then molded into shape with spray starch.
The picture rails on both sides of the room are made with brass tubing and pieces of card stock.

And that’s the inside of the studio. I had so much fun building it. It’s opened up a whole new world on how to approach miniatures. I love the idea of just capturing a tiny piece of a much bigger whole. I have plans to explore that idea further this year. So, we’ll see what happens.
The new Creatin’ Contest Kit has been announced. It’s the Corner Place , an open room box type build. Let’s just say my interest in the 2020 Creatin’ Contest has been piqued.
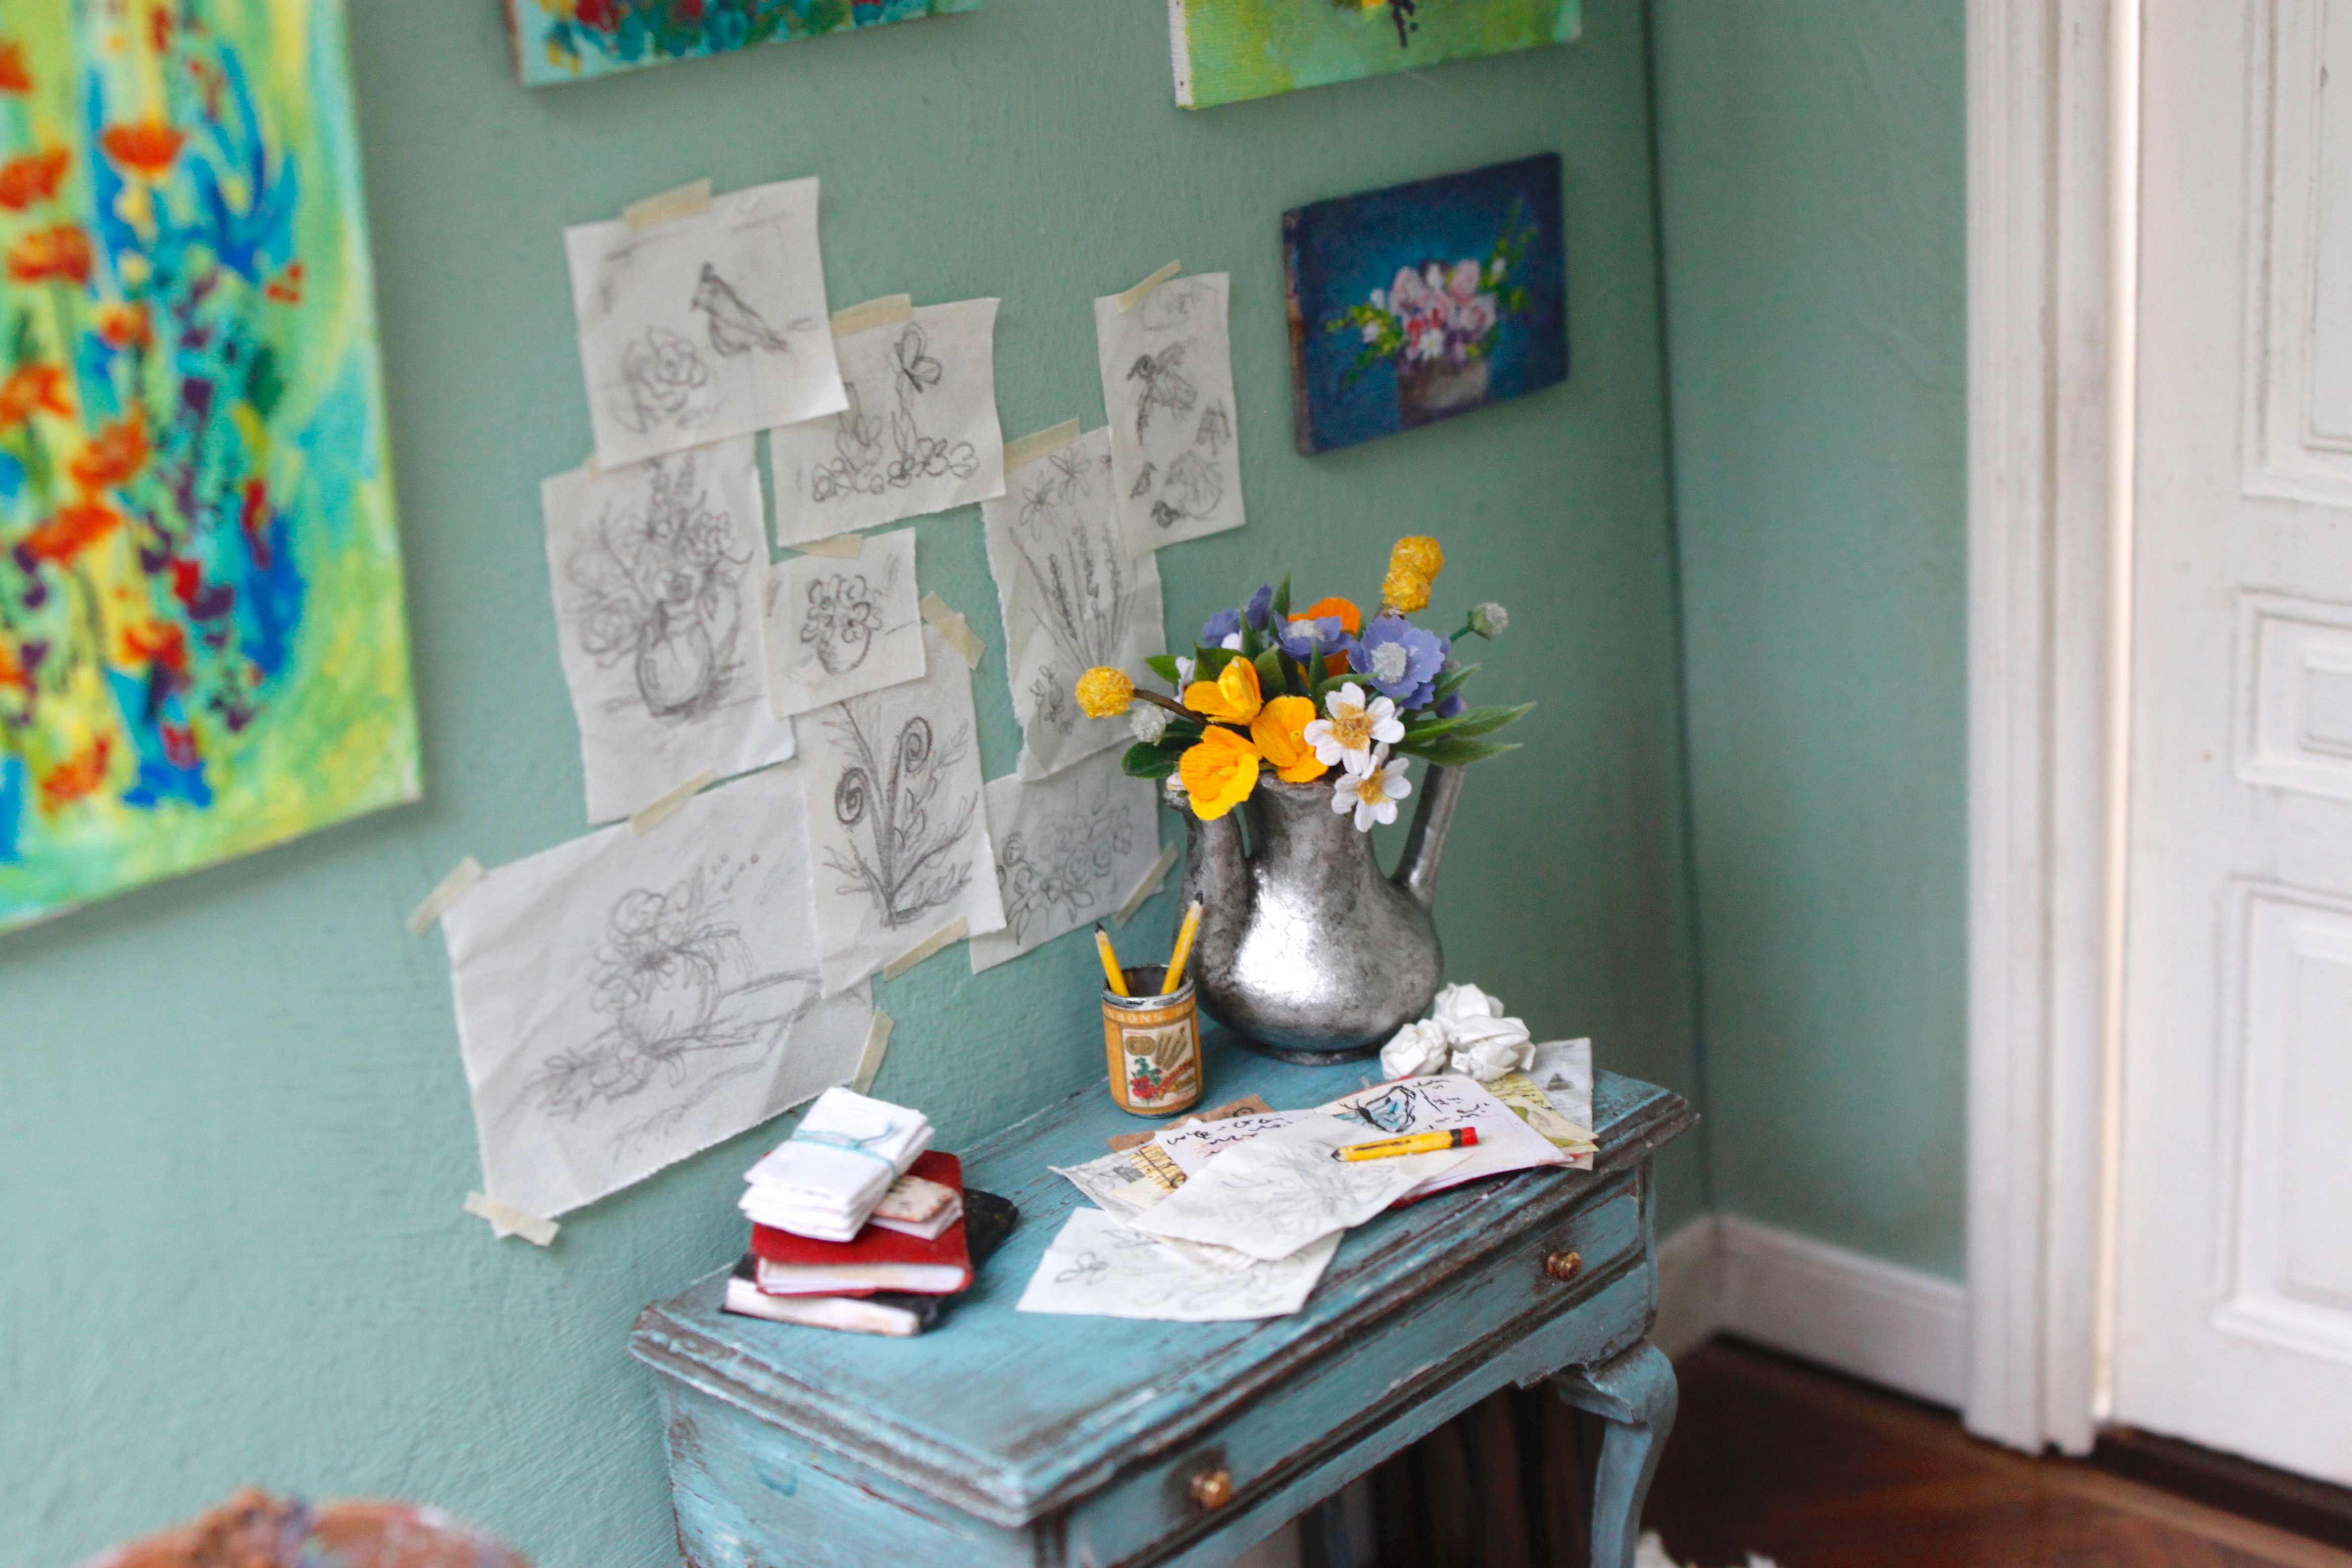
The desk on this side of the room was found at a thrift store many years ago. I repainted it and aged it a while ago. I thought the color would be a nice change from all the wood in the studio. The trash can is the top to one of my paint bottles. I gave it a quick coat of paint to make it look a little bit more like a trashcan. The basket is from Miniatures.com
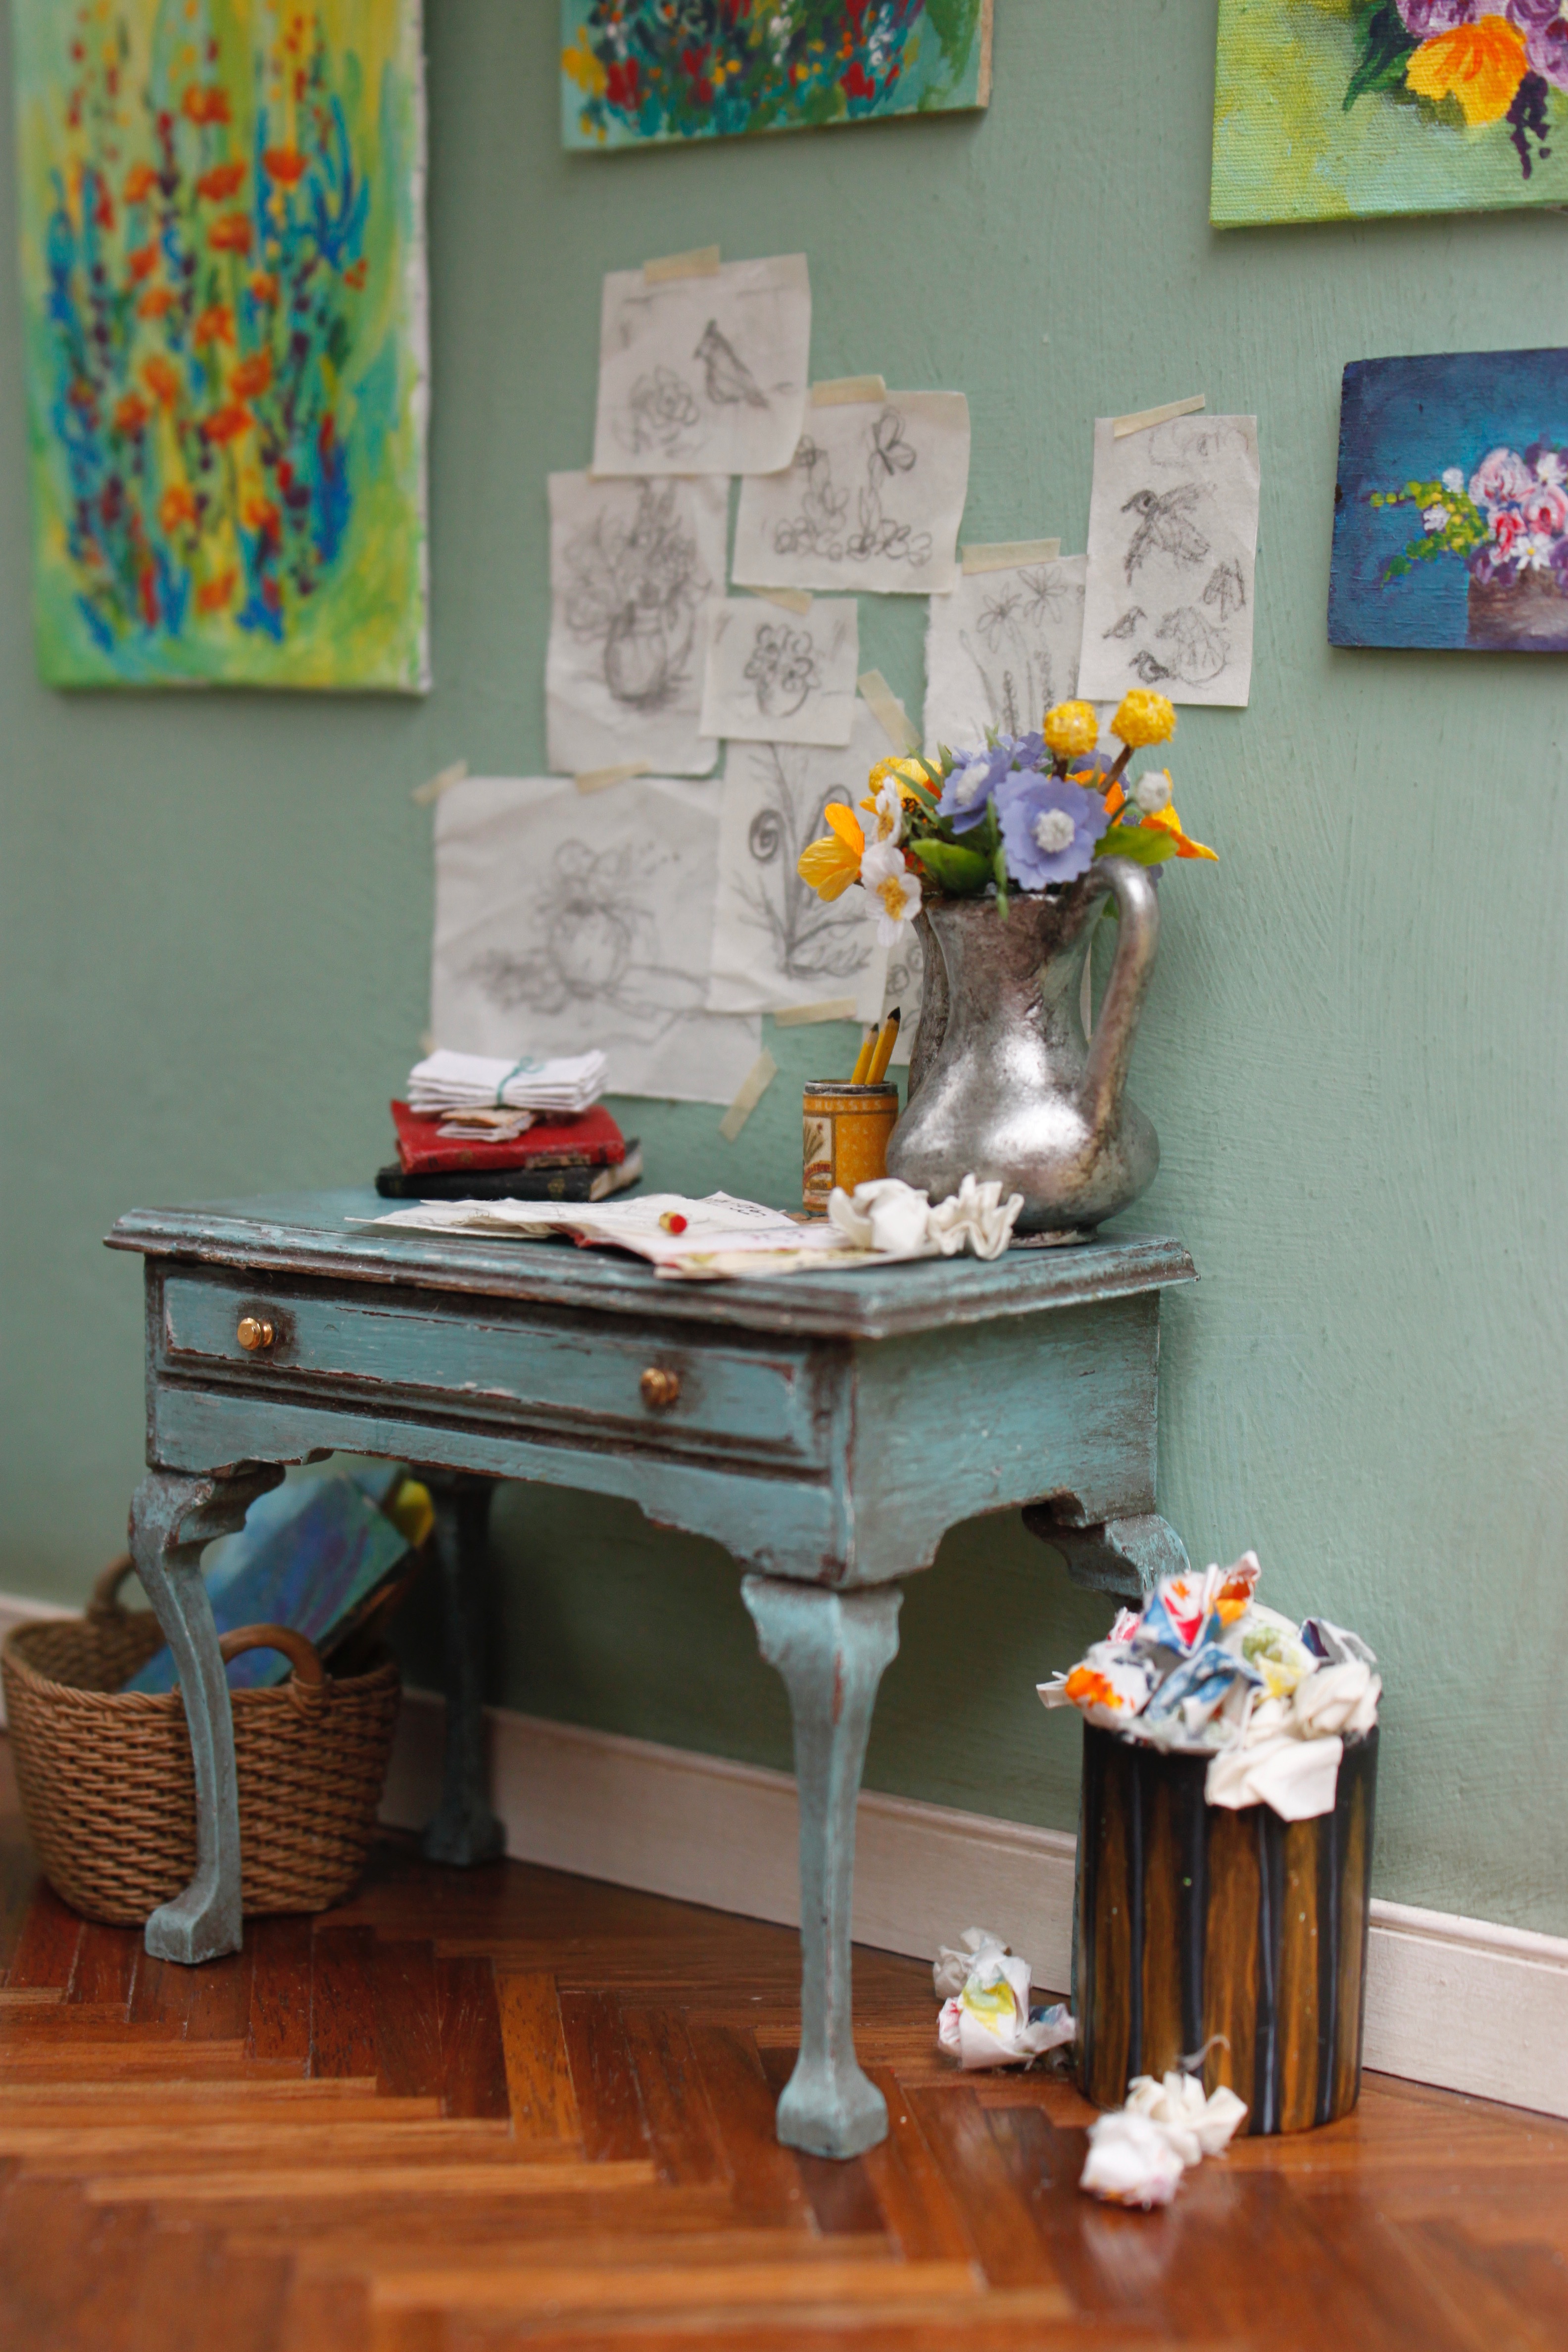
The teapot was a plastic Item I found at Michaels. I painted it with silver nail polish and then added a little black paint to make it look a little tarnished. All of the drawings and paintings were done by me. It was really fun working such a tiny scale. The pencils are tiny dowels that were sanded thin and painted to look like pencils. The flowers are made from more kits from The Miniature Garden on Etsy and the leaves are from plastic aquarium plants.
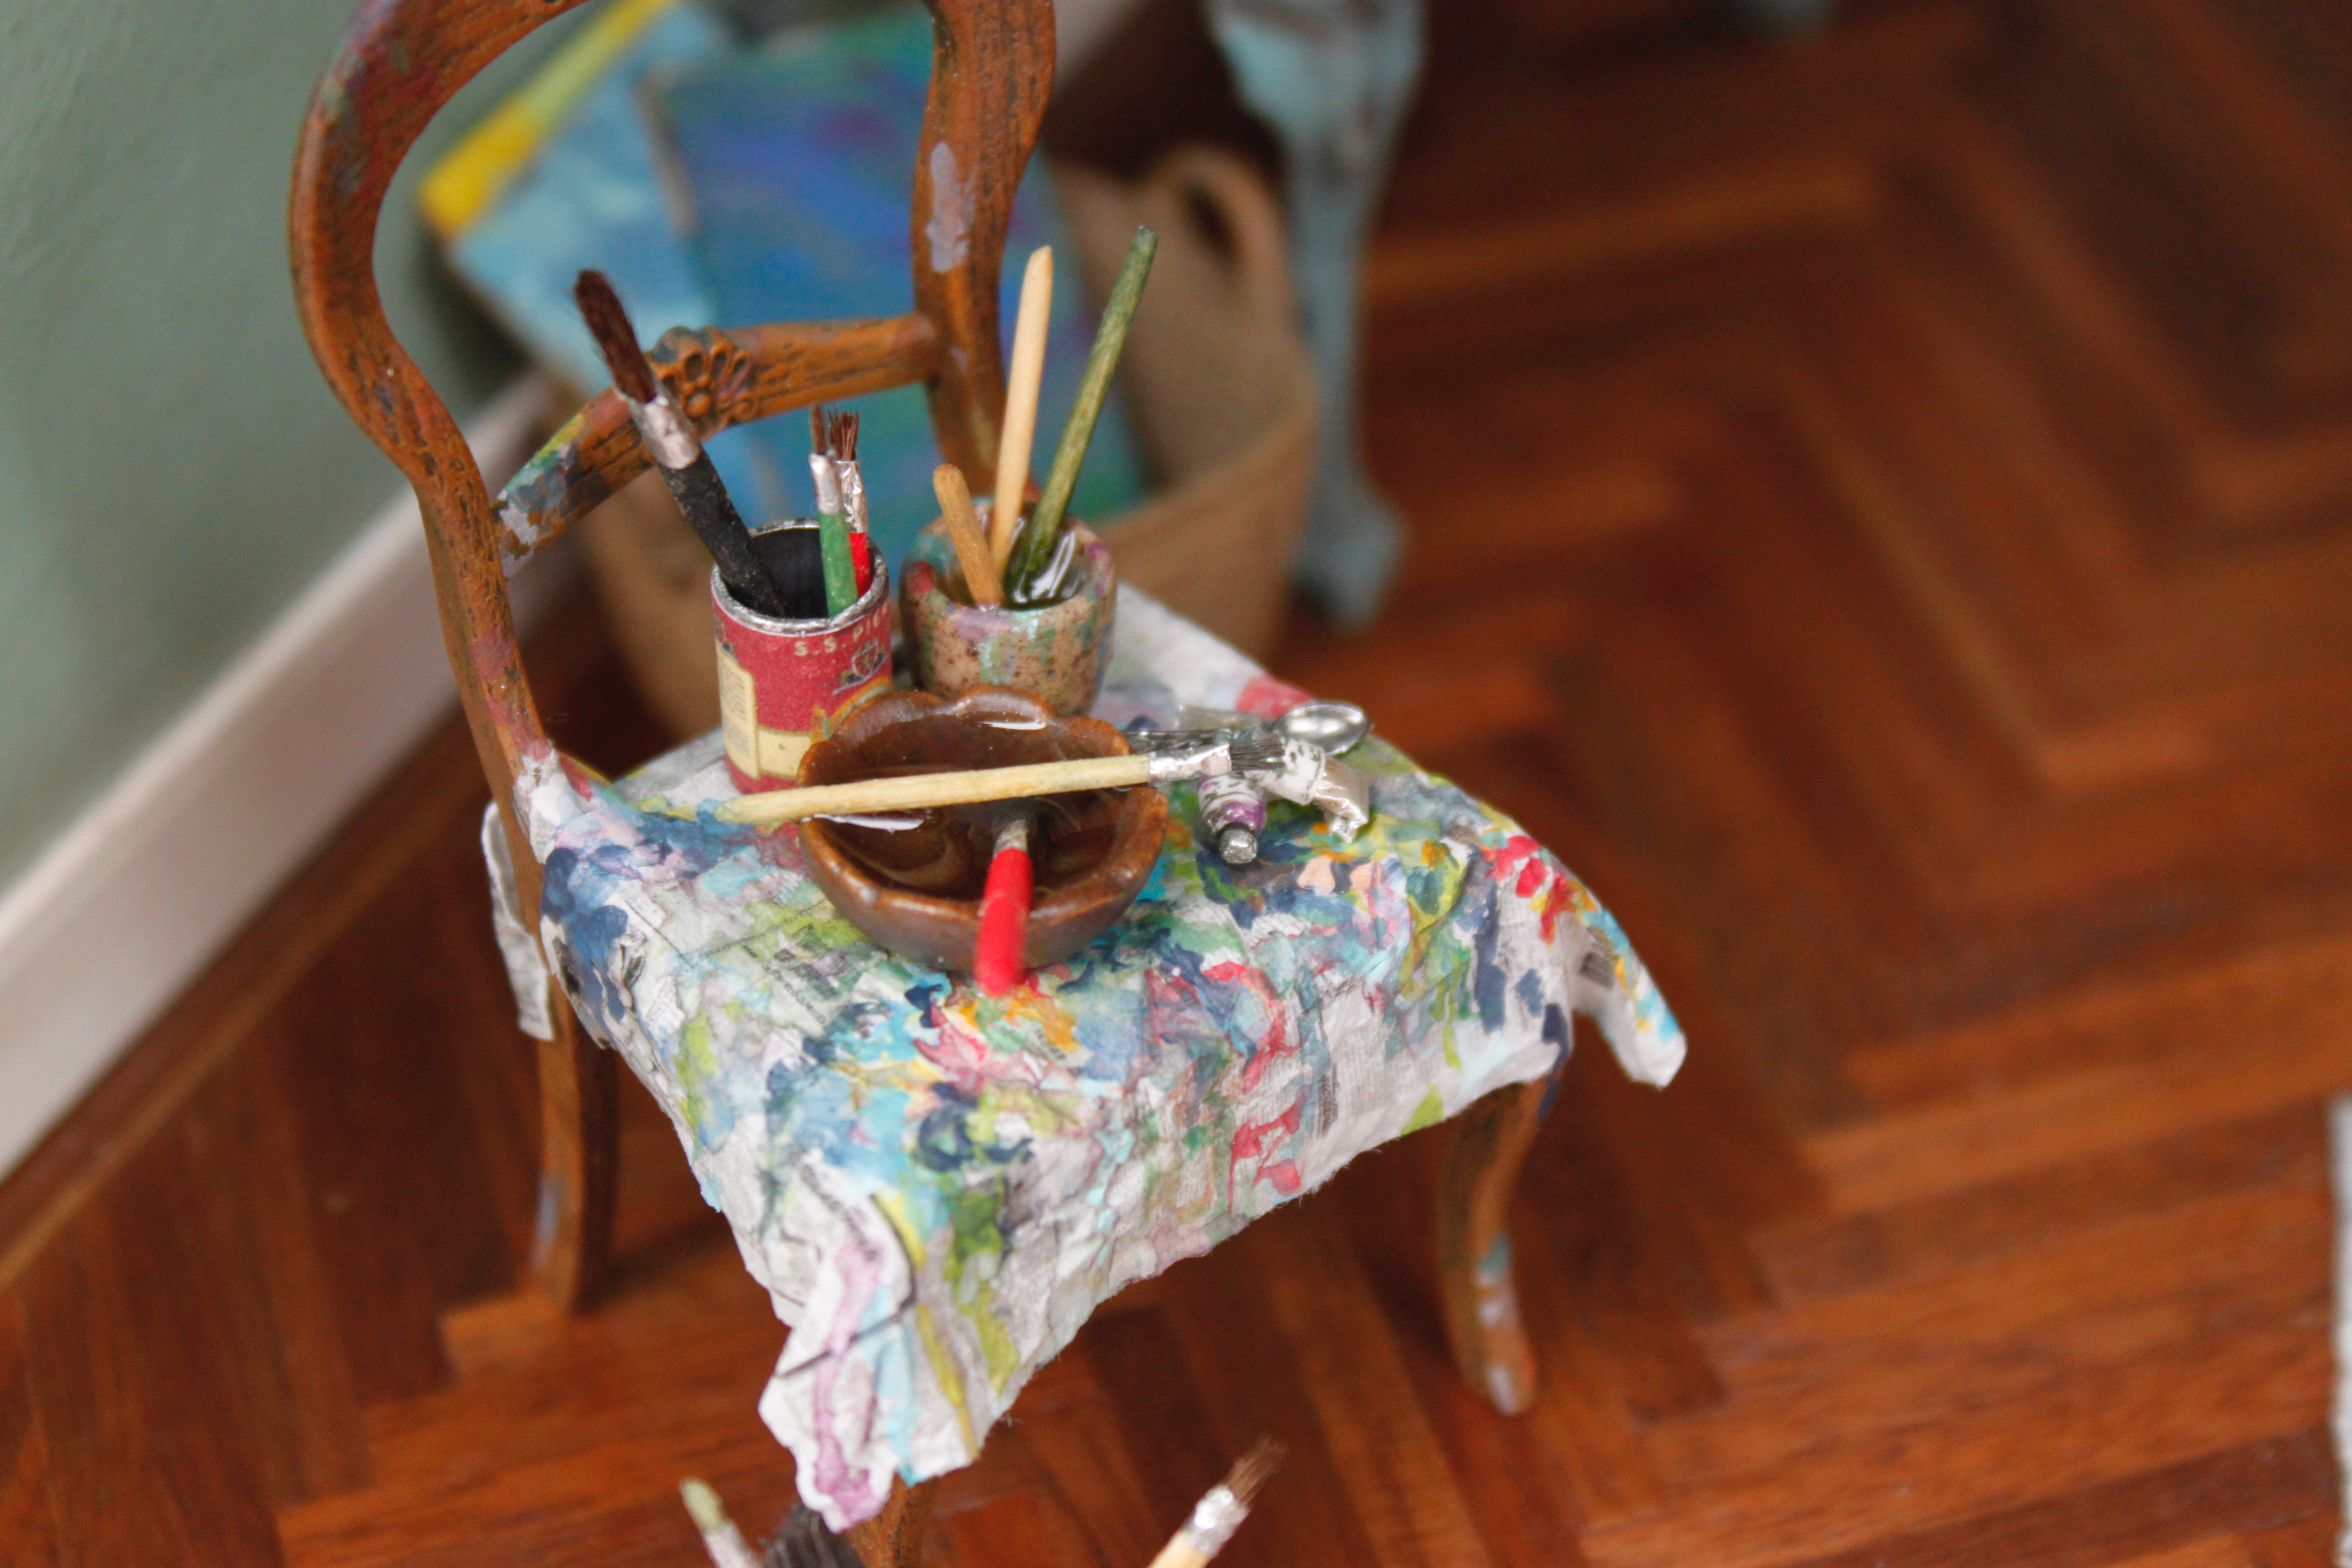
The chair was picked up at Earth and Tree Miniatures, but it is a Chrysnbon kit. When I got it it was already put together. I didn’t like the flatness of the faux wood, so I dry brushed layers of brown paint to bring out the grain of the wood imprints. The crock on the floor was made from a plastic canister I had gotten from Miniatures.com . I used superglue and baking soda to give it a rustic texture. A little sanding and a little paint and it was ready to go.
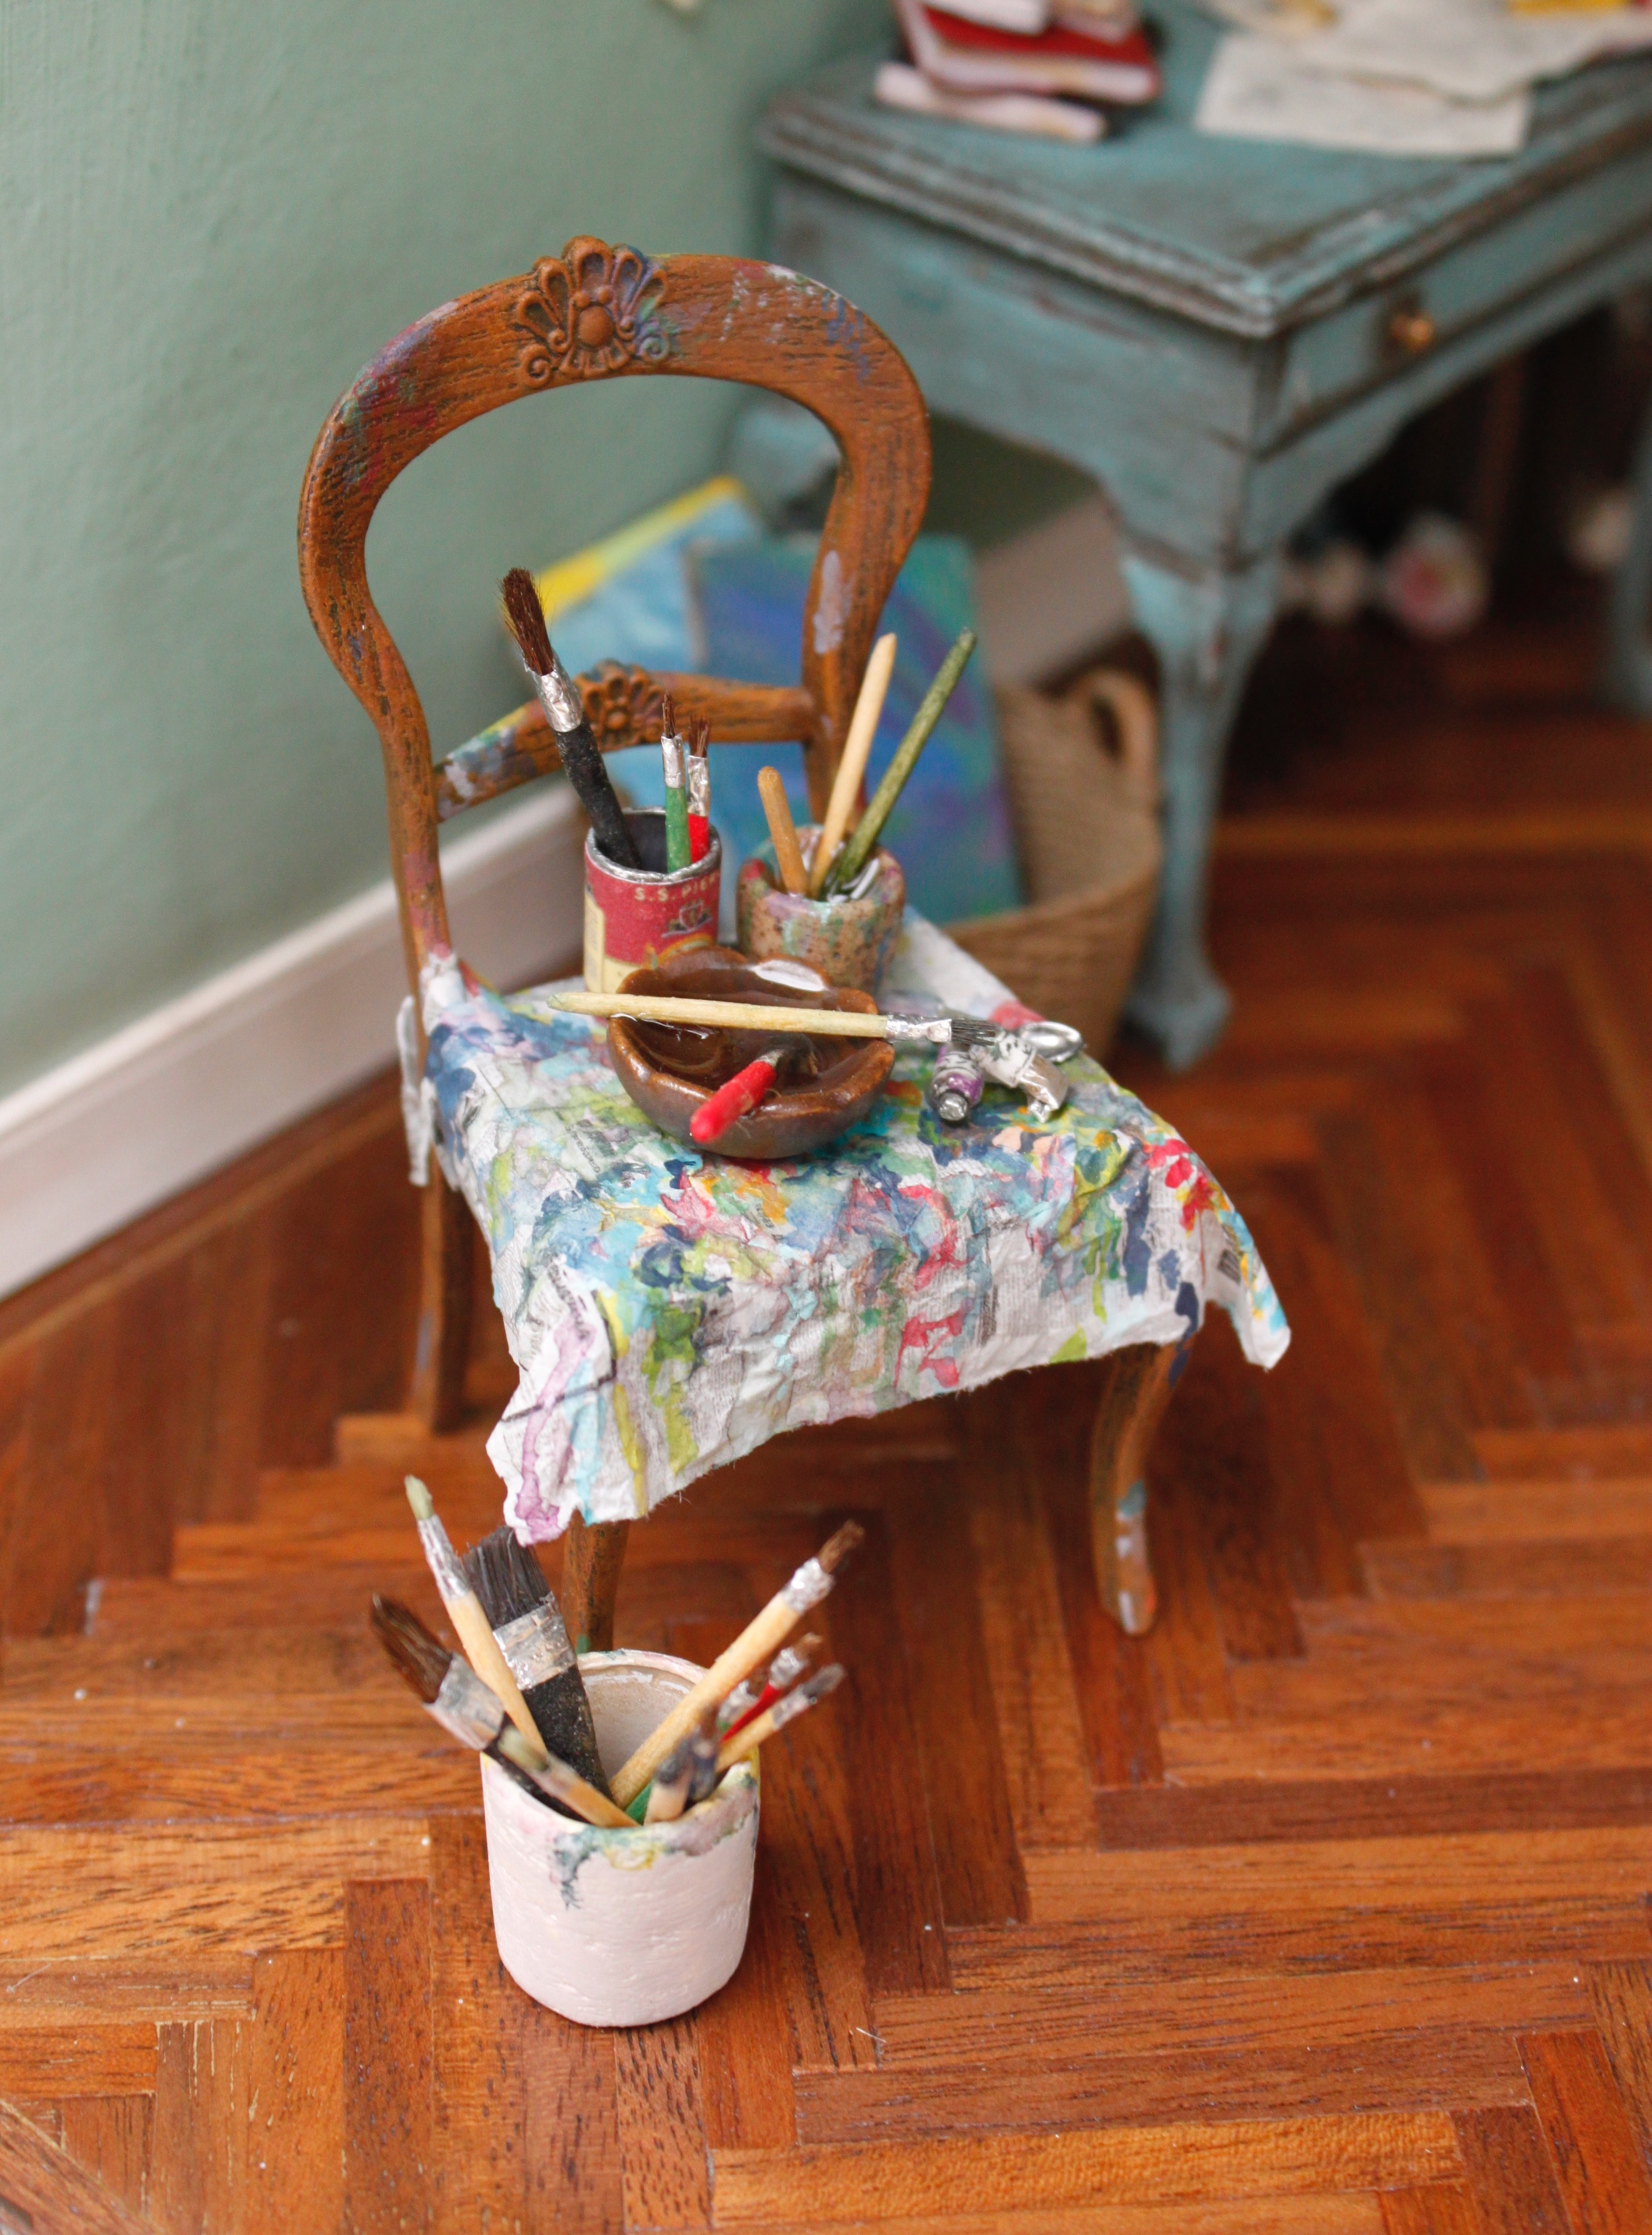
The bowl and cup were also picked up at Earth and Tree. The tin can was made with a small cup, painted silver with nail polish, and then added a label I found on google and printed out. The paint brushes are made with dowel, aluminum tape, and paintbrush bristles. The water in the bowl and cup is a triple thick varnish that people use for table and bar tops. I might have to finally break down and pick up some resin. I’m kind of liking adding water to things. The paint tubes are pieces of toothpick covered in aluminum tape. The newspaper image was found using google. I resized it using my word program and then printed it out on old typewriter paper.
The texture on the wall was created with tissue paper and watered down glue. It was the best way to cover the seam between the kit wall, the extra wood I added, and the windows I blocked off. You can see the walls before here. There was a lot of sanding, painting, more sanding, aging, repainting because I didn’t like the color, sanding, and then the final aging. I was hoping for a plaster like feel. The base board was picked up at Earth and Tree Miniatures.
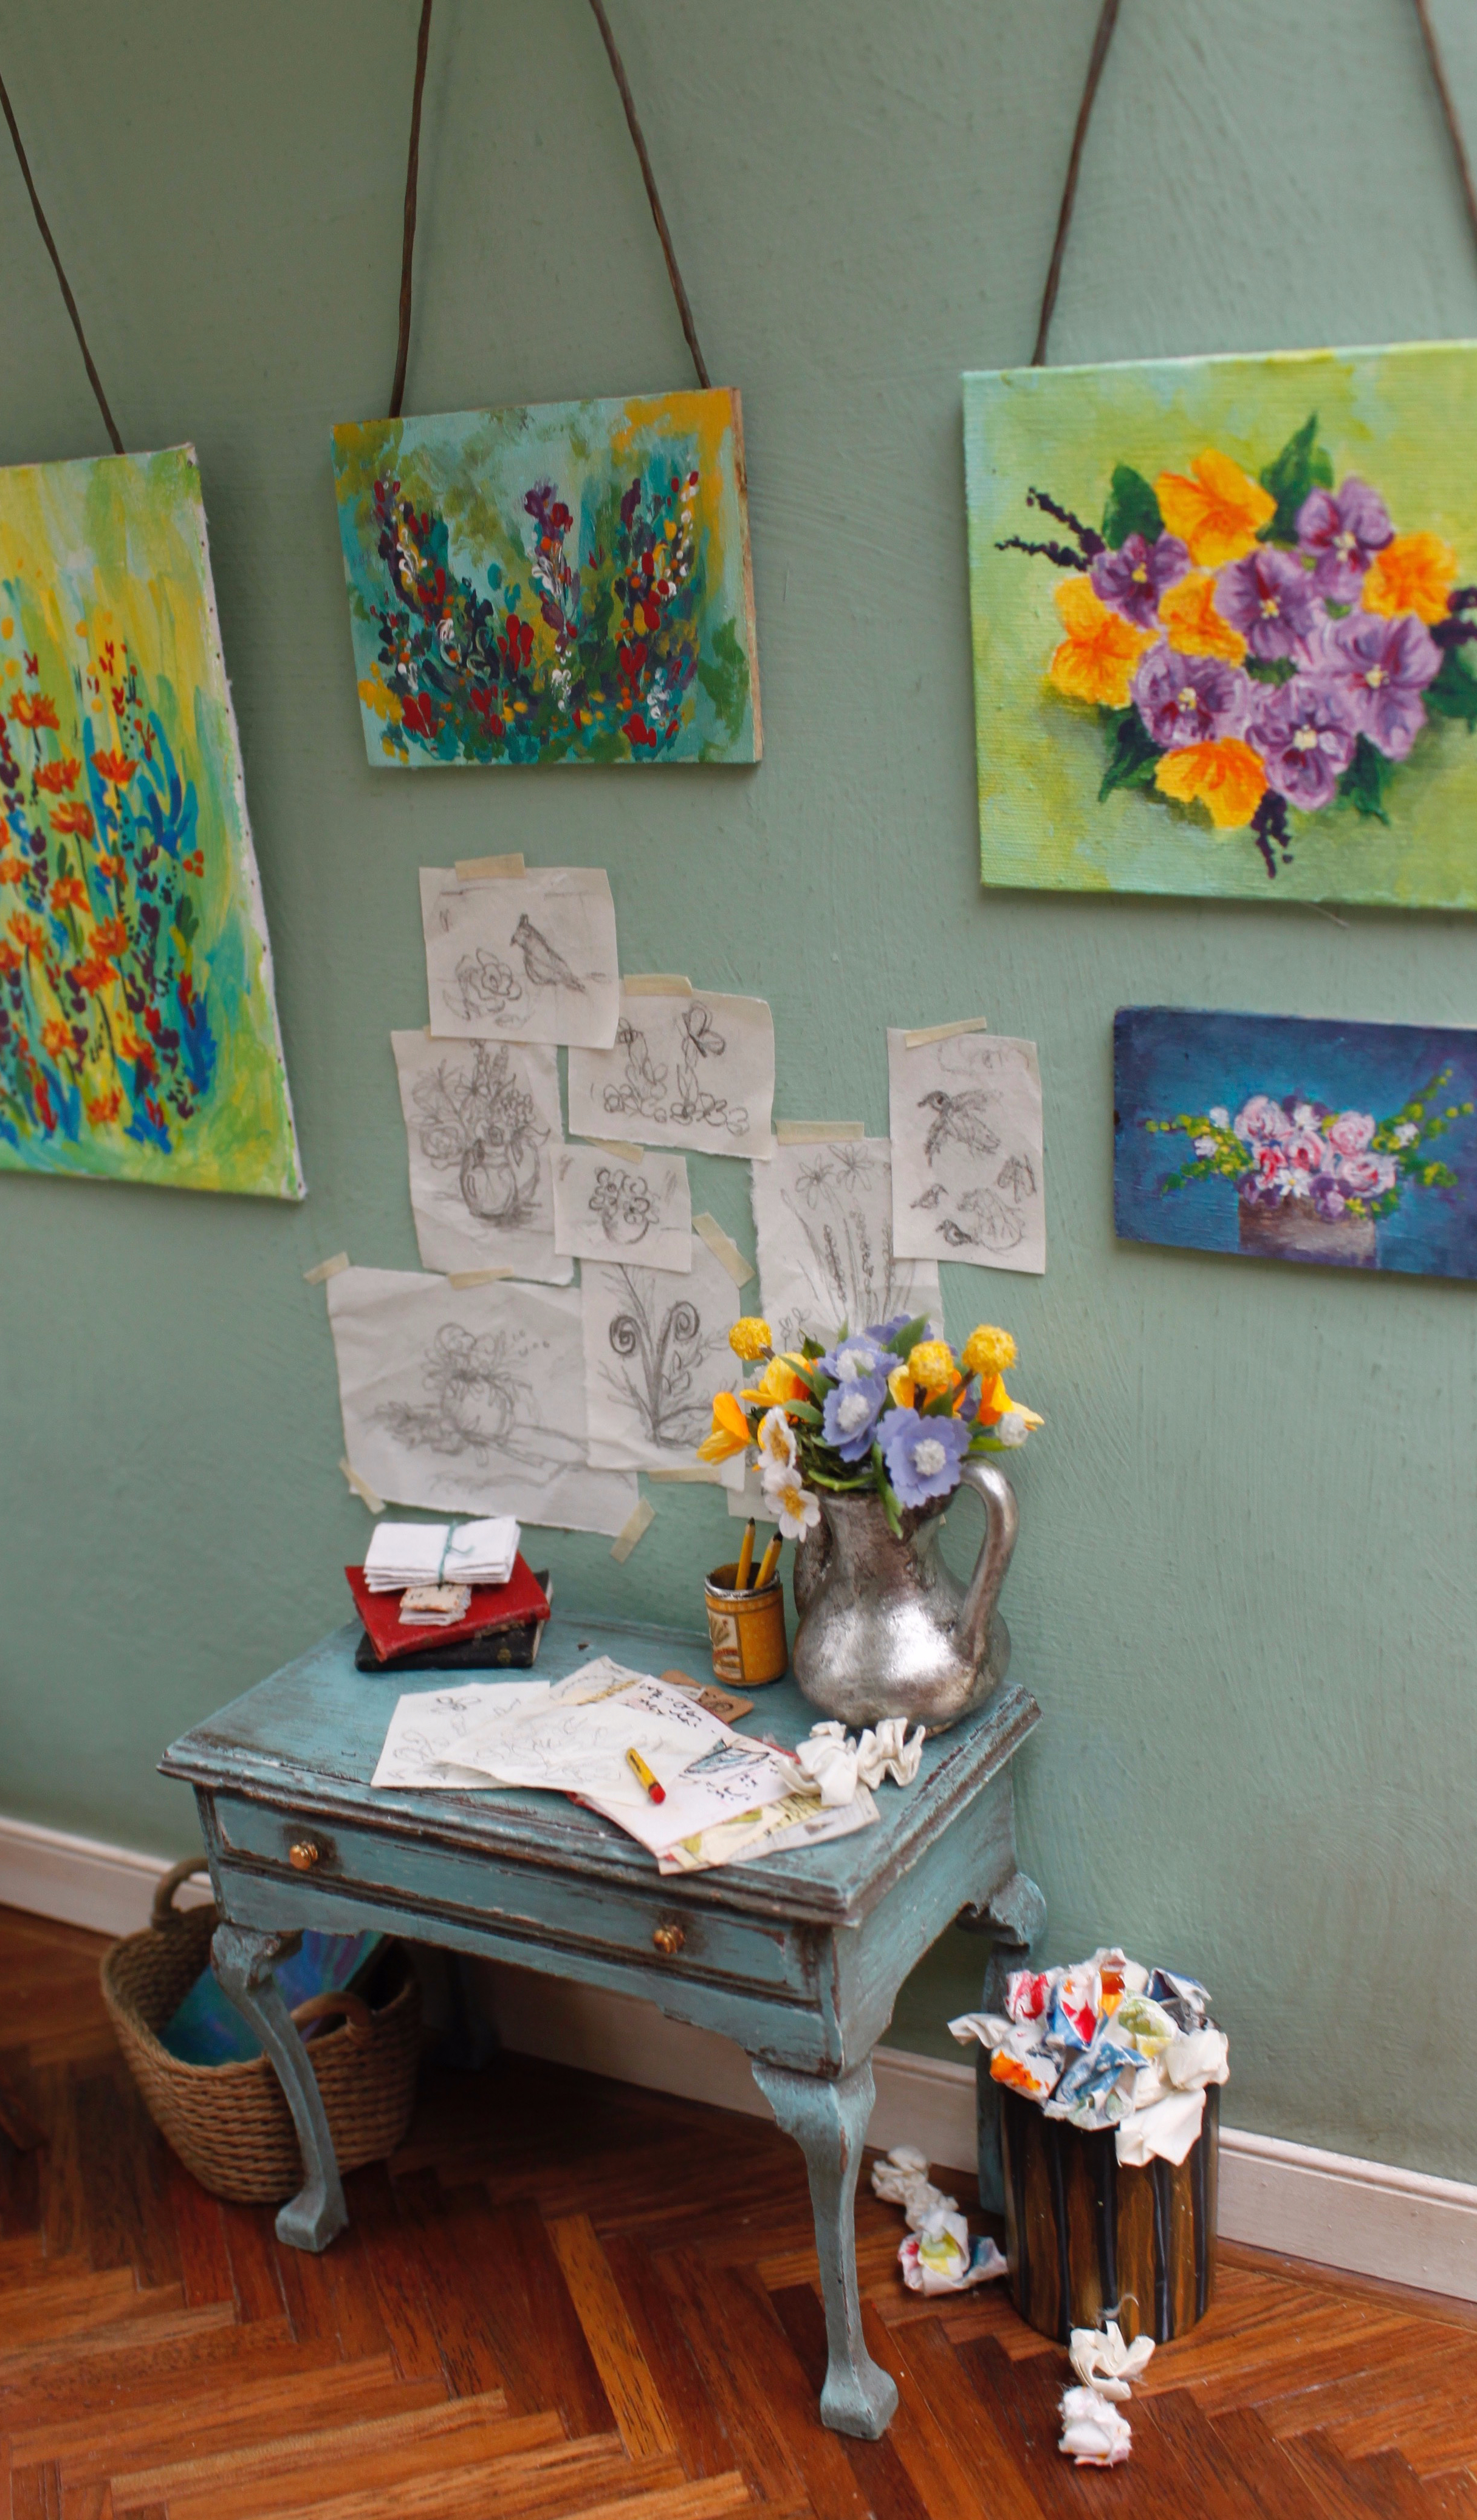
All of my dollhouses have 3 things: a butterfly, a bumble bee, and a tiki head. If you look carefully in the picture above you can see the butterfly and bumble bee in one of the drawing on the wall. The tiki will be seen in pictures from the table area. Hopefully I will be able to post those details tomorrow.
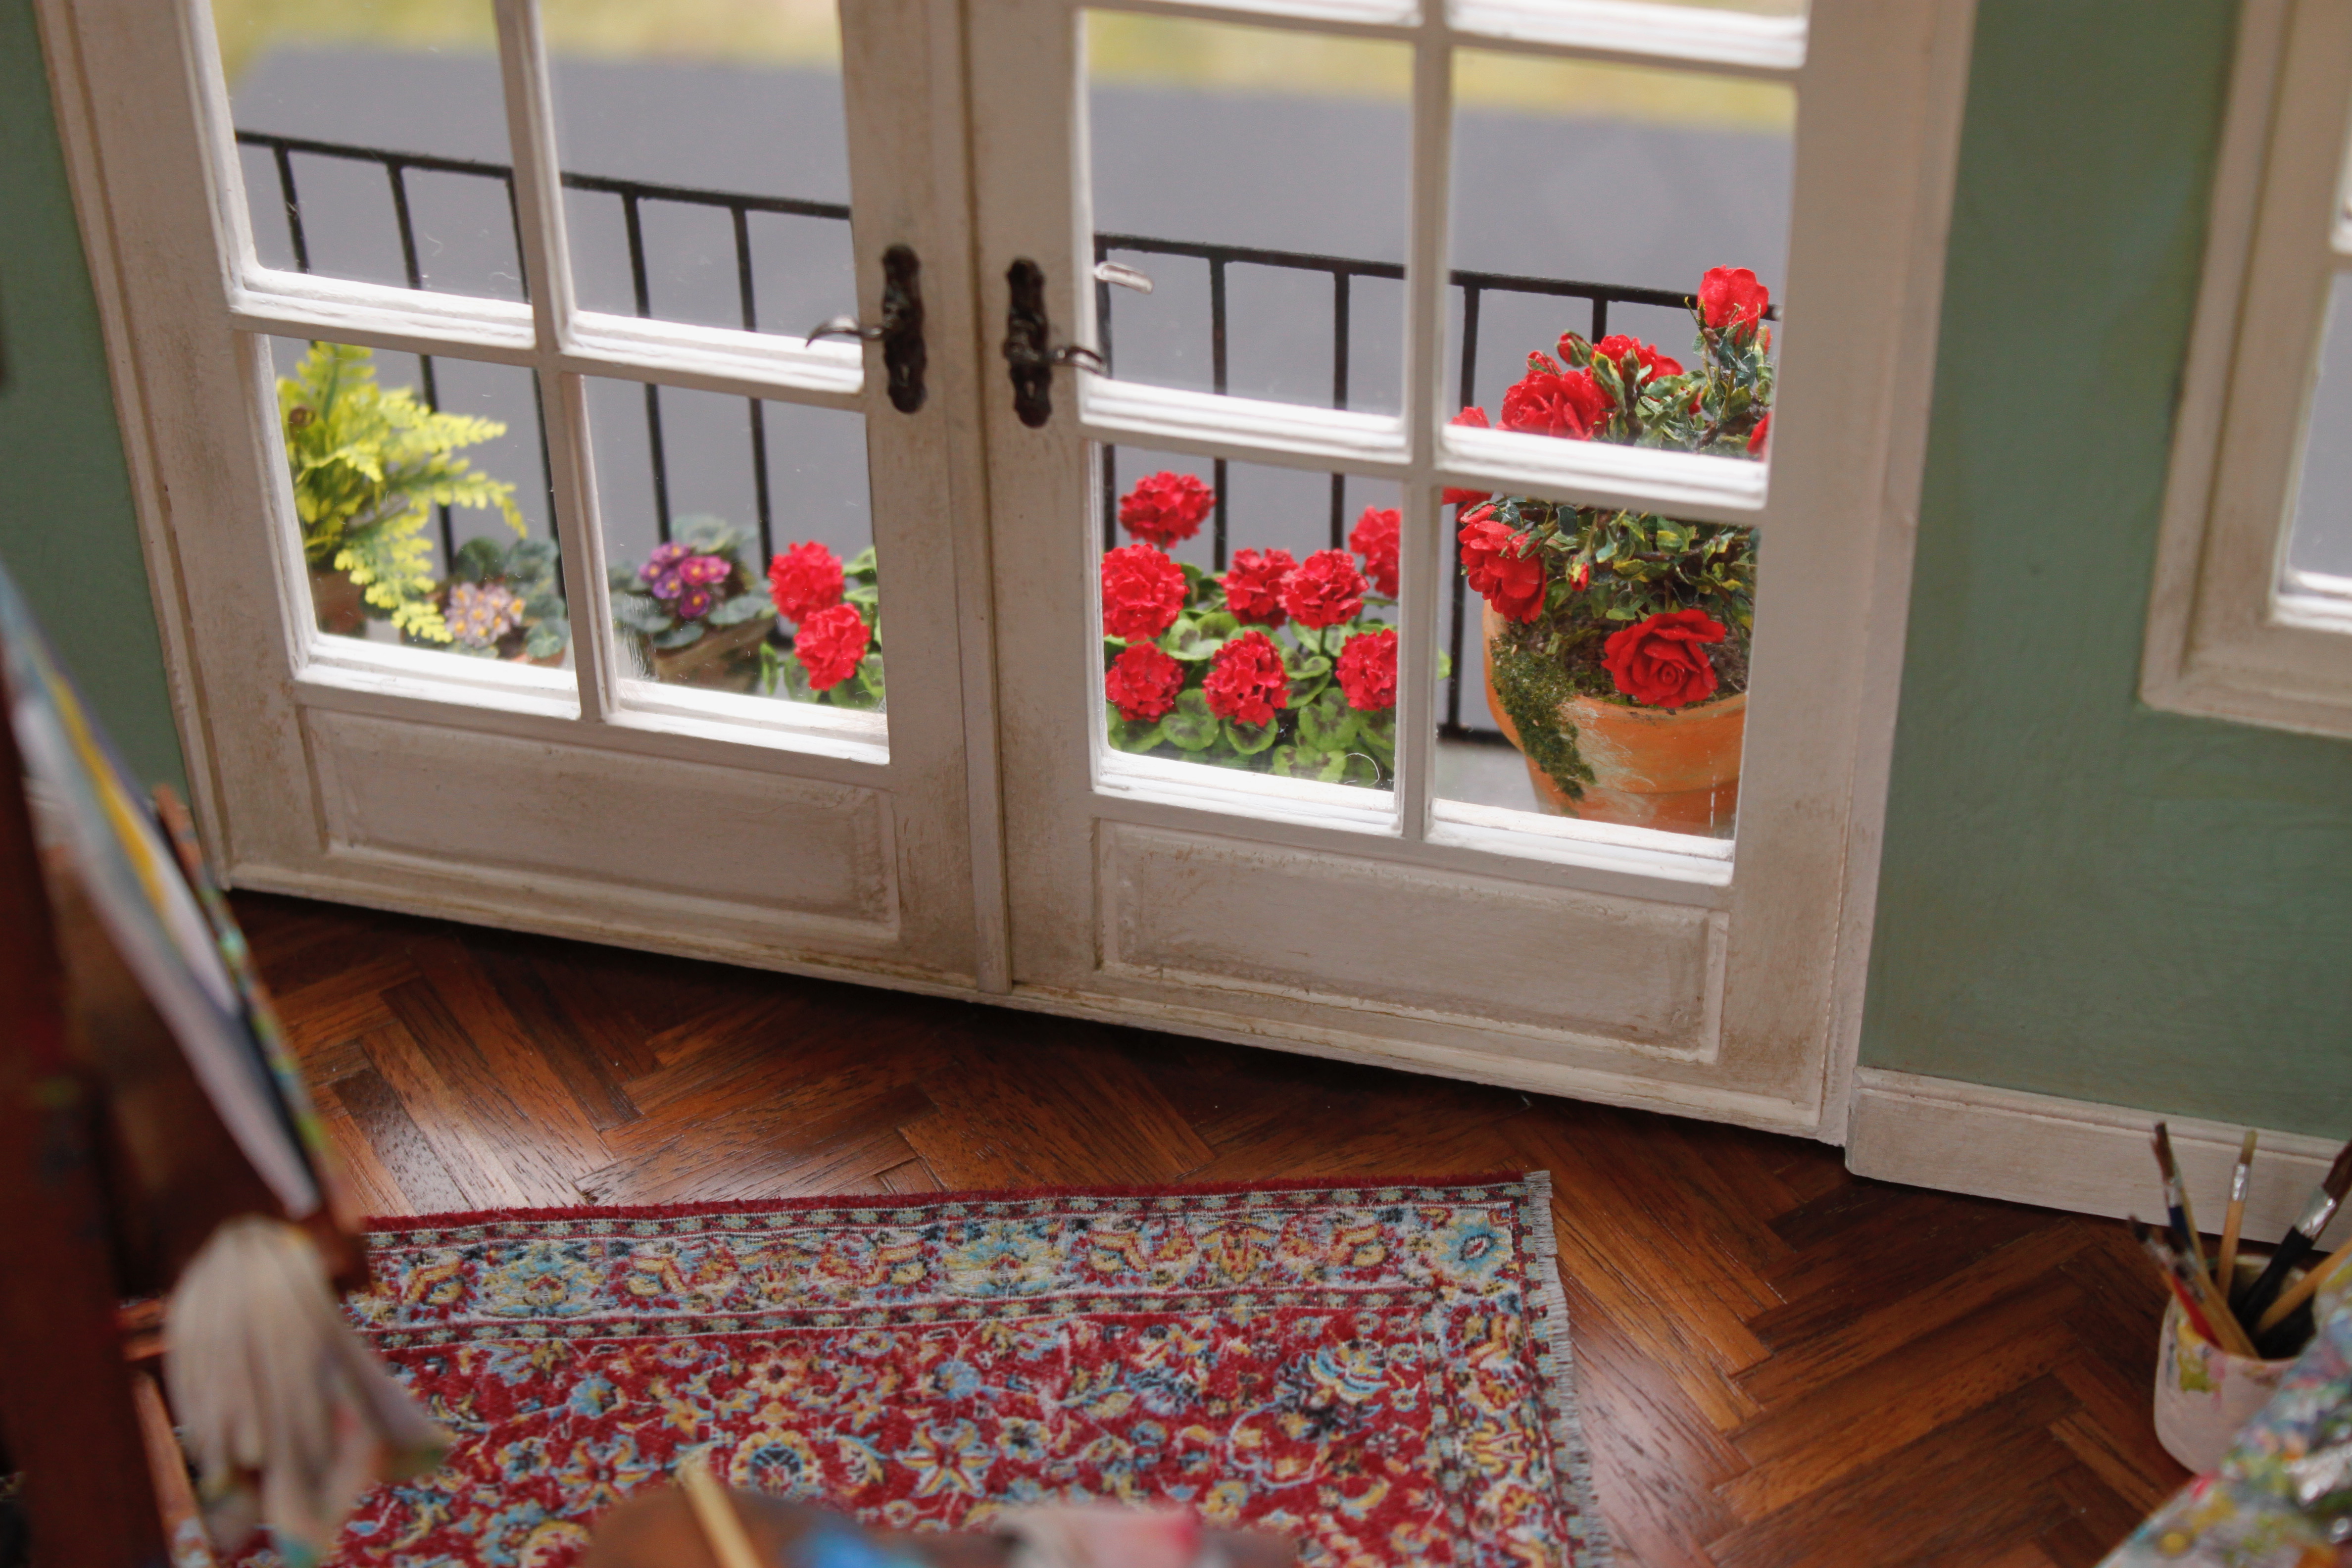
Inside the studio is where the fun happens. The floors are made from strips of walnut laid in a herringbone pattern. I show part of the process here. The rug is from Miniatures.com and aged using this process.
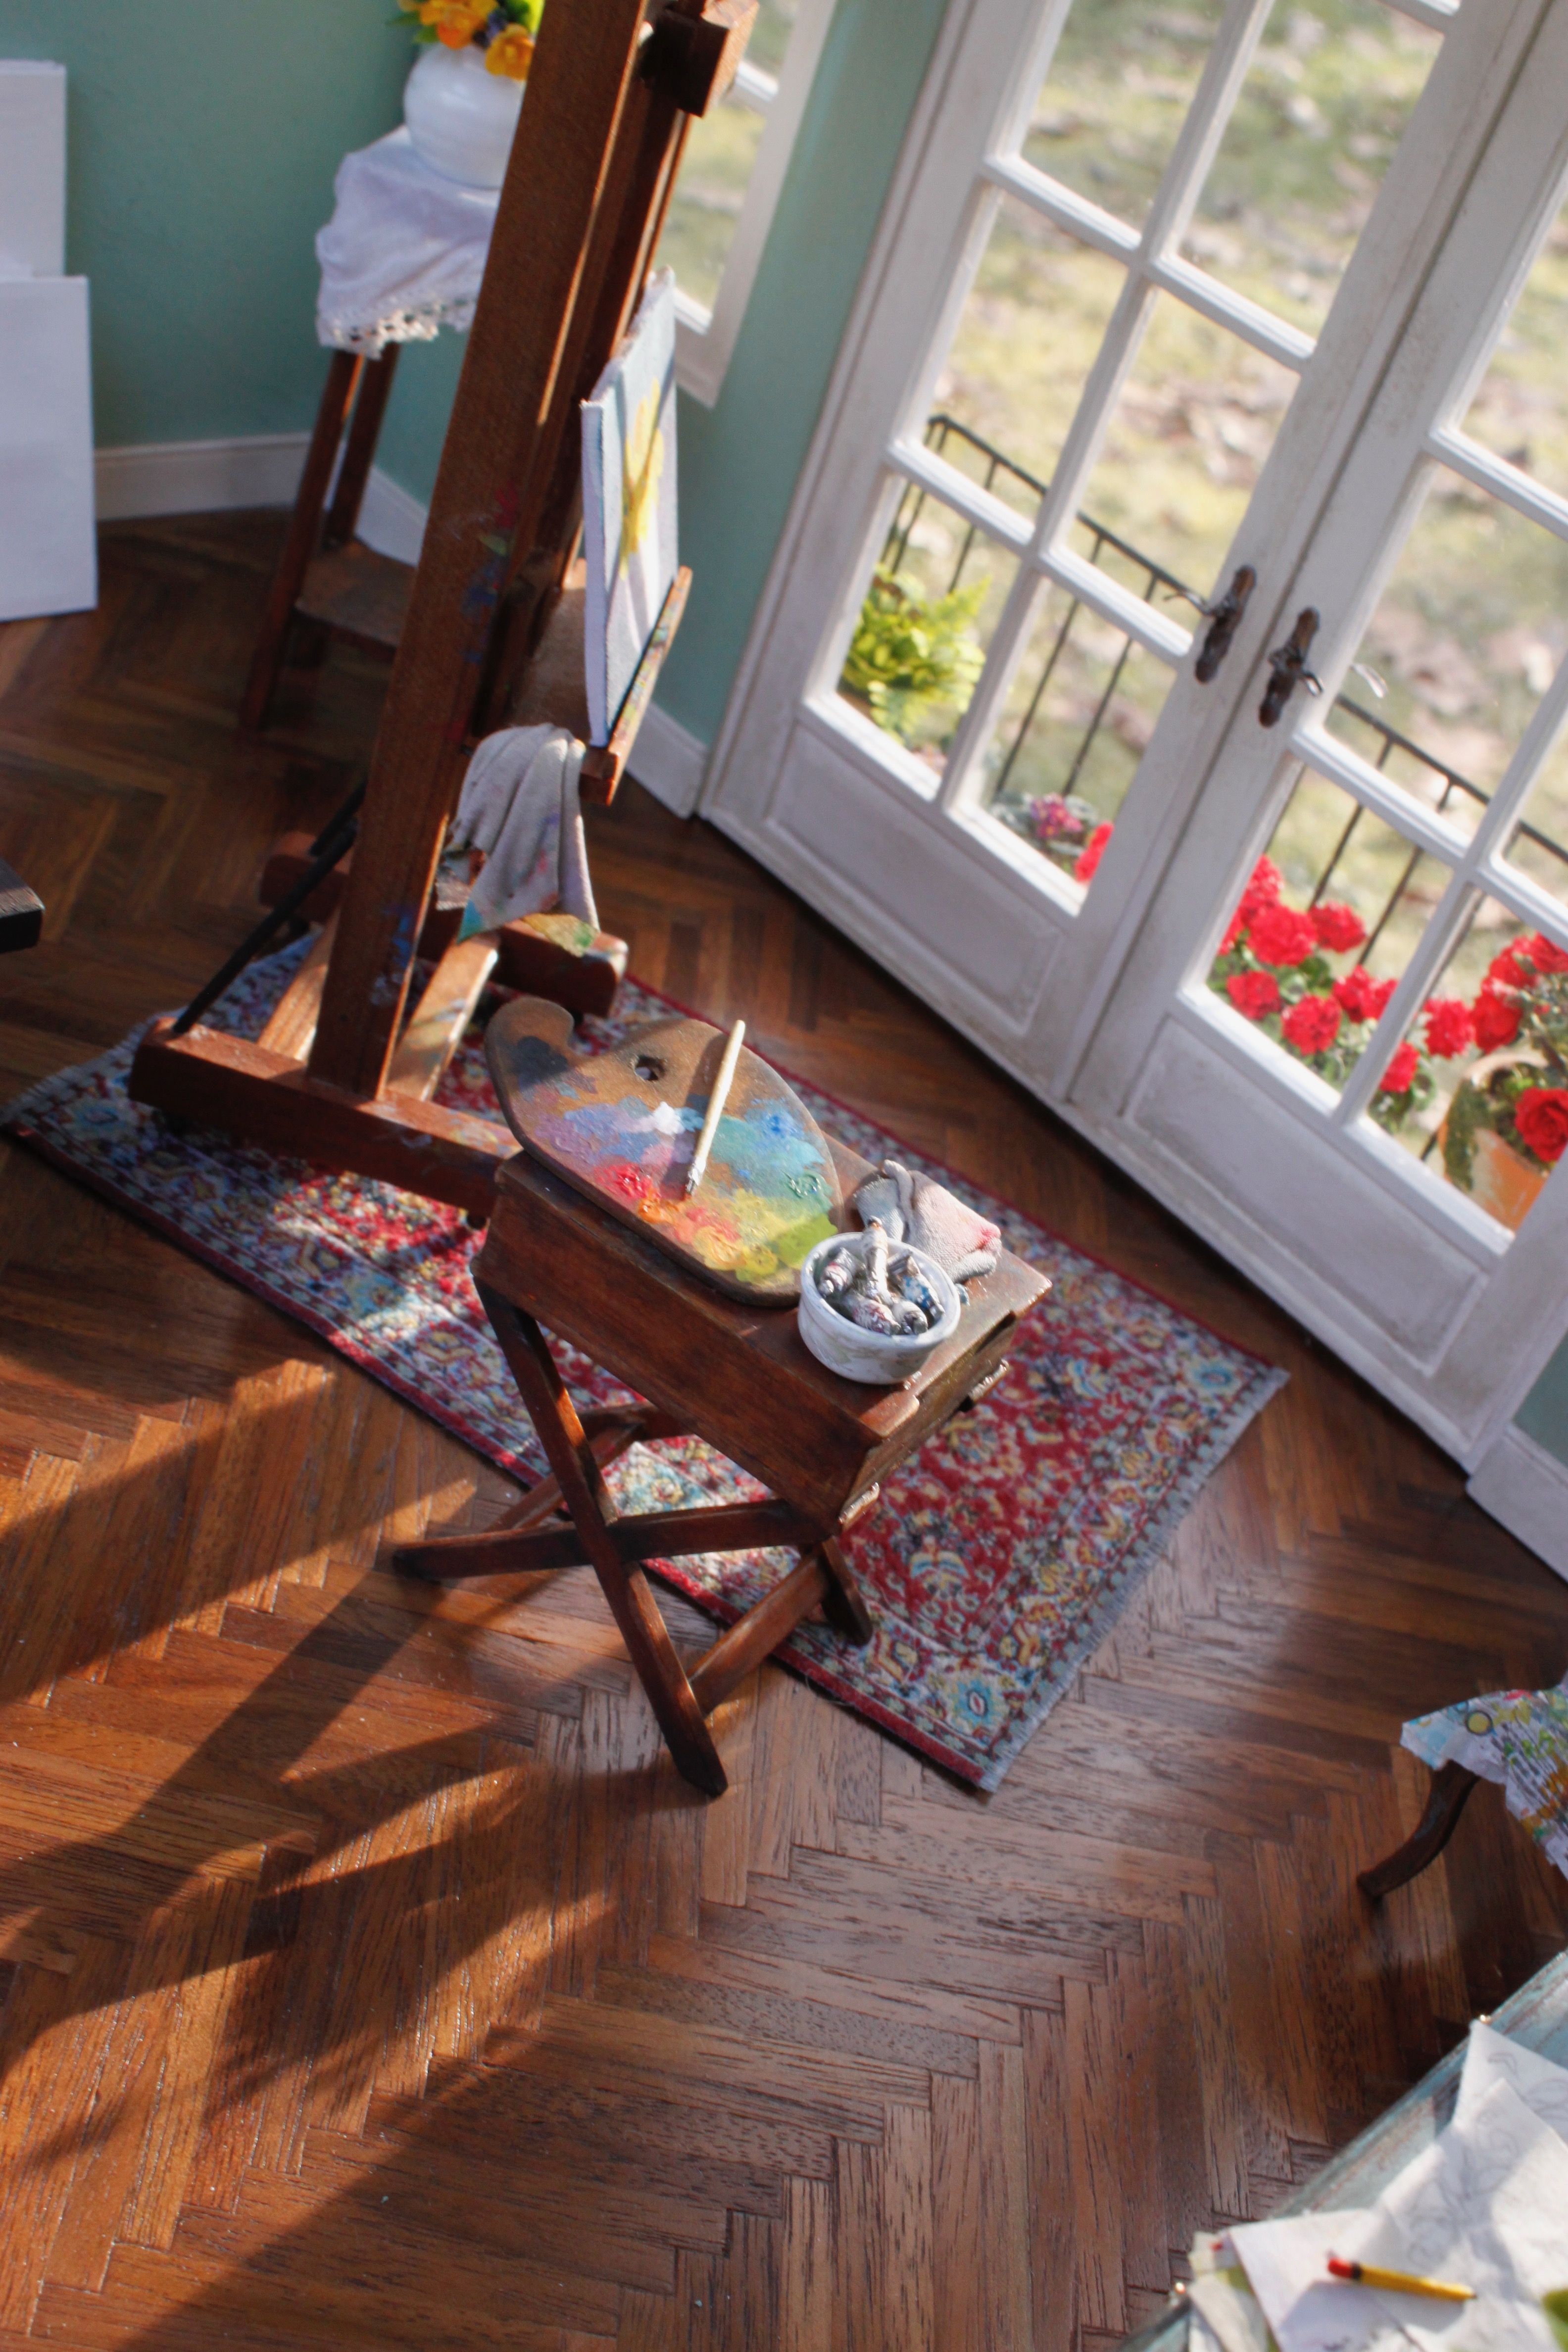
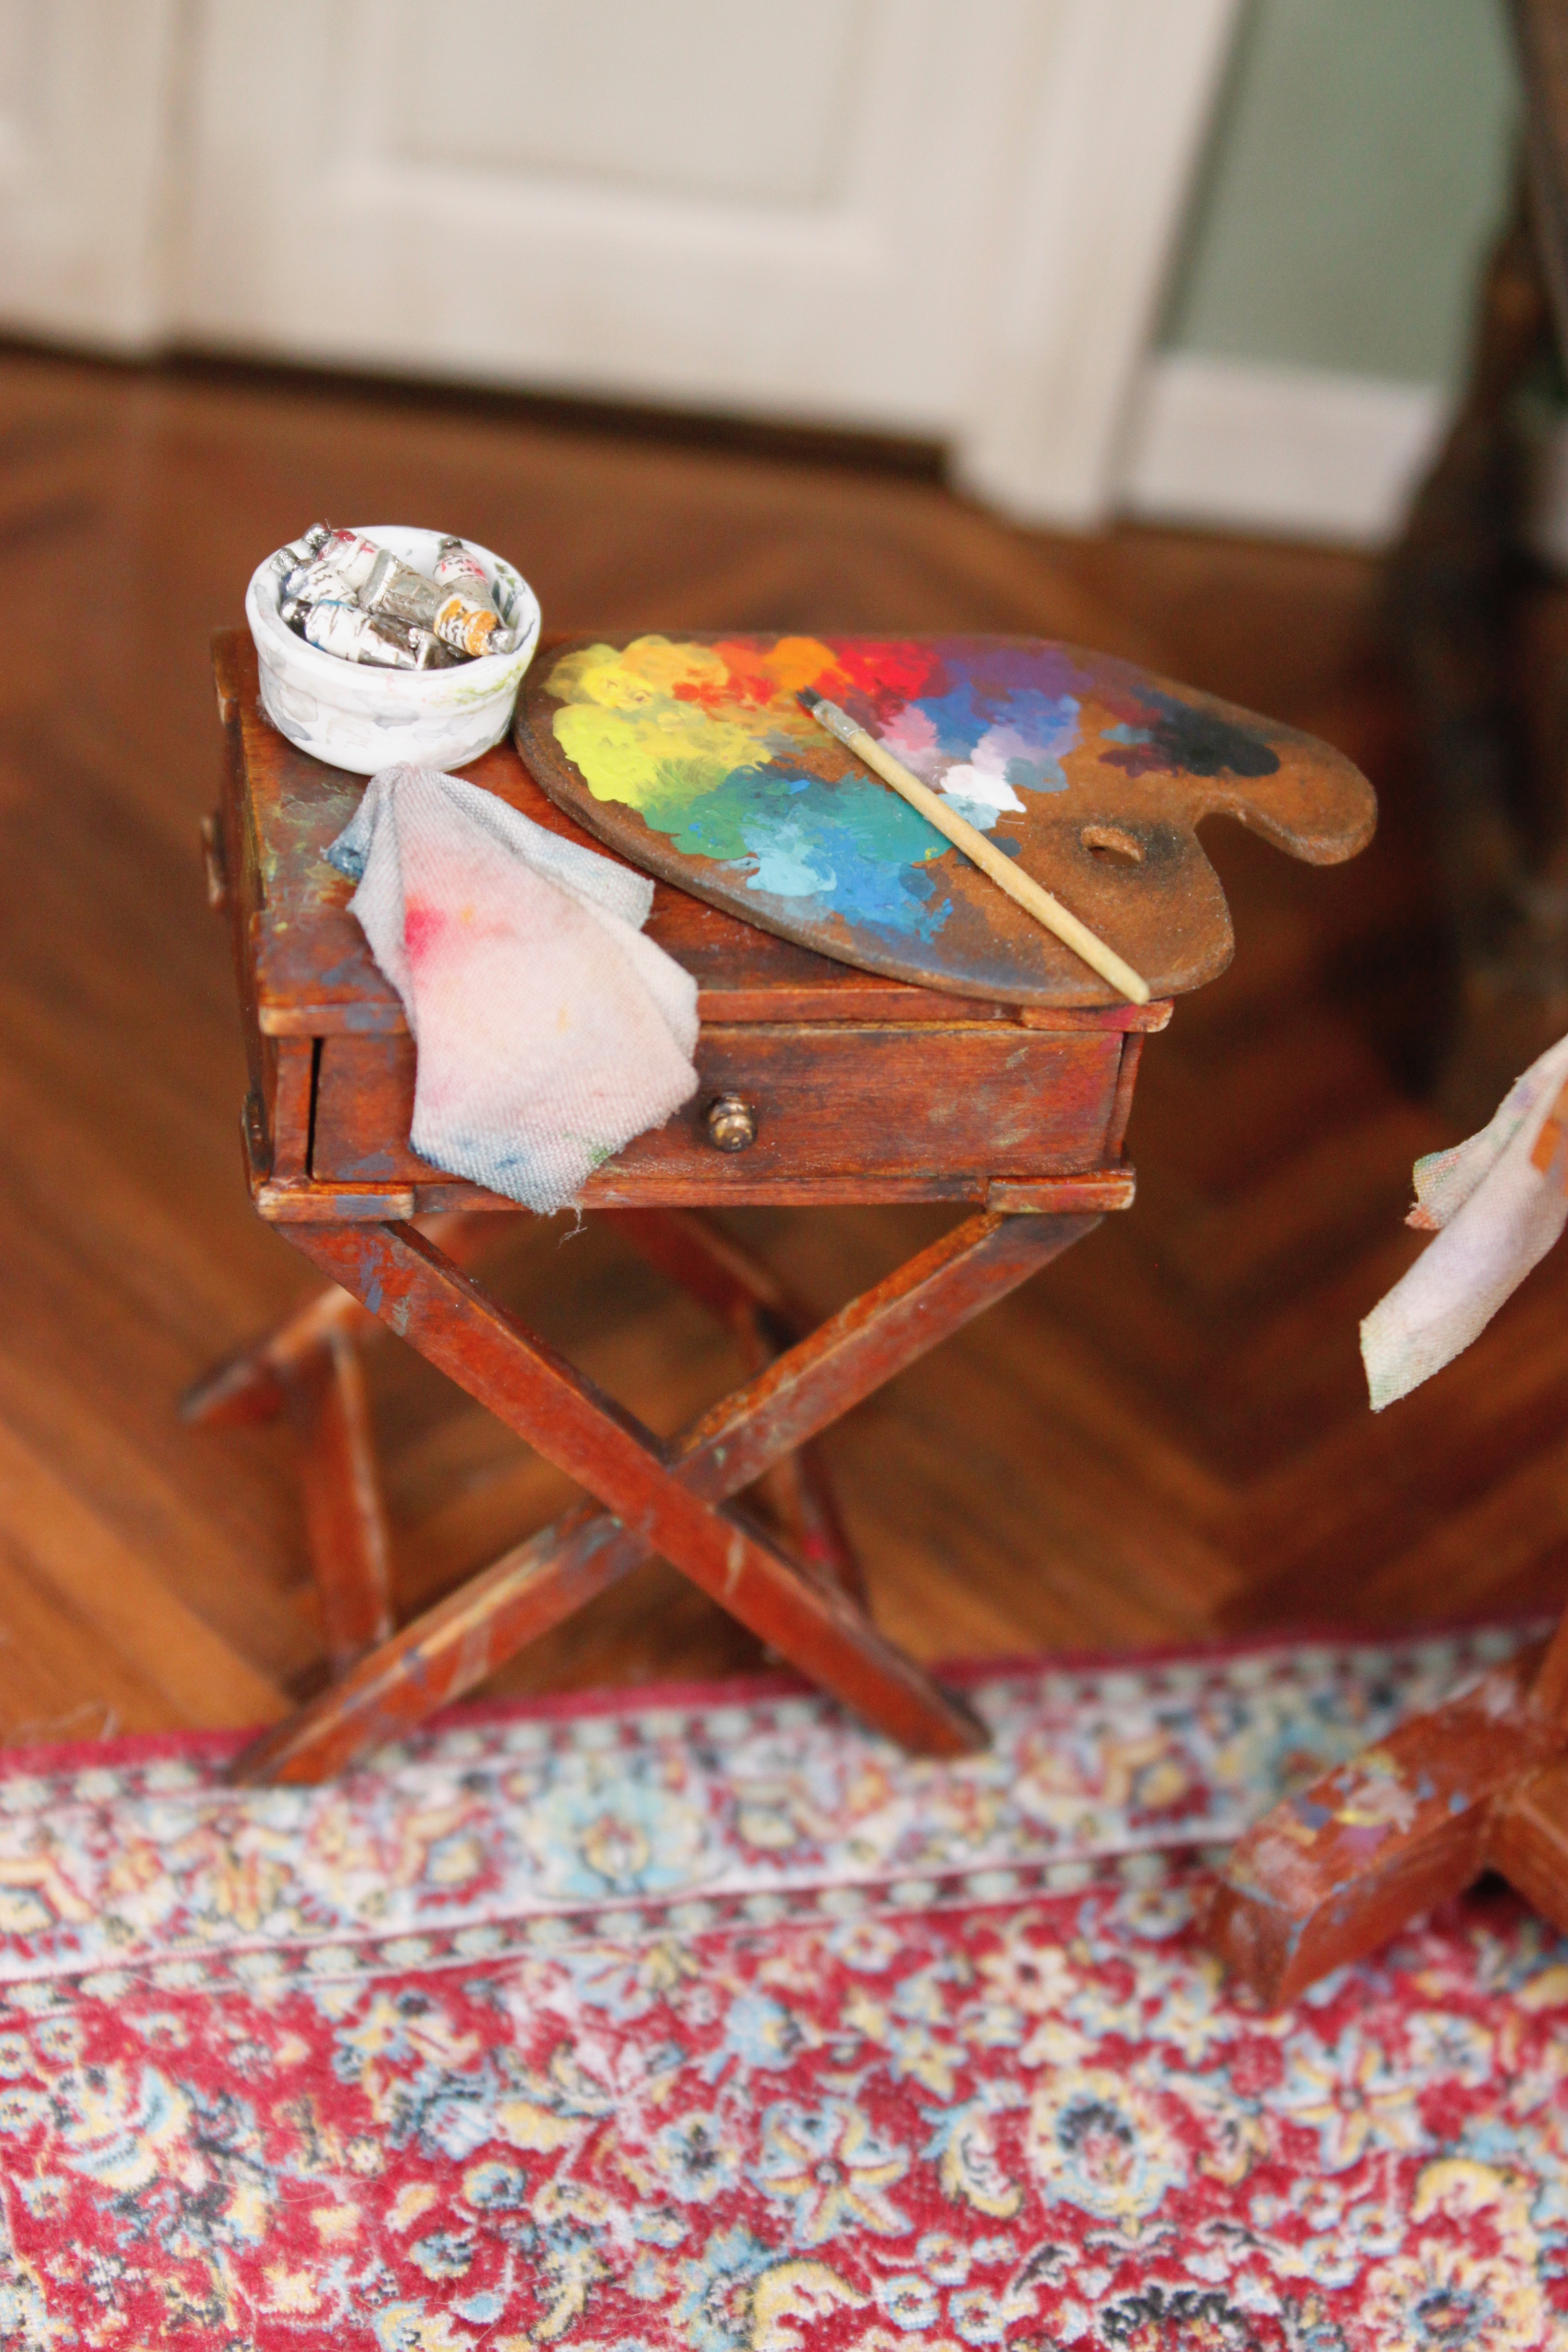
The easel was made by me from pieces of walnut. It’s adjustable and can hold large and small canvases. I’d like to make another one in the future, since there are a few things I would do differently. The tiny casters on the bottom and the small side table are from Miniatures.com. The hardest part of making the easel was adding the paint drops. I was so worried about messing it up.
The small side table was aged and paint was added to make it look well loved. The paint rags on the table and easel are just pieces of cloth that were painted with watercolor paint. I used vast amounts of spray starch and a lot of patience to get the fabric to hang the way I wanted.
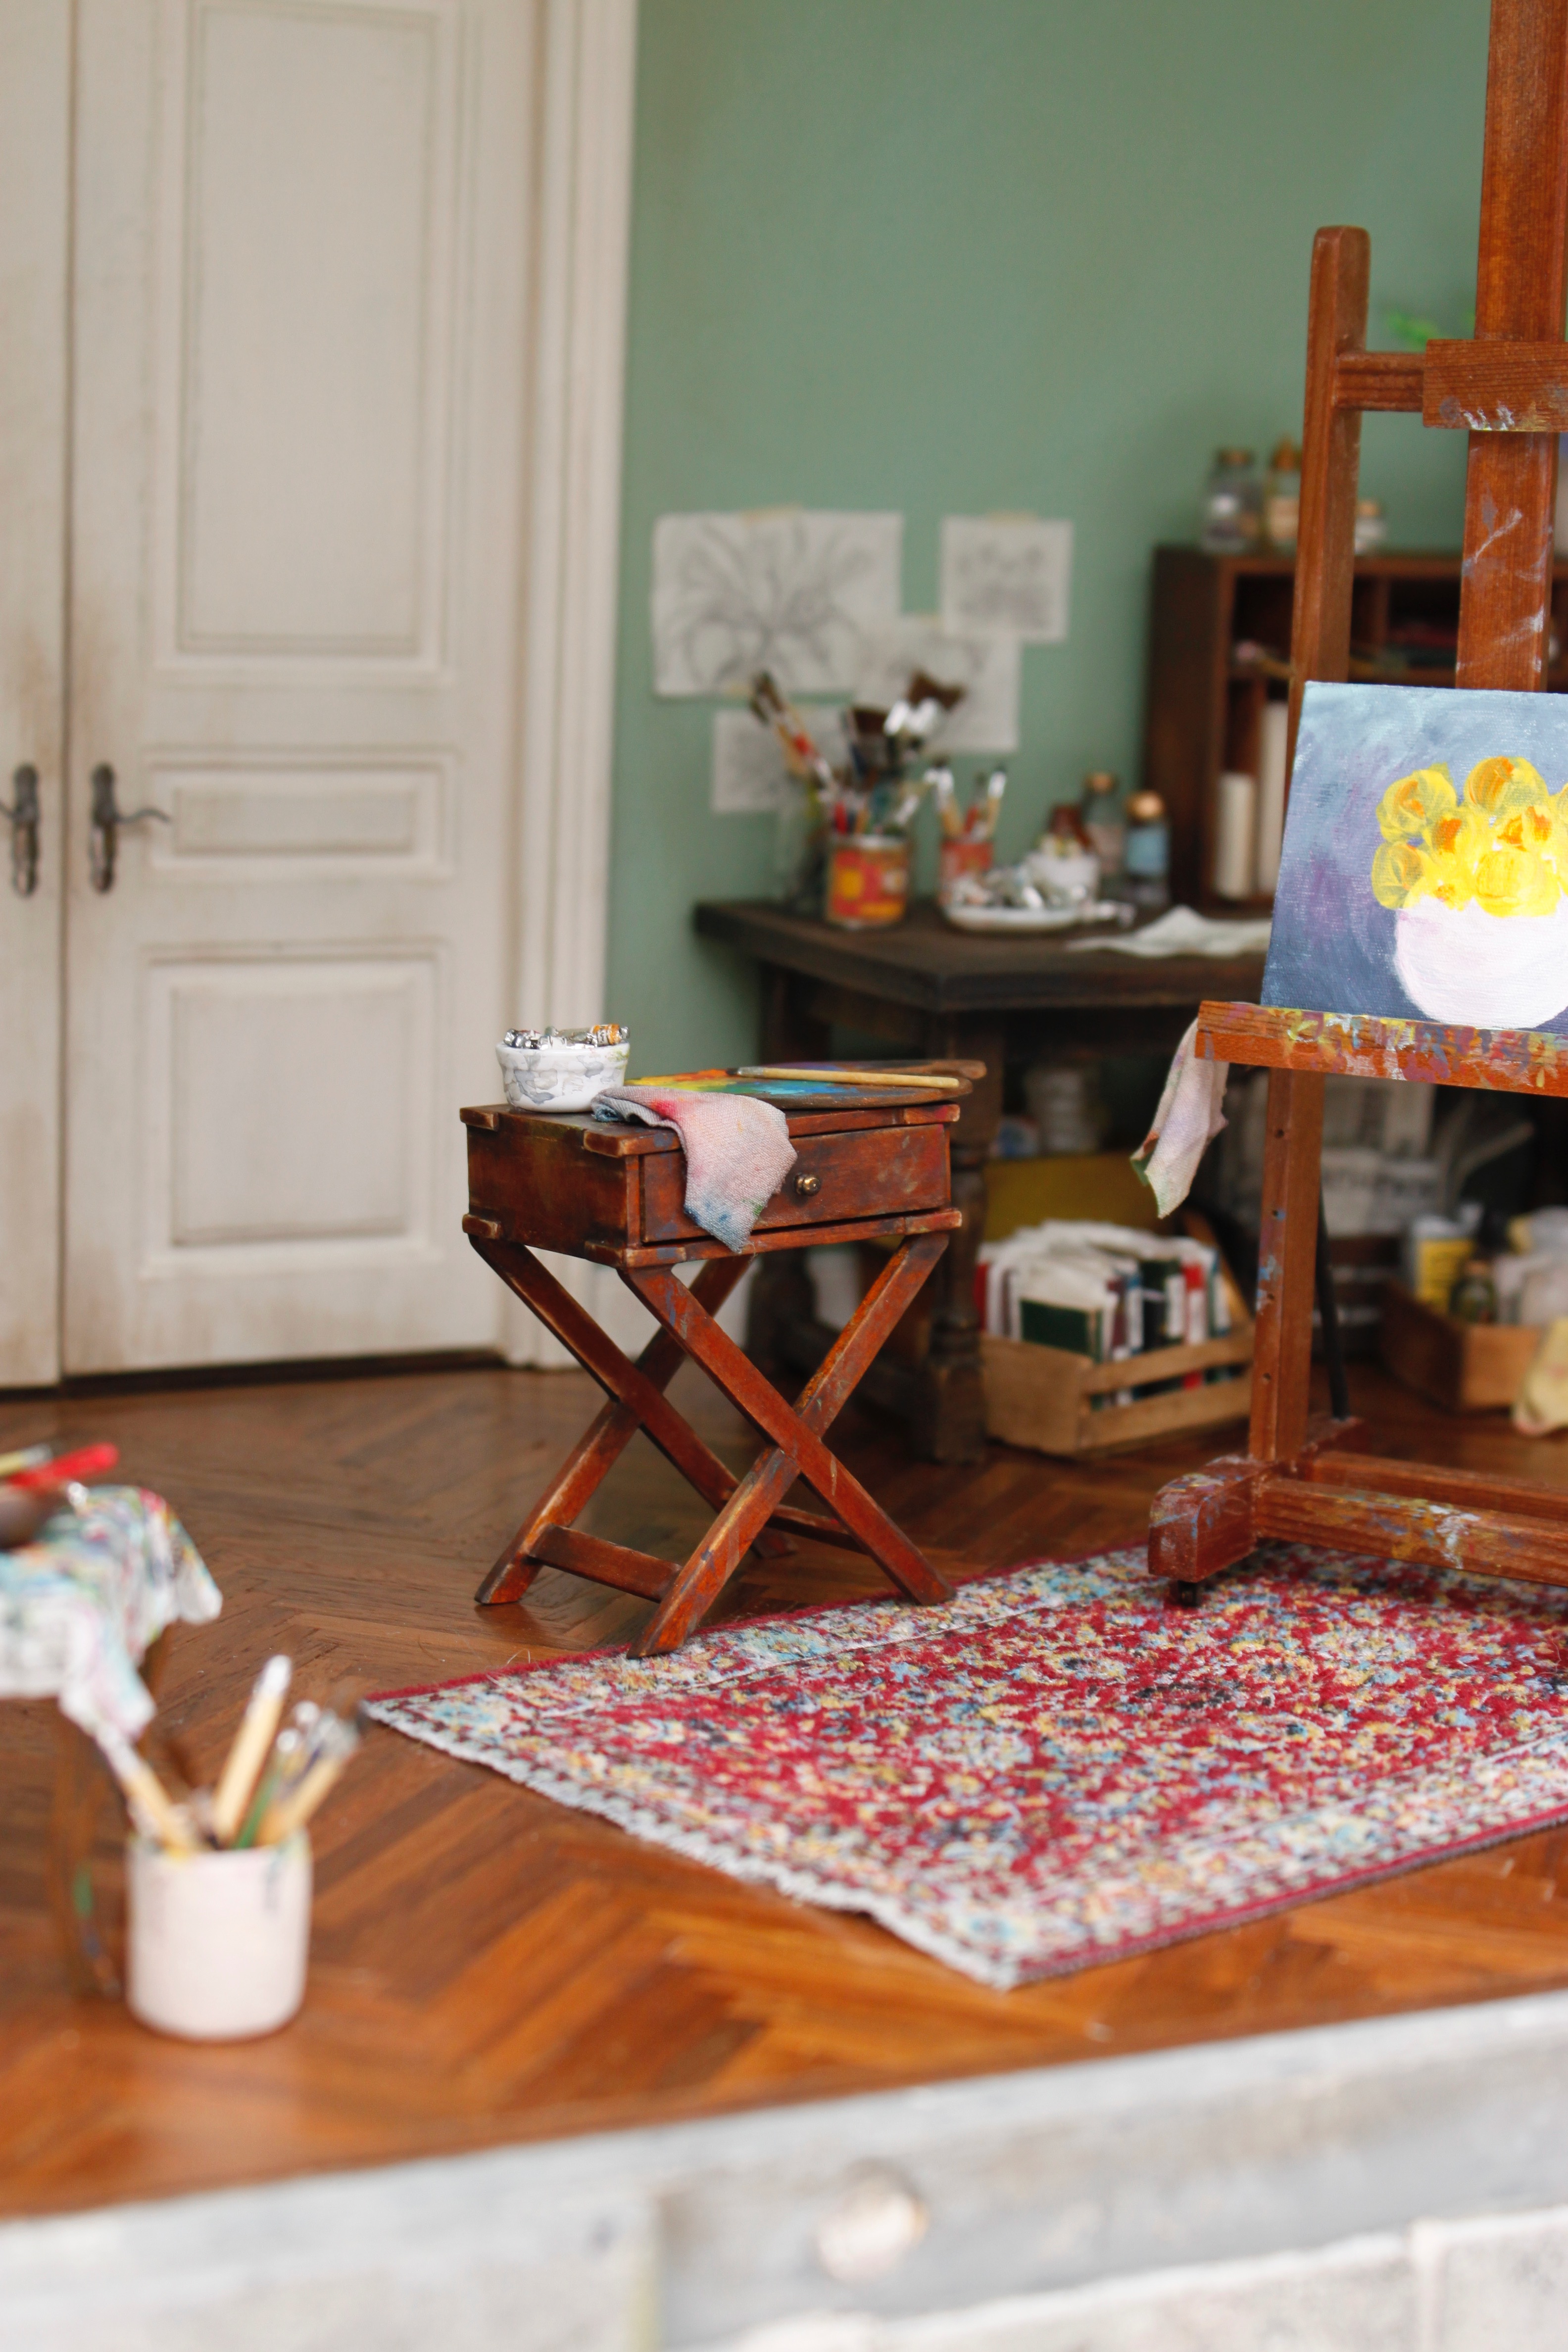
The pallet is bass wood cut to shape. The bowl was at one point a miniature sauce pan. I removed the handle, painted it with a few coats of white gel nail polish, and then added some paint to make it looked used. The tubes of paint are pieces of toothpick wrapped with aluminum tape and then shaped using tweezers. The labels are pieces of paper cut to size and glued on. The paint brushes were all made from pieces of dowel, aluminum tape, and. the bristles of old full scale paintbrushes.
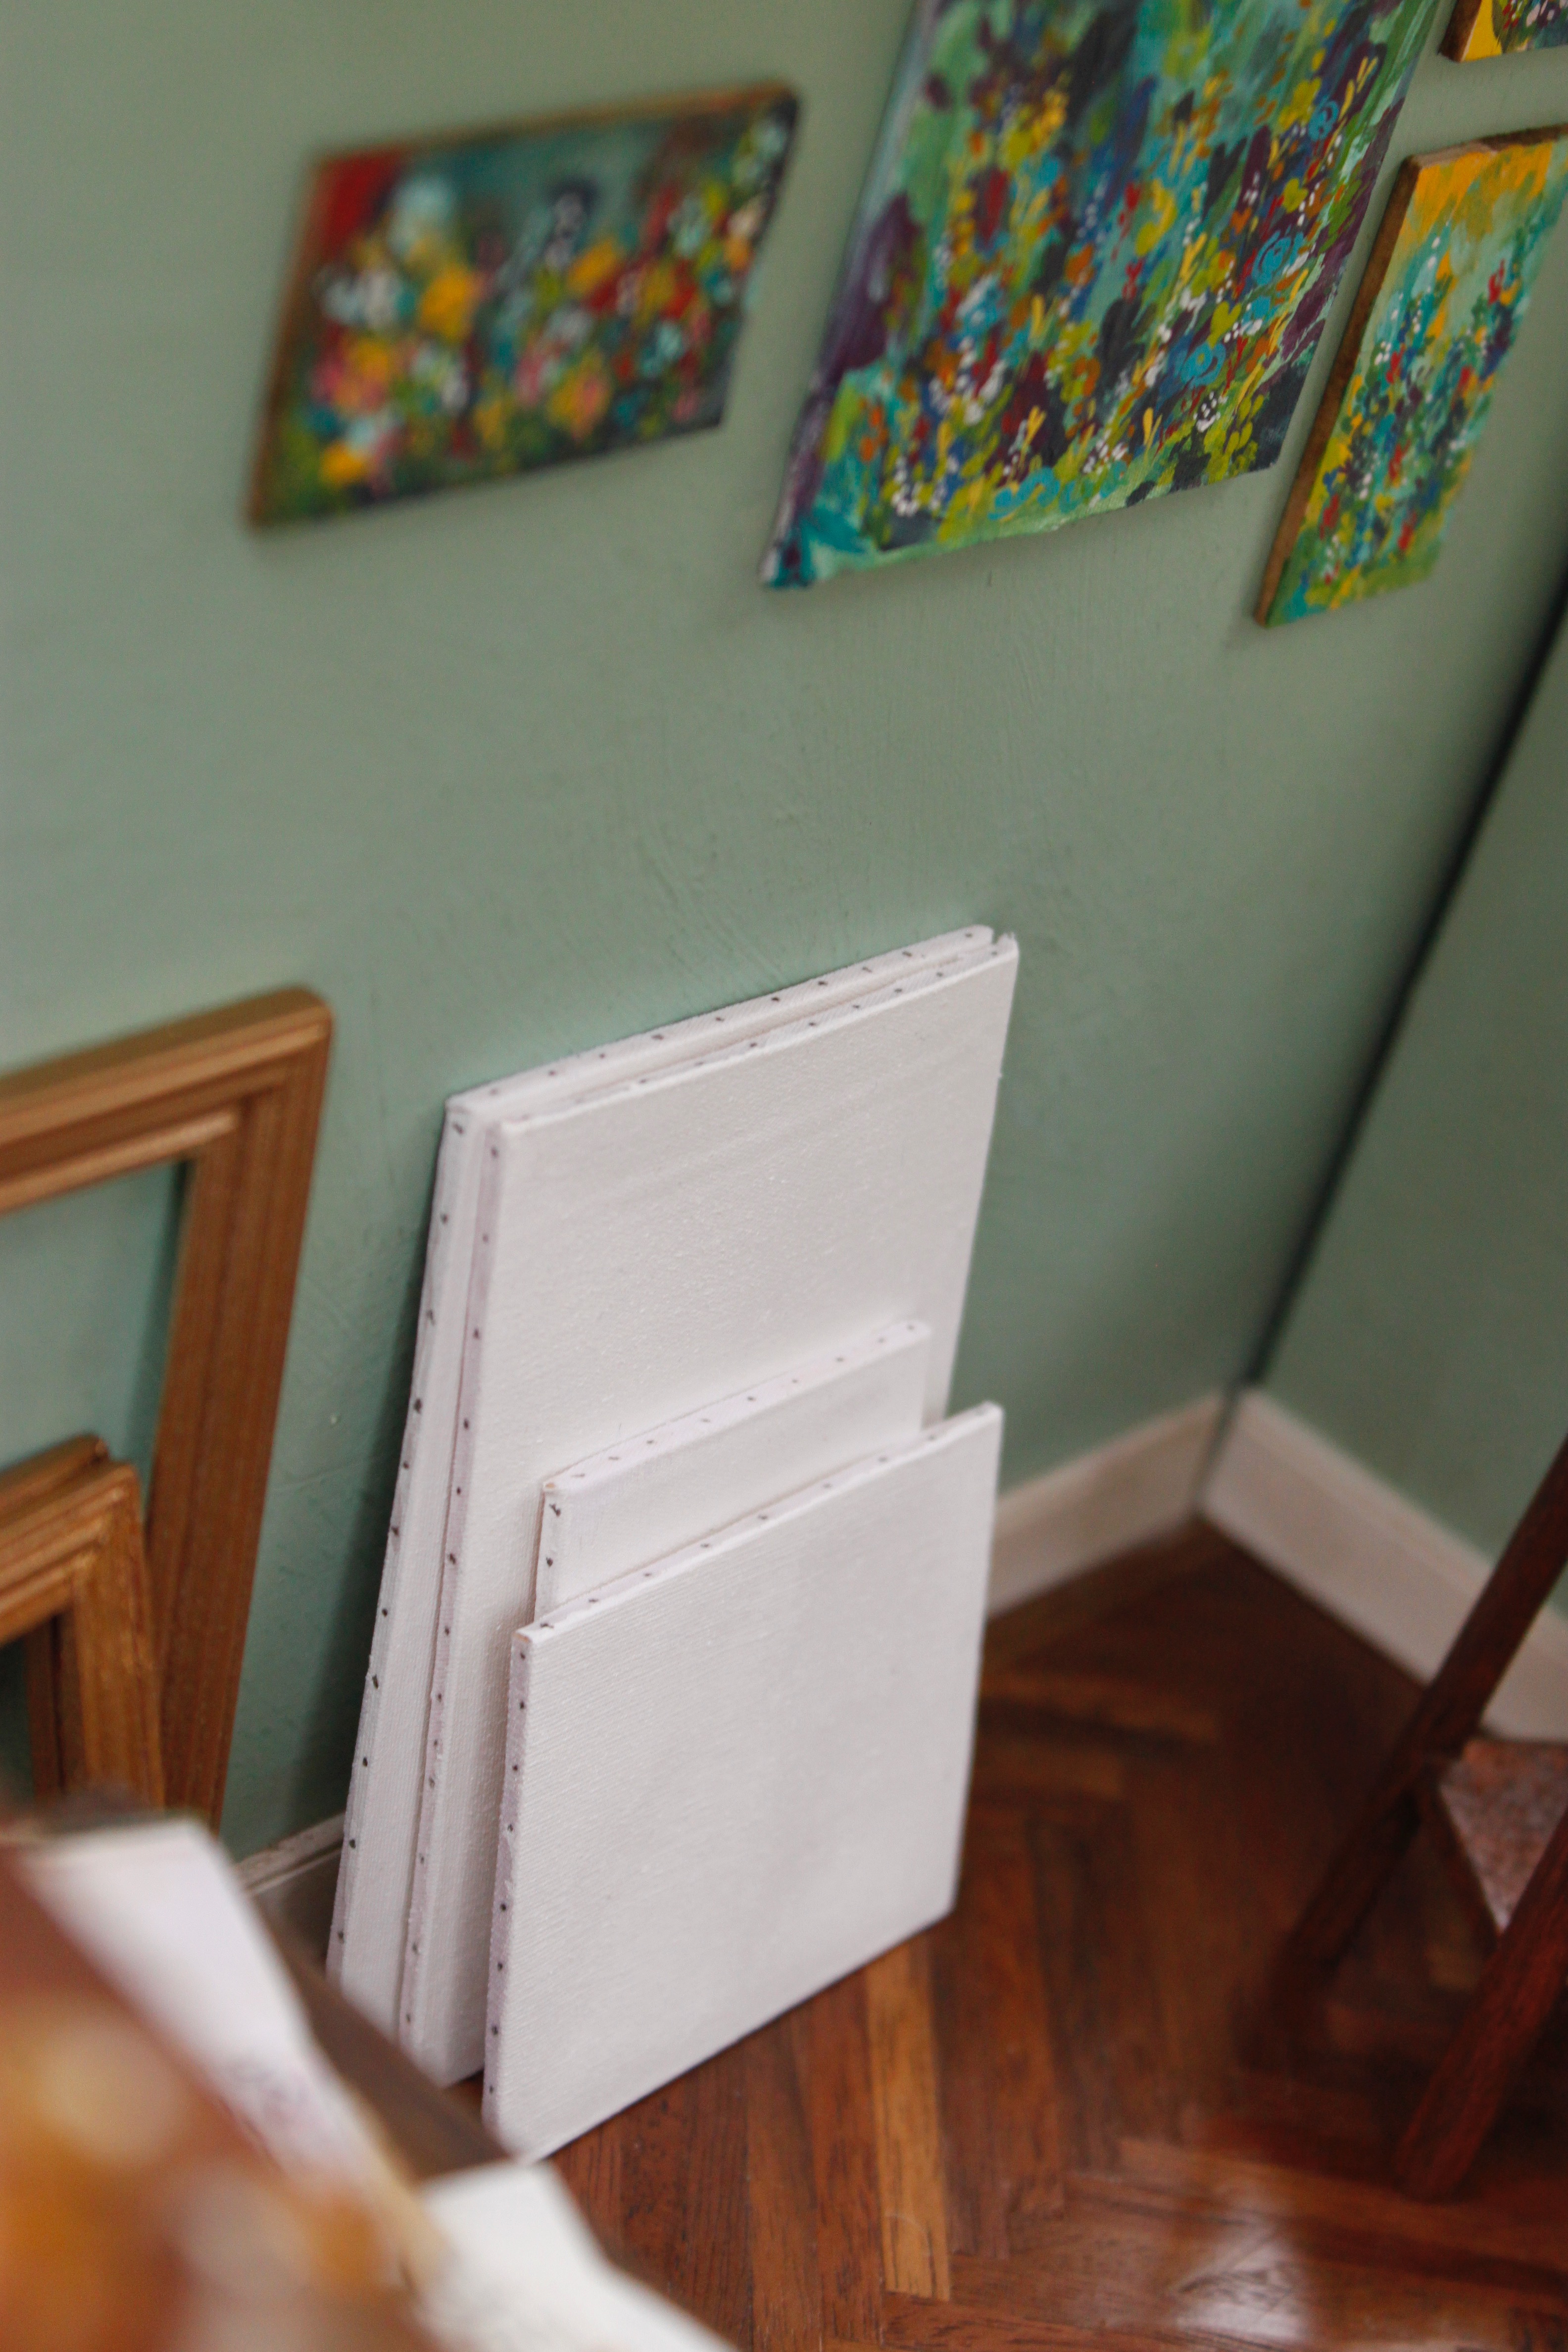
The canvases are wooden frames, that I cut with my Cricut, with white cotton fabric stretched over them. They were made in 2 different sizes. The smaller canvases that are hanging on the walls are pieces of wood.
I got the plant stand at Earth and Tree Miniatures. It was unfinished and I painted it to match the walnut color of the easel. The lace table cloth is a corner of an antique hankie.
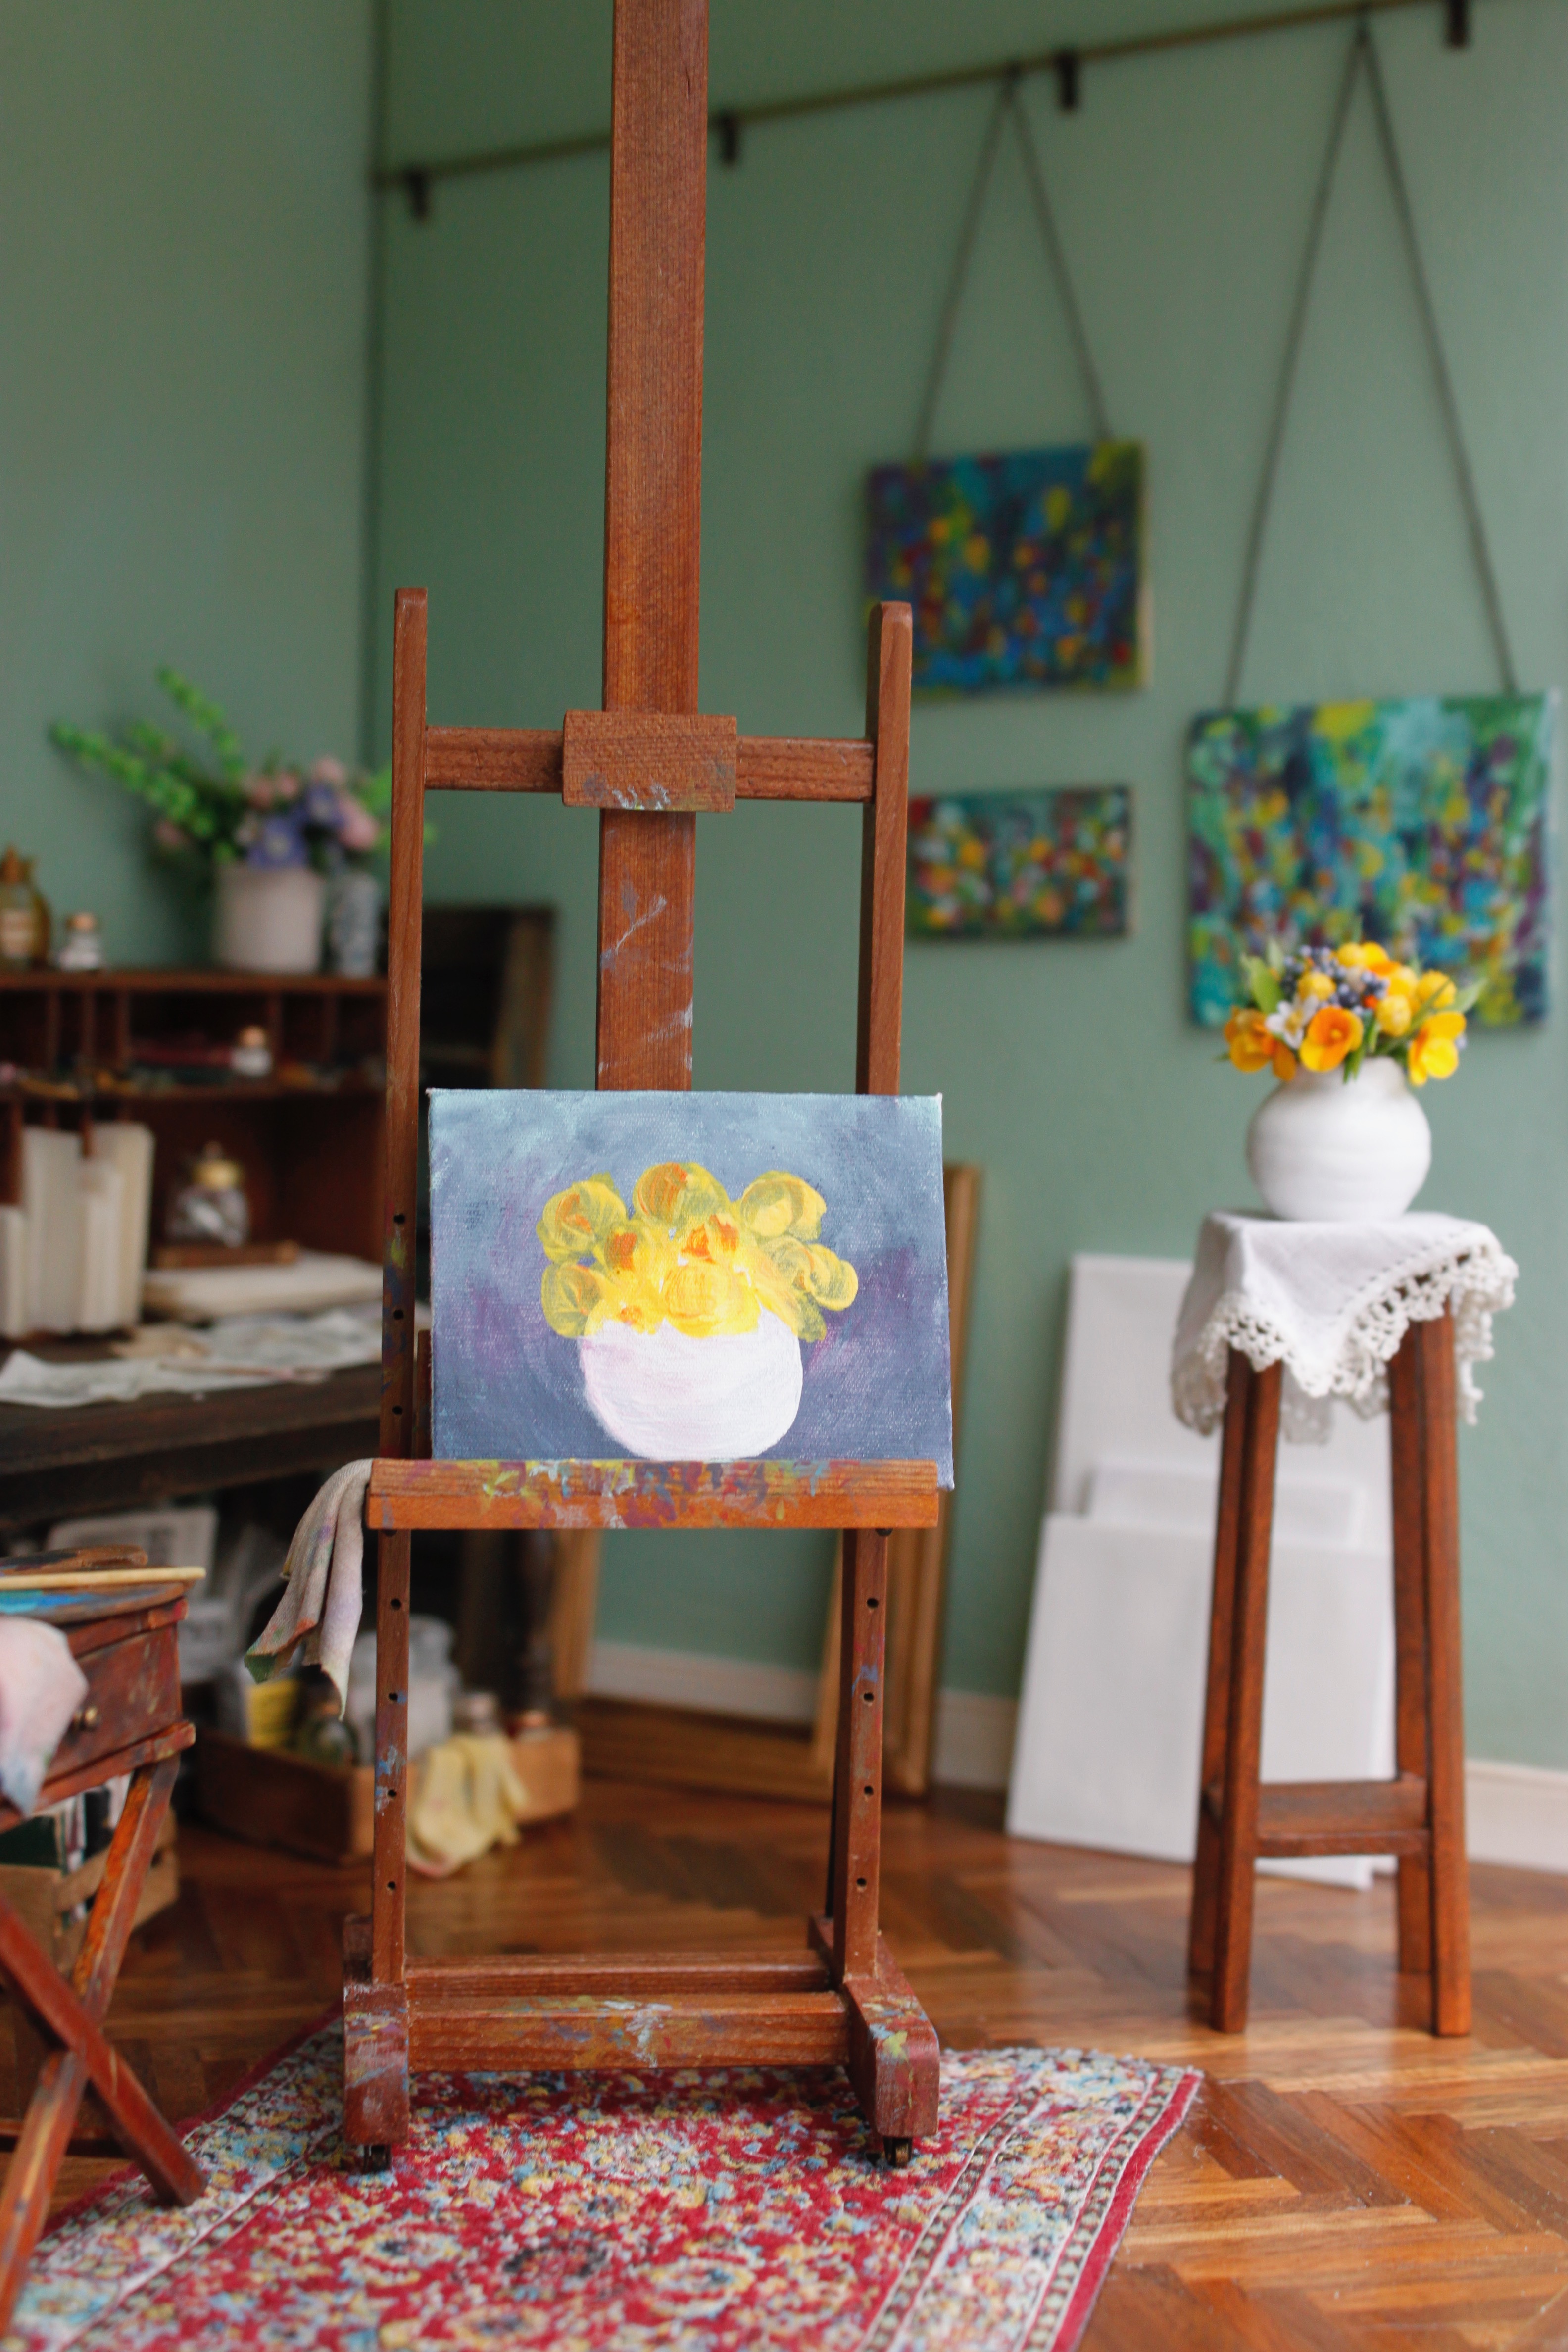
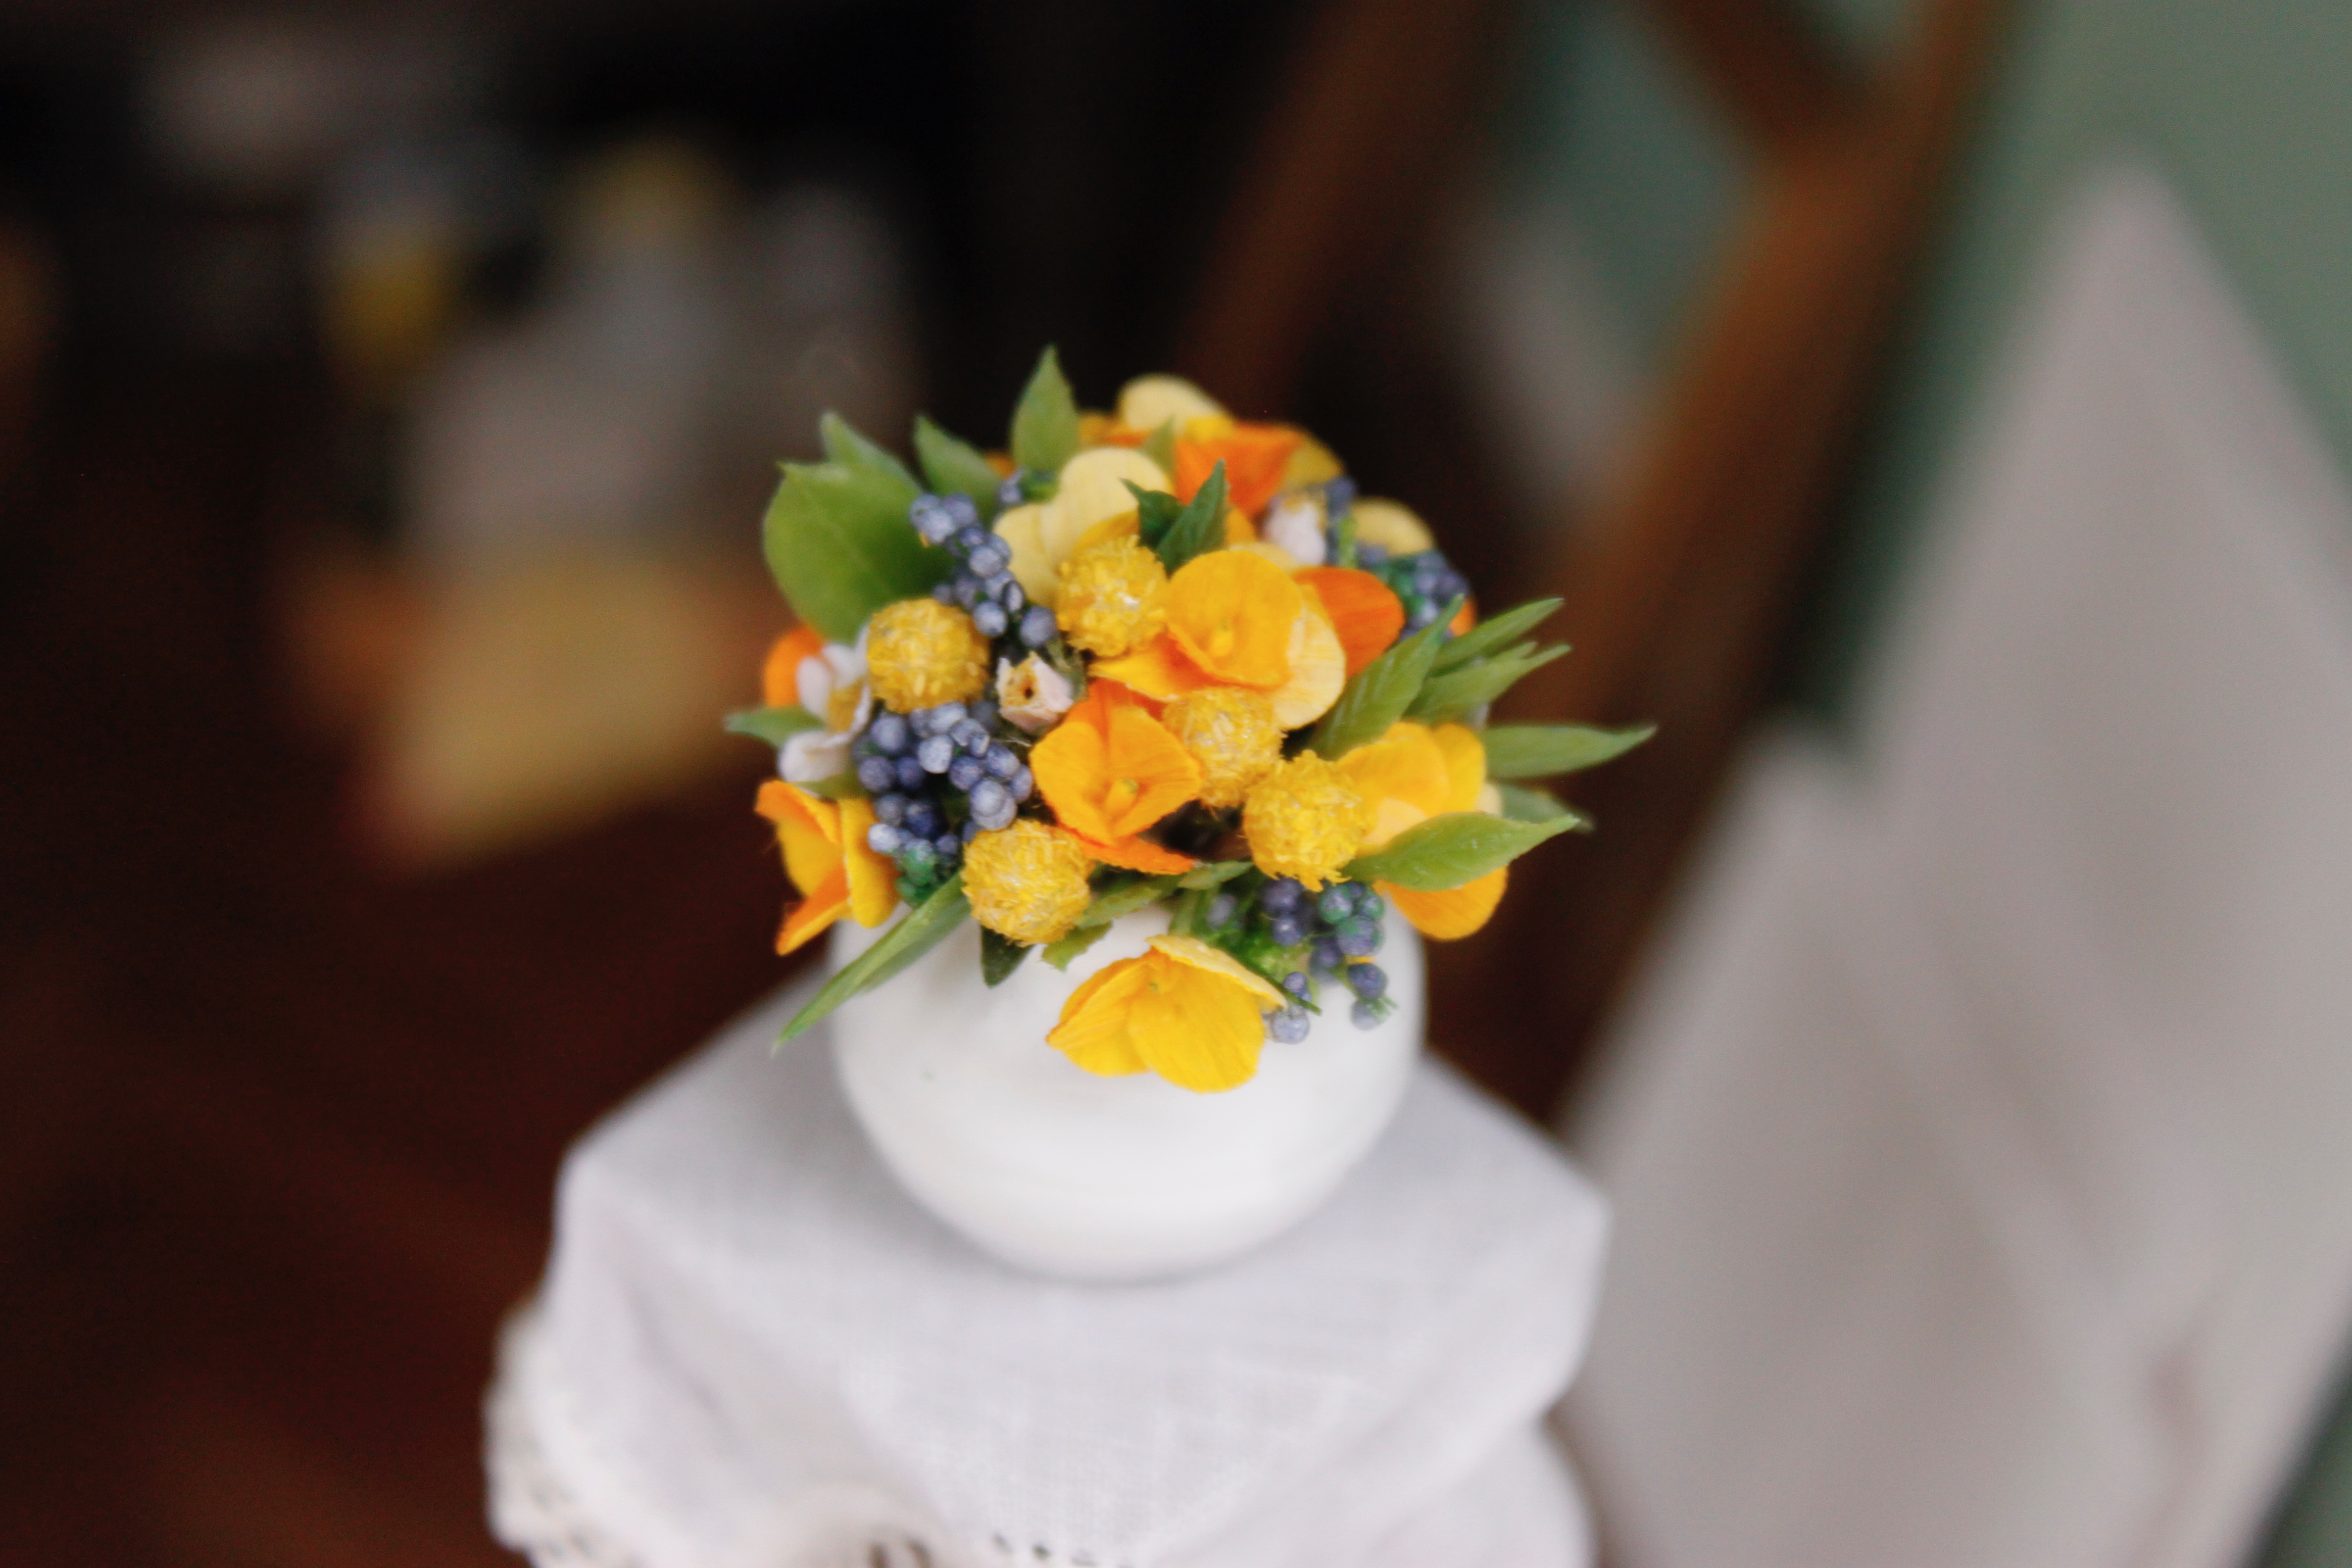
The poppies and cosmos were made using kits from Georgie Steeds, The Miniature Garden on Etsy. The leaves are from plastic aquarium plants, and the purple flowers were from silk flowers I found at a thrift store. The vase is a plastic container from the miniatures section at Michaels. I used white gel nail polish to make it look a little bit more like pottery.
I originally thought I would be able to share all of the inside details in one post. Then I realized the post was getting really long. So, next time I’ll share the other side of the room.
